The psychological weight of a “blown head gasket” diagnosis can lead even savvy vehicle owners to make hasty financial decisions. In the realm of high-stakes auto repair, the difference between a total engine overhaul and a minor cooling system fix often hinges on a single chemical reaction. Expert technicians understand that physical symptoms like overheating or “milkshake” oil are merely indicators, not conclusions. To avoid the massive overhead of unnecessary teardowns, the diagnostic process must move from general observation to molecular verification. A systematic approach ensures that you are not condemning a cylinder head for a fault that actually lies within a cheap plastic component.
Chemical Detection Outperforms Static Pressure Gauges
[IMAGE_PLACEHOLDER]
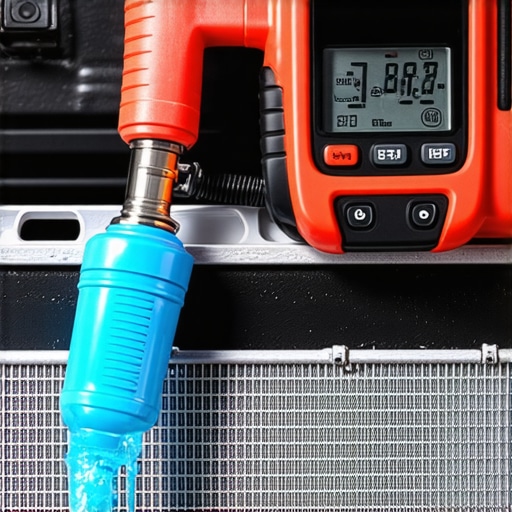
Traditional cooling system pressure testers are excellent for finding external leaks at hoses or radiators, but they frequently fail to detect a microscopic breach in the head gasket under operating temperatures. The combustion leak test kit, often referred to as a “block tester,” utilizes a pH-sensitive fluid that reacts exclusively to carbon dioxide. If combustion gasses are leaking into the water jacket, the blue fluid will transform, providing a definitive forensic signature. This level of precision is what separates a world-class mechanic from a parts-changer. Incorporating this into your diagnostic workflow prevents the misdiagnosis of a cracked block when the issue might be a simple intake manifold failure. By identifying the chemical footprint of exhaust in the coolant, you bypass the guesswork common in lower-tier repair shops.
How Do You Know if It’s a Failed Gasket or Just a Bad Radiator Cap?
One of the most common pitfalls in modern thermal management is the failure to verify the pressure-holding capacity of the radiator cap. A weak spring or a perished seal on the cap allows coolant to bypass the overflow at a lower temperature than intended, creating a localized boil-over that mimics the behavior of a breached fire ring. Before assuming the worst, check if the coolant loss occurs only after reaching full operating temperature. According to technical documentation from the Society of Automotive Engineers (SAE), cooling system pressure is critical for preventing cavitation and ensuring heat transfer efficiency. A simple pressure test of the cap itself often reveals that the gasket is intact, but the system pressure was simply venting prematurely.
Don’t Swap the Motor Until You Run the Blue Liquid
While many owners focus on a complete tune up checklist to keep their vehicles running smoothly, the cooling system’s chemical balance is often neglected until a crisis occurs. A chemical test takes less than ten minutes and costs roughly twenty dollars, yet it can save thousands in labor costs. This diagnostic step should be non-negotiable before any major engine work. Just as a thorough brake service requires measuring rotor thickness rather than just glancing at the pads, engine diagnostics require verifiable data. Before authorizing expensive repairs, explore these auto repair cost-saving tips from industry experts to better understand your vehicle’s true health. We invite you to share your own diagnostic success stories or technical questions in the professional forums to help other enthusiasts navigate these complex thermal failures.
Engineers often overlook the humble ground wire, yet it remains the most common source of ‘phantom’ mechanical symptoms that lead to unnecessary head gasket teardowns. When a ground connection corrodes, it creates a voltage drop that forces current to seek alternative paths through sensors or cooling system components. This electrical interference can induce electrolytic corrosion, which eats away at aluminum cylinder heads and creates localized overheating. Before you condemn the engine block, verify the integrity of the chassis-to-engine connections. A simple 14-dollar ground strap can often resolve erratic shifting or cooling fan failures that appear, on the surface, to be major mechanical disasters. You can even learn how to test your alternator using a simple screwdriver to rule out charging ripples that confuse the engine control unit (ECU) and trigger false temperature warnings.
Ghost Voltage and the Ground Straps That Lie to Your ECU
In the hierarchy of automotive failures, the most expensive mistake is replacing a major component for an issue caused by secondary pressure. High internal crankcase pressure, for instance, can force oil into the combustion chamber or push coolant out of the overflow, perfectly mimicking a head gasket breach. This phenomenon is frequently traced back to a neglected crankcase ventilation system rather than a catastrophic structural failure of the engine block. The National Institute for Automotive Service Excellence (ASE) emphasizes that a thorough visual and functional inspection of the PCV system is a prerequisite for any engine diagnostic. Failure to do so leads to ‘parts cannon’ repair strategies where expensive gaskets are replaced, only for the new seals to fail shortly after due to the same unresolved pressure issues.
Could a Clogged PCV Valve Actually Be Mimicking a Blown Gasket?
A restricted PCV system prevents the engine from ‘breathing,’ leading to a buildup of pressure that looks exactly like combustion gases entering the oiling system. If you notice oil in your air intake or a dipstick that constantly pops out, look at the 14-dollar PCV valve fix before assuming your rings or gaskets are toast. Clearing these pathways restores the vacuum balance and can instantly stabilize a wandering temperature gauge. If the engine continues to struggle with a rough idle after addressing the PCV, you may need to look at the 12-dollar sensor that fixes your rough idle to ensure the air-fuel mixture is optimized for the newly corrected pressure environment. These low-cost interventions represent the ‘low-hanging fruit’ of professional diagnostics that most DIYers skip in favor of more dramatic, and expensive, repairs.
Find Intake Leaks Fast Without a Smoke Machine
Vacuum leaks are the silent killers of fuel economy and idle quality, often leading to ‘lean’ codes that cause a technician to suspect a cracked manifold. Instead of investing in a professional-grade smoke machine, you can utilize the 5-dollar soapy water trick to pinpoint the exact location of a leak. By spraying a mixture around the intake runners while the engine is under a light load or vacuum, you can watch for bubbles or changes in engine RPM. This manual verification ensures that you are only replacing what is broken, rather than guessing at seals. Have you ever encountered a repair that seemed impossible until you found a simple, cheap component was the culprit? We encourage you to share your diagnostic breakthroughs in the comments below or suggest which ‘phantom’ symptom we should deconstruct in our next expert deep-dive.
Chemical stability is the unsung hero of a long-lasting engine. While most drivers think of coolant simply as a way to prevent freezing, its primary job in a high-performance environment is to maintain a neutral pH. When the additive package breaks down, the liquid becomes acidic. This acidity, combined with stray electrical currents—often caused by those faulty ground straps discussed earlier—accelerates the degradation of gaskets and soft metals. Professional technicians using a digital multimeter can measure the voltage present in the coolant itself. Any reading above 0.3 volts DC indicates that your cooling system has become a battery, slowly dissolving your engine from the inside out. Adhering to the ASTM D3306 standards for engine coolant performance is not just for laboratory technicians; it is a vital part of a professional auto repair strategy that prevents head gasket erosion before it starts.
Heat Maps Reveal Blockages That Gauges Miss
Thermal imaging has revolutionized how a master mechanic approaches a cooling system crisis. Instead of relying on a dashboard needle that only moves when a critical threshold is crossed, an infrared camera reveals the exact flow patterns within the radiator and hoses. A cold spot in the center of an otherwise hot radiator immediately indicates a localized blockage, often caused by the same internal scale buildup that leads many to misdiagnose a blown head gasket. If the radiator cannot shed heat effectively, the resulting pressure spike will eventually find the weakest point in the system. This often creates a secondary failure at the cylinder head, making the gasket a victim rather than the cause of the overheating.
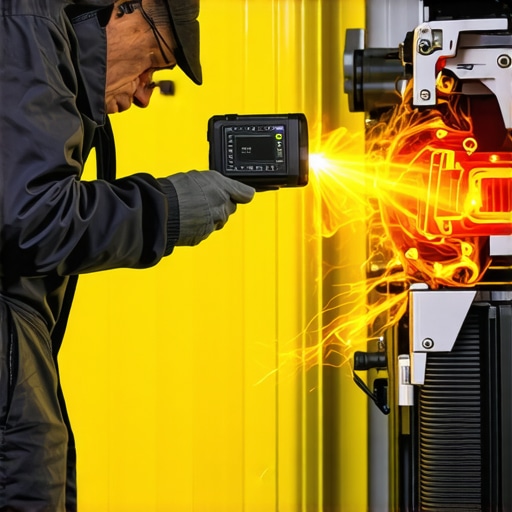
By visualizing the heat signature of the thermostat housing, you can confirm if the valve is opening at the precise temperature specified by the manufacturer. This non-invasive diagnostic method ensures that you are not authorizing a massive teardown for what is essentially a twenty-dollar mechanical failure. We recommend integrating this thermal check into your routine tune up checklist to catch these anomalies early. High-resolution thermography allows you to see the heat transfer in real-time, providing a level of forensic detail that traditional pressure testing simply cannot match.
Can a Faulty Transmission Cooler Create the Illusion of a Head Gasket Failure?
One of the most deceptive scenarios in the shop occurs when the internal walls of a radiator-integrated transmission cooler fail. This allows automatic transmission fluid (ATF) to mix with the engine coolant, creating a thick, discolored sludge often referred to as ‘strawberry milkshake.’ To the untrained eye, this looks identical to the ‘chocolate milkshake’ sludge caused by oil mixing with coolant through a breached head gasket. The key difference lies in the viscosity and the specific smell of the fluid. Before you pull the cylinder heads, check the transmission dipstick. If the fluid level is low or if it also shows signs of contamination, the problem is your radiator, not your engine. Understanding these nuances is a hallmark of elite auto repair and can save vehicle owners from five-figure repair bills that don’t actually solve the root problem.
The Pulse Test for Cracked Cylinder Walls
When chemical tests and pressure tests return inconclusive results, the next step in the diagnostic hierarchy is the cooling system pressure pulse test. By removing the radiator cap and cranking the engine with the ignition or fuel system disabled, a technician watches for rhythmic pulses in the coolant level. A steady rise and fall corresponding to the engine’s rotation indicates that combustion pressure is entering the water jacket through a crack in the cylinder wall or a lifting head. This mechanical heartbeat provides a definitive answer that static tests often miss, particularly when the breach only opens under the extreme stress of compression. While a standard brake service focuses on friction and heat dissipation at the wheels, this diagnostic focus on the internal heart of the engine is what ensures long-term reliability. If you suspect your engine is ‘breathing’ into the cooling system, consider performing this pulse check before the next time you top off the reservoir. As we transition into the complexities of variable valve timing and its impact on thermal load, it is essential to consider how electronic actuator failures can sometimes manifest as cooling issues.
Aluminum and Iron Don’t Expand at the Same Speed
The core of modern engine design relies on a delicate balance between a cast-iron block and an aluminum cylinder head, but this bimetallic marriage creates a phenomenon known as thermal scrubbing. Because aluminum has a significantly higher coefficient of thermal expansion than iron, the cylinder head literally grows at a faster rate as the engine warms up. This differential movement forces the gasket to act as a lateral shear absorber. Over time, this microscopic back-and-forth movement can degrade the coating on Multi-Layer Steel (MLS) gaskets, leading to a breach that no amount of coolant additive can seal. Expert technicians recognize that recurring failures often stem from this metallurgical conflict rather than a manufacturing defect in the gasket itself.
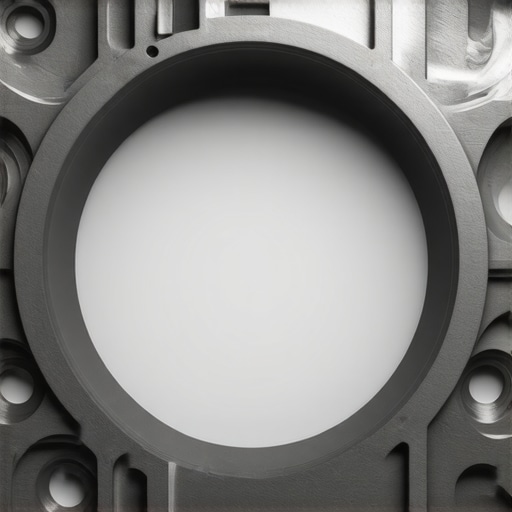
When dealing with these high-shear environments, the surface finish of both the deck and the head becomes the most critical variable in the auto repair process. If the surface is too rough, it tears the gasket coating; if it is too smooth, the gasket can’t ‘bite’ and move with the head. According to the AERA Engine Builders Association, modern MLS gaskets typically require a surface roughness (Ra) of 30 or less. Achieving this level of precision requires specialized machinery that many general mechanic shops simply do not possess. Without verifying these microscopic peaks and valleys, a new gasket is merely a temporary bandage on a structural mismatch.
Does Surface Finish Matter More Than the Gasket Brand Itself?
In the professional racing and high-performance world, the answer is a resounding yes. A premium gasket on a poorly machined surface will fail faster than a budget gasket on a perfectly flat, correctly surfaced deck. When you are performing a brake service, you understand that rotor runout causes pulsation; similarly, engine deck waviness causes combustion gas bypass. If you suspect a breach, using a precision straightedge and feeler gauges is the absolute minimum requirement. However, for a truly expert-level diagnosis, using a profilometer to measure the actual Ra value is the only way to guarantee that your repair will last another 100,000 miles. This attention to detail is what defines a top-tier engine builder.
The One-Time Use Reality of Torque-to-Yield Fasteners
Many DIY enthusiasts and even some seasoned technicians make the mistake of reusing head bolts, unaware that modern engines almost exclusively use Torque-to-Yield (TTY) fasteners. These bolts are designed to be tightened past their elastic limit into the zone of plastic deformation. This ensures a consistent clamping force across the entire cylinder head, which is vital for preventing the ‘lifting’ effect during high-boost or high-compression cycles. Once a TTY bolt has been stretched, it loses its spring-like properties. Reusing them means you are essentially using a dead spring to hold your engine together, leading to a loss of clamping load that eventually manifests as a blown head gasket. Before you begin reassembly, ensure you have a fresh set of fasteners and a high-quality torque angle gauge. Have you ever wondered if your cooling issues were actually caused by a bolt that simply couldn’t hold its stretch anymore? We invite you to audit your fastener choices and share your findings with the community below to help others avoid this invisible failure point.
The psychological weight of a “blown head gasket” diagnosis can lead even savvy vehicle owners to make hasty financial decisions. In the realm of high-stakes auto repair, the difference between a total engine overhaul and a minor cooling system fix often hinges on a single chemical reaction. Expert technicians understand that physical symptoms like overheating or “milkshake” oil are merely indicators, not conclusions. To avoid the massive overhead of unnecessary teardowns, the diagnostic process must move from general observation to molecular verification. A systematic approach ensures that you are not condemning a cylinder head for a fault that actually lies within a cheap plastic component.
Chemical Detection Outperforms Static Pressure Gauges
[IMAGE_PLACEHOLDER]
Traditional cooling system pressure testers are excellent for finding external leaks at hoses or radiators, but they frequently fail to detect a microscopic breach in the head gasket under operating temperatures. The combustion leak test kit, often referred to as a “block tester,” utilizes a pH-sensitive fluid that reacts exclusively to carbon dioxide. If combustion gasses are leaking into the water jacket, the blue fluid will transform, providing a definitive forensic signature. This level of precision is what separates a world-class mechanic from a parts-changer. Incorporating this into your diagnostic workflow prevents the misdiagnosis of a cracked block when the issue might be a simple intake manifold failure. By identifying the chemical footprint of exhaust in the coolant, you bypass the guesswork common in lower-tier repair shops.
How Do You Know if It’s a Failed Gasket or Just a Bad Radiator Cap?
One of the most common pitfalls in modern thermal management is the failure to verify the pressure-holding capacity of the radiator cap. A weak spring or a perished seal on the cap allows coolant to bypass the overflow at a lower temperature than intended, creating a localized boil-over that mimics the behavior of a breached fire ring. Before assuming the worst, check if the coolant loss occurs only after reaching full operating temperature. According to technical documentation from the Society of Automotive Engineers (SAE), cooling system pressure is critical for preventing cavitation and ensuring heat transfer efficiency. A simple pressure test of the cap itself often reveals that the gasket is intact, but the system pressure was simply venting prematurely.
Don’t Swap the Motor Until You Run the Blue Liquid
While many owners focus on a complete tune up checklist to keep their vehicles running smoothly, the cooling system’s chemical balance is often neglected until a crisis occurs. A chemical test takes less than ten minutes and costs roughly twenty dollars, yet it can save thousands in labor costs. This diagnostic step should be non-negotiable before any major engine work. Just as a thorough brake service requires measuring rotor thickness rather than just glancing at the pads, engine diagnostics require verifiable data. Before authorizing expensive repairs, explore these auto repair cost-saving tips from industry experts to better understand your vehicle’s true health. We invite you to share your own diagnostic success stories or technical questions in the professional forums to help other enthusiasts navigate these complex thermal failures.
Engineers often overlook the humble ground wire, yet it remains the most common source of ‘phantom’ mechanical symptoms that lead to unnecessary head gasket teardowns. When a ground connection corrodes, it creates a voltage drop that forces current to seek alternative paths through sensors or cooling system components. This electrical interference can induce electrolytic corrosion, which eats away at aluminum cylinder heads and creates localized overheating. Before you condemn the engine block, verify the integrity of the chassis-to-engine connections. A simple 14-dollar ground strap can often resolve erratic shifting or cooling fan failures that appear, on the surface, to be major mechanical disasters. You can even learn how to test your alternator using a simple screwdriver to rule out charging ripples that confuse the engine control unit (ECU) and trigger false temperature warnings.
Ghost Voltage and the Ground Straps That Lie to Your ECU
In the hierarchy of automotive failures, the most expensive mistake is replacing a major component for an issue caused by secondary pressure. High internal crankcase pressure, for instance, can force oil into the combustion chamber or push coolant out of the overflow, perfectly mimicking a head gasket breach. This phenomenon is frequently traced back to a neglected crankcase ventilation system rather than a catastrophic structural failure of the engine block. The National Institute for Automotive Service Excellence (ASE) emphasizes that a thorough visual and functional inspection of the PCV system is a prerequisite for any engine diagnostic. Failure to do so leads to ‘parts cannon’ repair strategies where expensive gaskets are replaced, only for the new seals to fail shortly after due to the same unresolved pressure issues.
Could a Clogged PCV Valve Actually Be Mimicking a Blown Gasket?
A restricted PCV system prevents the engine from ‘breathing,’ leading to a buildup of pressure that looks exactly like combustion gases entering the oiling system. If you notice oil in your air intake or a dipstick that constantly pops out, look at the 14-dollar PCV valve fix before assuming your rings or gaskets are toast. Clearing these pathways restores the vacuum balance and can instantly stabilize a wandering temperature gauge. If the engine continues to struggle with a rough idle after addressing the PCV, you may need to look at the 12-dollar sensor that fixes your rough idle to ensure the air-fuel mixture is optimized for the newly corrected pressure environment. These low-cost interventions represent the ‘low-hanging fruit’ of professional diagnostics that most DIYers skip in favor of more dramatic, and expensive, repairs.
Find Intake Leaks Fast Without a Smoke Machine
Vacuum leaks are the silent killers of fuel economy and idle quality, often leading to ‘lean’ codes that cause a technician to suspect a cracked manifold. Instead of investing in a professional-grade smoke machine, you can utilize the 5-dollar soapy water trick to pinpoint the exact location of a leak. By spraying a mixture around the intake runners while the engine is under a light load or vacuum, you can watch for bubbles or changes in engine RPM. This manual verification ensures that you are only replacing what is broken, rather than guessing at seals. Have you ever encountered a repair that seemed impossible until you found a simple, cheap component was the culprit? We encourage you to share your diagnostic breakthroughs in the comments below or suggest which ‘phantom’ symptom we should deconstruct in our next expert deep-dive.
Chemical stability is the unsung hero of a long-lasting engine. While most drivers think of coolant simply as a way to prevent freezing, its primary job in a high-performance environment is to maintain a neutral pH. When the additive package breaks down, the liquid becomes acidic. This acidity, combined with stray electrical currents—often caused by those faulty ground straps discussed earlier—accelerates the degradation of gaskets and soft metals. Professional technicians using a digital multimeter can measure the voltage present in the coolant itself. Any reading above 0.3 volts DC indicates that your cooling system has become a battery, slowly dissolving your engine from the inside out. Adhering to the ASTM D3306 standards for engine coolant performance is not just for laboratory technicians; it is a vital part of a professional auto repair strategy that prevents head gasket erosion before it starts.
Heat Maps Reveal Blockages That Gauges Miss
Thermal imaging has revolutionized how a master mechanic approaches a cooling system crisis. Instead of relying on a dashboard needle that only moves when a critical threshold is crossed, an infrared camera reveals the exact flow patterns within the radiator and hoses. A cold spot in the center of an otherwise hot radiator immediately indicates a localized blockage, often caused by the same internal scale buildup that leads many to misdiagnose a blown head gasket. If the radiator cannot shed heat effectively, the resulting pressure spike will eventually find the weakest point in the system. This often creates a secondary failure at the cylinder head, making the gasket a victim rather than the cause of the overheating.
By visualizing the heat signature of the thermostat housing, you can confirm if the valve is opening at the precise temperature specified by the manufacturer. This non-invasive diagnostic method ensures that you are not authorizing a massive teardown for what is essentially a twenty-dollar mechanical failure. We recommend integrating this thermal check into your routine tune up checklist to catch these anomalies early. High-resolution thermography allows you to see the heat transfer in real-time, providing a level of forensic detail that traditional pressure testing simply cannot match.
Can a Faulty Transmission Cooler Create the Illusion of a Head Gasket Failure?
One of the most deceptive scenarios in the shop occurs when the internal walls of a radiator-integrated transmission cooler fail. This allows automatic transmission fluid (ATF) to mix with the engine coolant, creating a thick, discolored sludge often referred to as ‘strawberry milkshake.’ To the untrained eye, this looks identical to the ‘chocolate milkshake’ sludge caused by oil mixing with coolant through a breached head gasket. The key difference lies in the viscosity and the specific smell of the fluid. Before you pull the cylinder heads, check the transmission dipstick. If the fluid level is low or if it also shows signs of contamination, the problem is your radiator, not your engine. Understanding these nuances is a hallmark of elite auto repair and can save vehicle owners from five-figure repair bills that don’t actually solve the root problem.
The Pulse Test for Cracked Cylinder Walls
When chemical tests and pressure tests return inconclusive results, the next step in the diagnostic hierarchy is the cooling system pressure pulse test. By removing the radiator cap and cranking the engine with the ignition or fuel system disabled, a technician watches for rhythmic pulses in the coolant level. A steady rise and fall corresponding to the engine’s rotation indicates that combustion pressure is entering the water jacket through a crack in the cylinder wall or a lifting head. This mechanical heartbeat provides a definitive answer that static tests often miss, particularly when the breach only opens under the extreme stress of compression. While a standard brake service focuses on friction and heat dissipation at the wheels, this diagnostic focus on the internal heart of the engine is what ensures long-term reliability. If you suspect your engine is ‘breathing’ into the cooling system, consider performing this pulse check before the next time you top off the reservoir. As we transition into the complexities of variable valve timing and its impact on thermal load, it is essential to consider how electronic actuator failures can sometimes manifest as cooling issues.
Aluminum and Iron Don’t Expand at the Same Speed
The core of modern engine design relies on a delicate balance between a cast-iron block and an aluminum cylinder head, but this bimetallic marriage creates a phenomenon known as thermal scrubbing. Because aluminum has a significantly higher coefficient of thermal expansion than iron, the cylinder head literally grows at a faster rate as the engine warms up. This differential movement forces the gasket to act as a lateral shear absorber. Over time, this microscopic back-and-forth movement can degrade the coating on Multi-Layer Steel (MLS) gaskets, leading to a breach that no amount of coolant additive can seal. Expert technicians recognize that recurring failures often stem from this metallurgical conflict rather than a manufacturing defect in the gasket itself.
When dealing with these high-shear environments, the surface finish of both the deck and the head becomes the most critical variable in the auto repair process. If the surface is too rough, it tears the gasket coating; if it is too smooth, the gasket can’t ‘bite’ and move with the head. According to the AERA Engine Builders Association, modern MLS gaskets typically require a surface roughness (Ra) of 30 or less. Achieving this level of precision requires specialized machinery that many general mechanic shops simply do not possess. Without verifying these microscopic peaks and valleys, a new gasket is merely a temporary bandage on a structural mismatch.
Does Surface Finish Matter More Than the Gasket Brand Itself?
In the professional racing and high-performance world, the answer is a resounding yes. A premium gasket on a poorly machined surface will fail faster than a budget gasket on a perfectly flat, correctly surfaced deck. When you are performing a brake service, you understand that rotor runout causes pulsation; similarly, engine deck waviness causes combustion gas bypass. If you suspect a breach, using a precision straightedge and feeler gauges is the absolute minimum requirement. However, for a truly expert-level diagnosis, using a profilometer to measure the actual Ra value is the only way to guarantee that your repair will last another 100,000 miles. This attention to detail is what defines a top-tier engine builder.
The One-Time Use Reality of Torque-to-Yield Fasteners
Many DIY enthusiasts and even some seasoned technicians make the mistake of reusing head bolts, unaware that modern engines almost exclusively use Torque-to-Yield (TTY) fasteners. These bolts are designed to be tightened past their elastic limit into the zone of plastic deformation. This ensures a consistent clamping force across the entire cylinder head, which is vital for preventing the ‘lifting’ effect during high-boost or high-compression cycles. Once a TTY bolt has been stretched, it loses its spring-like properties. Reusing them means you are essentially using a dead spring to hold your engine together, leading to a loss of clamping load that eventually manifests as a blown head gasket. Before you begin reassembly, ensure you have a fresh set of fasteners and a high-quality torque angle gauge. Have you ever wondered if your cooling issues were actually caused by a bolt that simply couldn’t hold its stretch anymore? We invite you to audit your fastener choices and share your findings with the community below to help others avoid this invisible failure point.
Expert Insights & Advanced Considerations
Why Electrolysis Is the Silent Predator of Aluminum Heads
Chemical stability in your cooling system is heavily influenced by electrical integrity. When ground connections fail, the coolant becomes an electrolyte, literally stripping metal from the cylinder head. Always check the simple ground wire move that fixes dim headlights to ensure your chassis isn’t using the engine block as a makeshift return path.
Stop Leak Additives Are a Death Sentence for Modern Radiators
Using a sealant to fix a head gasket is a gamble that often results in clogged heater cores and radiator channels. In a high-precision auto repair environment, these products are considered contaminants that ruin thermal efficiency. It is far safer to follow auto repair cost-saving tips from industry experts by identifying the specific leak point before opting for a ‘miracle’ fluid.
Measure Surface Roughness to Guarantee Gasket Longevity
Visual flatness is only half the battle. If you want a repair to last, you must verify the surface roughness (Ra) with a profilometer. A top-rated mechanic ensures safe auto repairs by matching the engine block’s texture to the specific requirements of the Multi-Layer Steel gasket.
Curated Expert Resources
AERA Engine Builders Association: The definitive source for engine machining specifications and metallurgical standards for bimetallic engines.
ASE (Automotive Service Excellence): Provides technical certification frameworks that differentiate a qualified engine specialist from a generalist.
Society of Automotive Engineers (SAE) Technical Papers: Offers deep-dives into thermal expansion coefficients and modern fastener tensioning science.
Final Expert Perspective
True expertise in auto repair is defined by the ability to look past the symptoms and uncover the mechanical or chemical root cause. Whether it is a stray voltage in the coolant or a microscopic surface imperfection on the engine deck, a systematic diagnostic approach is the only way to avoid the ‘parts cannon’ and ensure a long-term fix. We invite you to utilize our mechanic tips for diagnosing common auto problems to sharpen your technical edge. What is the most deceptive ‘phantom’ symptom you have encountered in your engine work? Join the conversation in the comments and help us build a more knowledgeable community of enthusiasts.