Automotive diagnostics in the modern era often suffer from an over-reliance on the OBD-II interface, yet a seasoned mechanic knows that a diagnostic trouble code is merely a starting point, not a definitive answer. While a scanner might point to a generic misfire, understanding the underlying physics of electrical induction allows for a much deeper analysis of a failing ignition coil. When the insulation within the primary or secondary windings begins to degrade, the resulting drop in voltage can lead to intermittent performance issues that digital sensors occasionally fail to register as a hard fault. Mastering these manual techniques is essential for anyone serious about auto repair and maintaining engine longevity.
The Physics of High-Voltage Induction Failure
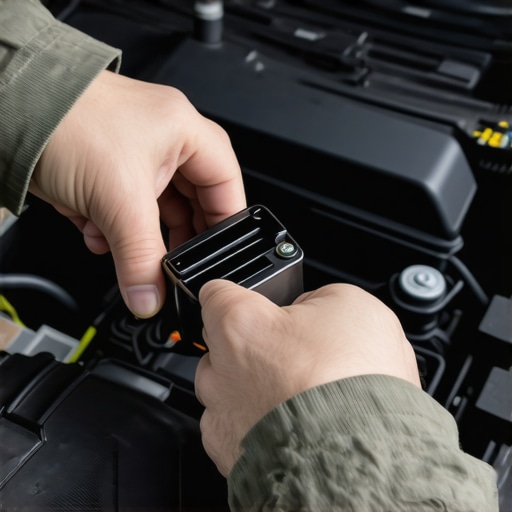
An ignition coil is essentially a compact transformer, converting low battery voltage into the thousands of volts necessary to bridge the spark plug gap. Over time, thermal cycling and vibration cause internal short circuits. A professional approach to tune up procedures involves more than just swapping parts; it requires verifying the integrity of this induction process. One of the most effective ways to identify a failing coil without a scanner is the cylinder power balance test. By safely disconnecting the electrical connector to each coil while the engine is idling, you can observe changes in RPM. If a coil is functioning correctly, the engine should stumble significantly; if the idle remains unchanged, you have successfully isolated the faulty component. This is a staple among mechanic tips diagnosing common auto problems when electronic tools are unavailable.
Can You Isolate a Dead Cylinder Without Digital Tools?
Beyond the power balance test, visual and tactile inspections often reveal what a computer cannot. A common failure point is the coil boot, which can develop nearly invisible hairline fractures. These cracks allow the high-voltage current to ‘arc’ or leak to the engine block rather than reaching the spark plug. Experts refer to this as carbon tracking. If you notice your engine still stumbles on cold starts or under heavy load, it is vital to inspect for these tracks. Often, why your idle stays rough after replacing every spark plug in the kit is not a fuel issue, but a failure to identify the 15-ignition-coil-boot-error-that-ruins-a-perfectly-good-tune-up. This simple oversight causes thousands of drivers to waste money on unnecessary fuel system repairs.
Why Resistance Readings Often Lie to Technicians
While some hobbyists rely on a multimeter to check primary and secondary resistance, this method has significant limitations. A coil may show perfect resistance at room temperature but fail spectacularly once it reaches operating temperatures—a phenomenon known as heat-soak failure. According to technical documentation from NGK Spark Plugs Technical Resources, internal shorts often only manifest under the high-stress environment of a running engine. For a more reliable analog test, use a dedicated spark tester to observe the color and consistency of the spark; a bright blue snap indicates health, while a weak yellow or orange spark signals a failing internal winding. If you are performing a comprehensive brake service or routine maintenance, taking ten minutes to perform these manual checks can prevent a breakdown. Consider reviewing our ultimate tune-up checklist for every car owner to ensure no critical components are overlooked during your next garage session. Are you currently battling a mystery misfire? Share your diagnostic findings with our community of experts below.
When you have exhausted the ignition system and the misfire persists, the focus must shift toward the air-fuel ratio and engine synchronization. A seasoned mechanic knows that an lean-burn misfire is often indistinguishable from a weak spark to the untrained ear. If the Engine Control Unit (ECU) detects an imbalance of unmetered air entering the combustion chamber, it cannot maintain the stoichometric ratio required for a smooth idle. This is why the 7-vacuum-hose-leak-that-tricked-your-mechanic-into-a-costly-tune-up is such a common industry pitfall. Instead of replacing expensive sensors immediately, start by learning how to find an intake leak using a 5-bottle-of-soapy-water. Spraying a simple solution around the intake manifold gaskets and vacuum ports while the engine is running will cause a visible change in bubble formation or a momentary shift in RPM if a leak is present, confirming that the hardware, not the software, is the culprit.
Does Your Fuel Rail Have Enough Pressure to Sustain Combustion Under Load?
A common mistake in auto repair is assuming that a fuel pump is either working or dead. In reality, fuel delivery exists on a spectrum of efficiency. A pump might provide enough volume to sustain an idle, but fail to maintain the necessary PSI when the injectors demand maximum flow during acceleration. This results in a high-speed misfire that often mimics a failing ignition coil. To confirm this, you must perform a dynamic pressure test. According to fuel system experts at Delphi Technologies, measuring fuel pressure under load is the only way to truly verify pump health. Many drivers find that the 14-fuel-rail-pressure-test-that-rescues-a-failing-tune-up reveals a clogged fuel filter or a weary pump that a static test would miss. If you suspect your vehicle is struggling at highway speeds, it is essential to learn how to diagnose a bad fuel pump before it strands you on the side of the road.
Don’t Ignore the Chassis Ground When Spark Fails
Modern tune up strategies must account for the increasing complexity of vehicle electronics. Every high-voltage spark requires a clean path back to the battery to complete the circuit. If the engine’s ground straps are corroded or frayed, electrical ‘noise’ can feed back into the ECU, causing phantom misfires and erratic sensor readings. This is a nuanced area of auto repair where a physical inspection beats a digital scan every time. A degraded ground can lead to massive headaches, yet the 20-ground-strap-that-solves-mystery-engine-misfires is one of the most cost-effective repairs a DIYer can perform. Furthermore, poor grounding is often the secret culprit behind transmission issues, such as the 14-ground-strap-fix-that-stops-ghost-shifting-problems. Always check the resistance between the engine block and the negative battery terminal; anything higher than 0.2 ohms suggests a connection that is actively fighting your engine’s performance. Have you ever chased a misfire for weeks only to find a loose bolt was the cause? Tell us your most frustrating diagnostic story in the comments below to help fellow drivers avoid the same traps.
When Variable Valve Timing Becomes Your Worst Enemy
Once you have ruled out spark and fuel delivery, the diagnostic path leads into the heart of engine synchronization. Modern engines rely heavily on Variable Valve Timing (VVT) to balance power and efficiency, but this system is notoriously sensitive to oil quality and pressure. A seasoned mechanic knows that a slightly clogged oil control solenoid can cause the camshaft to lag behind its commanded position, resulting in a stumble that feels identical to an ignition misfire. Unlike a hard failure, a sticky VVT solenoid often creates intermittent issues that only appear once the oil reaches its thinnest viscosity at operating temperature. Before condemning a timing chain, inspect the solenoid screens for debris; even microscopic metal shavings can jam the valve, preventing the hydraulic fluid from advancing or retarding the cam as required. This is a critical step in any advanced auto repair workflow, especially on high-mileage vehicles where sludge accumulation is common.
Does Low Oil Pressure Mimic a Faulty Timing Chain?
Technicians often struggle to differentiate between a stretched timing chain and a simple hydraulic failure. Because VVT systems are oil-driven, any fluctuation in the lubrication system directly impacts valve timing. If your oil pump is tired or you are using the wrong viscosity, the phasers may lack the force needed to lock into position. According to technical insights from SAE International, the relationship between oil aeration and VVT response time is a primary factor in erratic idle behavior. If you are performing a tune up and notice timing-related codes, verify your oil pressure with a mechanical gauge before assuming the worst. A simple oil change with a high-detergent synthetic can sometimes ‘cure’ a VVT fault by flushing out the varnish that restricts solenoid movement. Have you checked your oil level lately? It is the most overlooked ‘fix’ for complex timing issues.
The Exhaust Backpressure Trap Most Techs Skip
When an engine can’t breathe out, it can’t pull a fresh charge in, yet many DIYers overlook the exhaust system during a misfire investigation. A partially melted catalytic converter creates excessive backpressure, which forces spent exhaust gases back into the combustion chamber during the valve overlap period. This effectively EGR-dilutes the intake charge, causing a massive loss of power and a distinctive ‘hissing’ sound under load. To diagnose this without removing the exhaust, you can temporarily remove the upstream oxygen sensor and install a low-pressure gauge. A healthy engine should show less than 1.5 PSI of backpressure at 2,500 RPM. If the needle climbs higher, your auto repair budget needs to pivot toward the exhaust. If you’ve been searching for the 9-exhaust-clog-test-that-saves-thousands-in-unnecessary-engine-work, this is the manual method the pros use. Ignoring this can lead to burnt valves and permanent engine damage. Have you noticed a sudden drop in fuel economy alongside a sluggish throttle? It might be time to stop looking at the spark plugs and start looking at the tailpipe.
Why a Compression Test Alone Isn’t Enough
As we move deeper into the mechanical health of the engine, we must discuss the limitations of the standard cranking compression test. While a tune up might include a quick check to see if all cylinders are within 10% of each other, this static test doesn’t reveal the whole truth. A cylinder can hold pressure while the piston is moving slowly, yet fail to maintain a seal under the high-pressure environment of actual combustion. This is where the cylinder leak-down test becomes indispensable for a high-level mechanic. By injecting compressed air into the cylinder at Top Dead Center (TDC) and measuring the percentage of air that escapes, you can pinpoint exactly where the leak is occurring. Is the air escaping through the intake? You have a bad intake valve. Is it whistling out of the oil filler cap? Your piston rings are toast. This level of precision is what separates a parts-changer from a true diagnostic expert. Consider how a ‘wet’ compression test—adding a teaspoon of oil to the cylinder—can further isolate the issue, as the oil temporarily seals the rings…
Automotive diagnostics in the modern era often suffer from an over-reliance on the OBD-II interface, yet a seasoned mechanic knows that a diagnostic trouble code is merely a starting point, not a definitive answer. While a scanner might point to a generic misfire, understanding the underlying physics of electrical induction allows for a much deeper analysis of a failing ignition coil. When the insulation within the primary or secondary windings begins to degrade, the resulting drop in voltage can lead to intermittent performance issues that digital sensors occasionally fail to register as a hard fault. Mastering these manual techniques is essential for anyone serious about auto repair and maintaining engine longevity.
The Physics of High-Voltage Induction Failure
An ignition coil is essentially a compact transformer, converting low battery voltage into the thousands of volts necessary to bridge the spark plug gap. Over time, thermal cycling and vibration cause internal short circuits. A professional approach to tune up procedures involves more than just swapping parts; it requires verifying the integrity of this induction process. One of the most effective ways to identify a failing coil without a scanner is the cylinder power balance test. By safely disconnecting the electrical connector to each coil while the engine is idling, you can observe changes in RPM. If a coil is functioning correctly, the engine should stumble significantly; if the idle remains unchanged, you have successfully isolated the faulty component. This is a staple among mechanic tips diagnosing common auto problems when electronic tools are unavailable.
Can You Isolate a Dead Cylinder Without Digital Tools?
Beyond the power balance test, visual and tactile inspections often reveal what a computer cannot. A common failure point is the coil boot, which can develop nearly invisible hairline fractures. These cracks allow the high-voltage current to ‘arc’ or leak to the engine block rather than reaching the spark plug. Experts refer to this as carbon tracking. If you notice your engine still stumbles on cold starts or under heavy load, it is vital to inspect for these tracks. Often, why your idle stays rough after replacing every spark plug in the kit is not a fuel issue, but a failure to identify the 15-ignition-coil-boot-error-that-ruins-a-perfectly-good-tune-up. This simple oversight causes thousands of drivers to waste money on unnecessary fuel system repairs.
Why Resistance Readings Often Lie to Technicians
While some hobbyists rely on a multimeter to check primary and secondary resistance, this method has significant limitations. A coil may show perfect resistance at room temperature but fail spectacularly once it reaches operating temperatures—a phenomenon known as heat-soak failure. According to technical documentation from NGK Spark Plugs Technical Resources, internal shorts often only manifest under the high-stress environment of a running engine. For a more reliable analog test, use a dedicated spark tester to observe the color and consistency of the spark; a bright blue snap indicates health, while a weak yellow or orange spark signals a failing internal winding. If you are performing a comprehensive brake service or routine maintenance, taking ten minutes to perform these manual checks can prevent a breakdown. Consider reviewing our ultimate tune-up checklist for every car owner to ensure no critical components are overlooked during your next garage session. Are you currently battling a mystery misfire? Share your diagnostic findings with our community of experts below.
When you have exhausted the ignition system and the misfire persists, the focus must shift toward the air-fuel ratio and engine synchronization. A seasoned mechanic knows that an lean-burn misfire is often indistinguishable from a weak spark to the untrained ear. If the Engine Control Unit (ECU) detects an imbalance of unmetered air entering the combustion chamber, it cannot maintain the stoichometric ratio required for a smooth idle. This is why the 7-vacuum-hose-leak-that-tricked-your-mechanic-into-a-costly-tune-up is such a common industry pitfall. Instead of replacing expensive sensors immediately, start by learning how to find an intake leak using a 5-bottle-of-soapy-water. Spraying a simple solution around the intake manifold gaskets and vacuum ports while the engine is running will cause a visible change in bubble formation or a momentary shift in RPM if a leak is present, confirming that the hardware, not the software, is the culprit.
Does Your Fuel Rail Have Enough Pressure to Sustain Combustion Under Load?
A common mistake in auto repair is assuming that a fuel pump is either working or dead. In reality, fuel delivery exists on a spectrum of efficiency. A pump might provide enough volume to sustain an idle, but fail to maintain the necessary PSI when the injectors demand maximum flow during acceleration. This results in a high-speed misfire that often mimics a failing ignition coil. To confirm this, you must perform a dynamic pressure test. According to fuel system experts at Delphi Technologies, measuring fuel pressure under load is the only way to truly verify pump health. Many drivers find that the 14-fuel-rail-pressure-test-that-rescues-a-failing-tune-up reveals a clogged fuel filter or a weary pump that a static test would miss. If you suspect your vehicle is struggling at highway speeds, it is essential to learn how to diagnose a bad fuel pump before it strands you on the side of the road.
Don’t Ignore the Chassis Ground When Spark Fails
Modern tune up strategies must account for the increasing complexity of vehicle electronics. Every high-voltage spark requires a clean path back to the battery to complete the circuit. If the engine’s ground straps are corroded or frayed, electrical ‘noise’ can feed back into the ECU, causing phantom misfires and erratic sensor readings. This is a nuanced area of auto repair where a physical inspection beats a digital scan every time. A degraded ground can lead to massive headaches, yet the 20-ground-strap-that-solves-mystery-engine-misfires is one of the most cost-effective repairs a DIYer can perform. Furthermore, poor grounding is often the secret culprit behind transmission issues, such as the 14-ground-strap-fix-that-stops-ghost-shifting-problems. Always check the resistance between the engine block and the negative battery terminal; anything higher than 0.2 ohms suggests a connection that is actively fighting your engine’s performance. Have you ever chased a misfire for weeks only to find a loose bolt was the cause? Tell us your most frustrating diagnostic story in the comments below to help fellow drivers avoid the same traps.
When Variable Valve Timing Becomes Your Worst Enemy
Once you have ruled out spark and fuel delivery, the diagnostic path leads into the heart of engine synchronization. Modern engines rely heavily on Variable Valve Timing (VVT) to balance power and efficiency, but this system is notoriously sensitive to oil quality and pressure. A seasoned mechanic knows that a slightly clogged oil control solenoid can cause the camshaft to lag behind its commanded position, resulting in a stumble that feels identical to an ignition misfire. Unlike a hard failure, a sticky VVT solenoid often creates intermittent issues that only appear once the oil reaches its thinnest viscosity at operating temperature. Before condemning a timing chain, inspect the solenoid screens for debris; even microscopic metal shavings can jam the valve, preventing the hydraulic fluid from advancing or retarding the cam as required. This is a critical step in any advanced auto repair workflow, especially on high-mileage vehicles where sludge accumulation is common.
Does Low Oil Pressure Mimic a Faulty Timing Chain?
Technicians often struggle to differentiate between a stretched timing chain and a simple hydraulic failure. Because VVT systems are oil-driven, any fluctuation in the lubrication system directly impacts valve timing. If your oil pump is tired or you are using the wrong viscosity, the phasers may lack the force needed to lock into position. According to technical insights from SAE International, the relationship between oil aeration and VVT response time is a primary factor in erratic idle behavior. If you are performing a tune up and notice timing-related codes, verify your oil pressure with a mechanical gauge before assuming the worst. A simple oil change with a high-detergent synthetic can sometimes ‘cure’ a VVT fault by flushing out the varnish that restricts solenoid movement. Have you checked your oil level lately? It is the most overlooked ‘fix’ for complex timing issues.
The Exhaust Backpressure Trap Most Techs Skip
When an engine can’t breathe out, it can’t pull a fresh charge in, yet many DIYers overlook the exhaust system during a misfire investigation. A partially melted catalytic converter creates excessive backpressure, which forces spent exhaust gases back into the combustion chamber during the valve overlap period. This effectively EGR-dilutes the intake charge, causing a massive loss of power and a distinctive ‘hissing’ sound under load. To diagnose this without removing the exhaust, you can temporarily remove the upstream oxygen sensor and install a low-pressure gauge. A healthy engine should show less than 1.5 PSI of backpressure at 2,500 RPM. If the needle climbs higher, your auto repair budget needs to pivot toward the exhaust. If you’ve been searching for the 9-exhaust-clog-test-that-saves-thousands-in-unnecessary-engine-work, this is the manual method the pros use. Ignoring this can lead to burnt valves and permanent engine damage. Have you noticed a sudden drop in fuel economy alongside a sluggish throttle? It might be time to stop looking at the spark plugs and start looking at the tailpipe.
Why a Compression Test Alone Isn’t Enough
As we move deeper into the mechanical health of the engine, we must discuss the limitations of the standard cranking compression test. While a tune up might include a quick check to see if all cylinders are within 10% of each other, this static test doesn’t reveal the whole truth. A cylinder can hold pressure while the piston is moving slowly, yet fail to maintain a seal under the high-pressure environment of actual combustion. This is where the cylinder leak-down test becomes indispensable for a high-level mechanic. By injecting compressed air into the cylinder at Top Dead Center (TDC) and measuring the percentage of air that escapes, you can pinpoint exactly where the leak is occurring. Is the air escaping through the intake? You have a bad intake valve. Is it whistling out of the oil filler cap? Your piston rings are toast. This level of precision is what separates a parts-changer from a true diagnostic expert. Consider how a ‘wet’ compression test—adding a teaspoon of oil to the cylinder—can further isolate the issue, as the oil temporarily seals the rings. However, even perfect leak-down results can’t account for what happens when the engine is under full thermal load.
Stop Trusting Static Readings When Engines Are Dynamic
The most advanced technicians utilize a running compression test to evaluate engine breathing at operational speeds. By removing a spark plug and installing a pressure transducer connected to an oscilloscope, you can visualize the pressure changes during every stroke of the four-cycle process. A mechanic might find that while cranking compression is a healthy 180 PSI, the running compression drops to 60 PSI, indicating a severe intake restriction or a camshaft that is no longer lifting the valves to their full extent. This diagnostic leap is essential for complex auto repair scenarios where a car idles perfectly but falls flat under acceleration. According to comprehensive case studies by Pico Technology, analyzing pressure waveforms allows for the detection of broken valve springs or excessive exhaust backpressure without ever turning a single internal bolt.
Can You Spot a Worn Camshaft Lobe Without Removing the Valve Cover?
Yes, by observing the ‘exhaust ramp’ on a pressure transducer waveform. If the exhaust valve opens late or closes early, the waveform will show a distinctive shift in the vacuum pocket. This mechanical nuance is often misdiagnosed as a faulty sensor or a required tune up when, in reality, the engine has suffered physical wear. For the home enthusiast, a vacuum gauge attached to the intake manifold remains a powerful, though less precise, tool. A needle that vibrates rapidly at high RPM suggests a weak valve spring, whereas a needle that drops slowly indicates an exhaust restriction. Are you ready to elevate your diagnostic game from basic scan tools to laboratory-grade analysis? The secret lies in visualizing the air moving through the engine rather than just reading the digital interpretations from the ECU.
Leveraging Waveform Analysis to See Inside the Combustion Chamber
To truly master modern auto repair, one must transition from reading codes to interpreting data streams and electrical signals. Ignition secondary waveforms provide a window into the spark event, showing the ‘burn time’ of the plug. A short burn time often suggests a lean condition, whereas a high firing voltage points toward excessive resistance in the plug or wire. When combined with a brake service or total vehicle health check, these high-level insights ensure your vehicle runs with peak efficiency and reliability. If you have been chasing a phantom stumble, it is time to put down the scanner and pick up a scope. Have you ever encountered a misfire that only appeared at a specific speed? Let us know how you solved it in the comments below.
Automotive diagnostics in the modern era often suffer from an over-reliance on the OBD-II interface, yet a seasoned mechanic knows that a diagnostic trouble code is merely a starting point, not a definitive answer. While a scanner might point to a generic misfire, understanding the underlying physics of electrical induction allows for a much deeper analysis of a failing ignition coil. When the insulation within the primary or secondary windings begins to degrade, the resulting drop in voltage can lead to intermittent performance issues that digital sensors occasionally fail to register as a hard fault. Mastering these manual techniques is essential for anyone serious about auto repair and maintaining engine longevity.
The Physics of High-Voltage Induction Failure
An ignition coil is essentially a compact transformer, converting low battery voltage into the thousands of volts necessary to bridge the spark plug gap. Over time, thermal cycling and vibration cause internal short circuits. A professional approach to tune up procedures involves more than just swapping parts; it requires verifying the integrity of this induction process. One of the most effective ways to identify a failing coil without a scanner is the cylinder power balance test. By safely disconnecting the electrical connector to each coil while the engine is idling, you can observe changes in RPM. If a coil is functioning correctly, the engine should stumble significantly; if the idle remains unchanged, you have successfully isolated the faulty component.
Can You Isolate a Dead Cylinder Without Digital Tools?
Beyond the power balance test, visual and tactile inspections often reveal what a computer cannot. A common failure point is the coil boot, which can develop nearly invisible hairline fractures. These cracks allow the high-voltage current to ‘arc’ or leak to the engine block rather than reaching the spark plug. Experts refer to this as carbon tracking. Often, why your idle stays rough after replacing every spark plug in the kit is not a fuel issue, but a failure to identify the 15-ignition-coil-boot-error-that-ruins-a-perfectly-good-tune-up. This simple oversight causes thousands of drivers to waste money on unnecessary fuel system repairs.
Why Resistance Readings Often Lie to Technicians
While some hobbyists rely on a multimeter to check primary and secondary resistance, this method has significant limitations. A coil may show perfect resistance at room temperature but fail spectacularly once it reaches operating temperatures. For a more reliable analog test, use a dedicated spark tester to observe the color and consistency of the spark; a bright blue snap indicates health, while a weak yellow or orange spark signals a failing internal winding. Taking ten minutes to perform these manual checks can prevent a breakdown. Consider reviewing our ultimate tune-up checklist for every car owner to ensure no critical components are overlooked during your next garage session.
Does Your Fuel Rail Have Enough Pressure to Sustain Combustion Under Load?
A common mistake in auto repair is assuming that a fuel pump is either working or dead. In reality, fuel delivery exists on a spectrum of efficiency. A pump might provide enough volume to sustain an idle, but fail to maintain the necessary PSI when the injectors demand maximum flow during acceleration. This results in a high-speed misfire that often mimics a failing ignition coil. Many drivers find that the 14-fuel-rail-pressure-test-that-rescues-a-failing-tune-up reveals a clogged fuel filter or a weary pump that a static test would miss. If you suspect your vehicle is struggling at highway speeds, it is essential to learn how to diagnose a bad fuel pump before it strands you on the side of the road.
Don’t Ignore the Chassis Ground When Spark Fails
Every high-voltage spark requires a clean path back to the battery to complete the circuit. If the engine’s ground straps are corroded or frayed, electrical ‘noise’ can feed back into the ECU, causing phantom misfires and erratic sensor readings. A degraded ground can lead to massive headaches, yet the 20-ground-strap-that-solves-mystery-engine-misfires is one of the most cost-effective repairs a DIYer can perform. Always check the resistance between the engine block and the negative battery terminal; anything higher than 0.2 ohms suggests a connection that is actively fighting your engine’s performance.
The Exhaust Backpressure Trap Most Techs Skip
When an engine can’t breathe out, it can’t pull a fresh charge in. A partially melted catalytic converter creates excessive backpressure, which forces spent exhaust gases back into the combustion chamber during the valve overlap period. To diagnose this, you can temporarily remove the upstream oxygen sensor and install a low-pressure gauge. If you’ve been searching for the 9-exhaust-clog-test-that-saves-thousands-in-unnecessary-engine-work, this is the manual method the pros use. Ignoring this can lead to burnt valves and permanent engine damage.
Stop Trusting Static Readings When Engines Are Dynamic
The most advanced technicians utilize a running compression test to evaluate engine breathing at operational speeds. By removing a spark plug and installing a pressure transducer connected to an oscilloscope, you can visualize the pressure changes during every stroke of the four-cycle process. A mechanic might find that while cranking compression is a healthy 180 PSI, the running compression drops significantly, indicating a severe intake restriction or a camshaft that is no longer lifting the valves to their full extent. This diagnostic leap is essential for complex auto repair scenarios where a car idles perfectly but falls flat under acceleration.
Expert Insights and Advanced Considerations
Heat Expansion Can Hide Ring Failures
Metal expands at different rates, and a piston ring that seals during a cold leak-down test may lose tension once the engine block reaches operating temperature. If you find that why your car still stumbles on cold starts despite a fresh tune-up remains a mystery, perform your mechanical tests while the engine is still hot to catch these ‘thermal leaks’ before they disappear from sight.
Alternator Diode Ripple Can Mimic Sensor Failure
A failing alternator diode can leak AC voltage into the DC system, creating electrical noise that confuses the ECU. This ‘dirty’ power can cause erratic misfires or sensor codes that lead to unnecessary auto repair expenses. Always check for AC ripple at the battery terminal with your multimeter; anything over 0.5V AC can sabotage your diagnostic accuracy and send you chasing ghosts.
Fuel Trims Provide the Ultimate Truth
While codes tell you what happened, fuel trims tell you why. Short-term and long-term fuel trims act as the ECU’s scoreboard for air-fuel correction. A seasoned mechanic knows that positive fuel trims at idle that improve at higher RPM almost always point to a vacuum leak, while trims that worsen under load suggest a fuel delivery issue. Understanding this balance is one of the most effective auto repair cost saving tips from industry experts.
Curated Expert Resources
ScannerDanner Premium: Paul Danner’s training is the gold standard for learning how to use an oscilloscope to diagnose engine mechanical issues through pressure transducers and waveform analysis. IATN (International Automotive Technicians Network): This is a peer-reviewed database where the world’s most experienced technicians share real-world fixes for the most obscure vehicle problems. AESWave Diagnostic Solutions: A specialized resource for high-end diagnostic tools and technical webinars that bridge the gap between basic scanning and advanced laboratory-grade testing.
Final Expert Perspective
The transition from a parts-changer to a diagnostic authority requires a shift in mindset: stop trusting the scanner blindly and start questioning the physics of the engine. Whether you are performing a routine tune up or a complex engine teardown, the goal is always to prove the failure through multiple points of physical data. By combining traditional mechanical tests with modern waveform analysis, you eliminate the guesswork that plagues most modern shops. Knowing how to choose a skilled mechanic you can trust often means finding someone who owns more than just a code reader. We invite you to dive deeper into our advanced guides or share your most difficult diagnostic success stories below to help the community master the art of the auto repair.