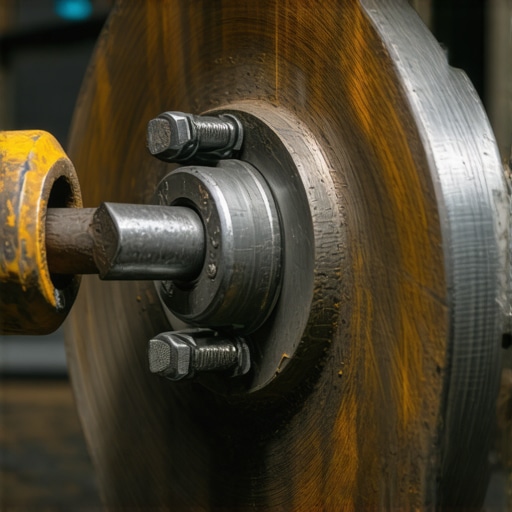
For any seasoned mechanic, the sight of a drum fused to a hub by years of galvanic corrosion and relentless heat cycling is a standard challenge in professional brake service. While the instinctual response often involves a heavy sledgehammer, this blunt force approach carries significant risks, including fractured drum castings, damaged wheel bearings, and bent backing plates. Success in auto repair depends not on the magnitude of the impact, but on the precision of the physics applied to the interface between the drum and the spindle.
Stop Beating the Metal and Start Using Thermal Dynamics
The primary antagonist in a seized brake drum is the rust bond formed at the center pilot hole. To break this bond without resorting to violence, professionals utilize penetrating catalysts with low surface tension that can wick into the microscopic gaps between the iron and steel. If chemical intervention fails, localized heat application—directed specifically at the drum face around the lug studs—can induce thermal expansion. This expansion creates the necessary clearance to disrupt the oxidation layer. During a comprehensive tune up, ensuring these surfaces are cleaned and treated with anti-seize can prevent future seizures, a technique often highlighted in brake maintenance hacks to prevent costly failures.
Is a Seized Star Wheel Sabotaging Your Brake Service Efforts?
Oftentimes, the drum isn’t actually rusted to the hub; rather, the brake shoes have worn a groove into the inner surface of the drum, creating a physical lip that prevents the assembly from sliding off. In these scenarios, hammering the drum only wedges the shoes tighter. A professional mechanic will locate the access slot on the backing plate to back off the star wheel adjuster. By retracting the shoes, you eliminate the mechanical interference. If you find your brake components are consistently difficult to service, it may be time to consult our guide on mechanic tips for diagnosing common auto problems to identify underlying hardware issues.
[IMAGE_PLACEHOLDER]
Harness the Power of Integrated Extraction Holes
Most modern Japanese and European drums feature two small threaded holes (usually M8x1.25). These are not accidental; they are designed for mechanical extraction. By threading two bolts into these holes and tightening them evenly, you create a built-in gear puller effect that applies uniform outward pressure against the hub face. This method is the gold standard in the industry because it minimizes the risk of warping the drum or damaging the delicate internals of the braking system. According to technical papers from the Society of Automotive Engineers (SAE), maintaining even pressure across the friction surface is critical to preventing micro-fractures in cast iron components. For more insights on maintaining system integrity, explore our detailed analysis of why your brake pedal feels like stepping on a marshmallow to ensure your hydraulic system is as solid as your mechanical components.
If you are looking to elevate your workshop efficiency and avoid the frustration of stubborn components, we invite you to share your most difficult extraction stories or ask our experts for specific tool recommendations in our community forums.
Step Up to Heavy-Duty Hub Pullers for Stubborn Cases
While the extraction bolt method works for most commuter vehicles, heavy-duty trucks or vehicles with significant road salt exposure may require a specialized hub puller. A three-jaw or five-jaw slide hammer assembly allows you to exert force directly on the center of the hub while pulling the drum outward. This mechanical advantage ensures that the force is perfectly axial, preventing the drum from “cocking” or binding on the lug studs. If you are struggling with a drum that refuses to budge even with pullers, it might be worth investigating if a frozen pin or seized caliper hardware is indirectly putting pressure on the assembly.
#IMAGE_PLACE_HOLDER_B#
Are You Unwittingly Compromising the Hub Surface with Wire Brushes?
Precision is the hallmark of professional auto repair. Many technicians reach for a coarse wire brush on an angle grinder to clean the hub surface once the drum is removed. However, excessive abrasion can remove microscopic amounts of metal, leading to a hub that is no longer perfectly true. This minor deviation can cause lateral runout, leading many owners to wonder why your brake rotors warp after only 5000 miles. A better approach is to use a dedicated hub cleaning kit with nylon or soft abrasive pads that remove the rust without gouging the steel. Technical guidelines from Brembo emphasize that even 0.002 inches of variation at the hub can translate to significant pedal pulsation at the wheel.
The Hub Scrub That Ends Persistent Brake Squeal
Once the drum is free, the real work begins. Cleaning the contact points—the places where the shoes touch the backing plate and the drum touches the hub—is non-negotiable for a quiet brake service. Using a high-quality silicone-based lubricant on the backing plate pads prevents the “click” or “snap” sound often heard during low-speed braking. Some DIYers ignore this, but performing the simple hub scrub that ends persistent brake squeal ensures the assembly remains quiet for the life of the shoes. This attention to detail is what separates a backyard job from a professional-grade tune up of the braking system.
Verify the Maximum Diameter Before Reinstallation
Every brake drum has a “Discard Diameter” stamped into the casting. This is the absolute limit of wear the metal can withstand before it loses the structural integrity required to contain hydraulic pressure. During a brake service, use a drum micrometer to verify you are still within the safe operating range. Reinstalling a drum that is too thin leads to excessive heat buildup and potential cracking. In the world of high-stakes auto repair, “close enough” isn’t an option; if the measurement is within 0.030 inches of the limit, replacement is the only professional recommendation.
Check the Internal Hardware for Hidden Fatigue
A drum removal often reveals secondary issues that go unnoticed during a standard inspection. Look for leaking wheel cylinders, weak return springs, or a broken plastic clip that stops your brake pedal clicking. If the springs have lost their tension due to heat, the shoes won’t retract properly, leading to dragging and premature wear. A skilled mechanic knows that replacing a $10 spring kit is cheap insurance against a $200 drum replacement later on. If you have a specific noise coming from your rear wheels that you can’t identify, drop a comment below with your vehicle’s make and model, and we will help you troubleshoot the specific hardware involved.
Peeling Back the Boot for the Signs of Silent Failure
Experienced technicians know that a dry exterior doesn’t always equate to a healthy hydraulic system. During any brake service, it is imperative to gently peel back the rubber dust boots on the wheel cylinder. If even a small amount of brake fluid escapes, the internal cup seals have failed. While some might suggest a rebuild kit, the modern mechanic usually opts for a full cylinder replacement due to the high probability of bore pitting. According to the National Highway Traffic Safety Administration (NHTSA) under the FMVSS No. 135 laboratory test procedures, hydraulic integrity is paramount for maintaining the strictly regulated stopping distances required for passenger vehicles. Ignoring a weeping cylinder leads to contaminated shoes, which effectively ruins your auto repair investment by permanently soaking the friction material in glycol-based fluid.
Does Your Master Cylinder Still Use a Residual Pressure Valve?
In older systems or specific disc/drum conversion setups, the master cylinder often incorporates a residual pressure valve (RPV). This tiny component maintains approximately 2 to 10 PSI in the lines to keep the wheel cylinder cups expanded against the bore and to hold the shoes near the drum surface. If you find your rear brakes are dragging or overheating despite a perfect tune up of the mechanical parts, the RPV might be sticking. Conversely, if your pedal is excessively low on the first pump, the valve may have failed, allowing fluid to retreat too far back into the reservoir. This is a level of diagnosis that separates a basic part-changer from a diagnostic specialist. If you’ve encountered a “phantom drag” that no amount of star-wheel backing could fix, let us know—we can help you identify if your hydraulic system is holding too much backpressure.
High-Carbon Metallurgy and the Reality of Thermal Shock
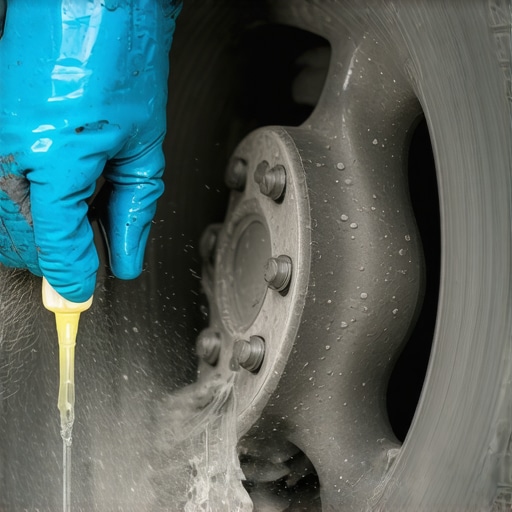
Not all replacement drums are created equal. When sourcing parts for a brake service, the choice between standard grey iron and high-carbon alloys is critical. High-carbon drums offer superior thermal conductivity and dampening properties, which significantly reduce the risk of “heat checking”—those tiny cracks that form on the friction surface after heavy use. Cheap, offshore castings often lack the consistent density required to dissipate heat evenly, leading to localized hot spots. These hot spots change the molecular structure of the iron, creating hard patches of cementite that are nearly impossible to machine out on a brake lathe. Investing in premium metallurgy ensures that your auto repair stands up to the rigors of mountain driving or heavy towing without the vibration associated with thermal distortion.
Stop the Squeal Before It Starts with the Correct Bedding-In Procedure
The final, often skipped, step of a professional tune up is the burnishing process. New brake shoes and drums need to be “mated” through a series of controlled heat cycles to establish a uniform transfer layer of friction material. This isn’t just about performance; it’s about noise control. Without proper bedding, the shoes can vibrate at high frequencies, creating that piercing squeal that drives customers back to the shop. To do this correctly, perform several moderate stops from 30 MPH down to 10 MPH, allowing the drums to cool slightly between each cycle. This gradual thermal conditioning stabilizes the resins in the shoe lining. If you’re interested in perfecting your technique, check out our deep dive into the proper brake bedding procedures for maximum longevity.
Evaluating the Compensating Port in the Master Cylinder
When the rear drums refuse to release, the problem might actually be located under the hood. The master cylinder’s compensating port allows fluid to return to the reservoir when the pedal is released. If the pushrod is adjusted too long, or if internal debris blocks this pin-sized hole…
…if internal debris blocks this pin-sized hole, the fluid cannot return to the reservoir as it expands from heat. This creates a self-energizing cycle of friction and heat that can eventually cause the rear wheels to lock up entirely during a long drive. A simple check involves loosening the master cylinder mounting nuts slightly; if the wheels suddenly spin free, your pushrod is improperly adjusted—a nuance often missed during a standard brake service. This mechanical misalignment prevents the piston from returning fully, effectively keeping the system pre-loaded.
Stop the Drag Before Your Drums Turn Blue
Excessive heat is the silent killer of drum assemblies. When a mechanic encounters “blued” metal, it indicates the drum has exceeded its annealing temperature, permanently altering its structural integrity. This level of thermal distress often stems from a restricted brake hose. Over time, the internal lining of a flexible rubber hose can collapse, acting as a one-way check valve. Pressure goes to the wheel cylinder but cannot return. Before you condemn the hardware, perform a “crack test” at the bleeder screw; if fluid squirts out under pressure with the pedal released, that hose is your culprit. Addressing this is a critical part of a complete auto repair strategy to prevent recurring failures.
Why Do Your Rear Wheels Lock Up After a Rainy Night?
Many drivers experience a terrifying “grab” or instant lock-up the first time they apply brakes after the vehicle has sat in high humidity. This isn’t necessarily a sign of a mechanical failure, but rather the result of flash rust on the cast iron surface. Cast iron is highly hygroscopic; a thin layer of iron oxide forms within hours of exposure to moisture. The friction coefficient of this rust is significantly higher than that of clean iron, causing the shoes to “bite” aggressively. Professionals recommend a few light “cleansing” applications of the brake pedal at low speeds to scrub this oxidation away before entering heavy traffic.
Ceramic vs. Semi-Metallic: Which Lining Wins the Heat Battle?
Choosing the right friction material is a pivotal part of any tune up. Semi-metallic shoes are the workhorses of the industry, offering excellent heat dissipation and cold-bite characteristics, making them ideal for heavy-duty towing. However, they are prone to noise and generate more abrasive dust. Conversely, ceramic formulations provide a quieter experience and lower dust levels, but they may not handle extreme thermal loads as gracefully. According to technical data from Akebono Brake Corporation, the specific “transfer layer” created by high-quality ceramic linings is what maintains the rotor and drum’s surface finish over time.
Diagnose Like a Pro with Hydraulic Pressure Testing
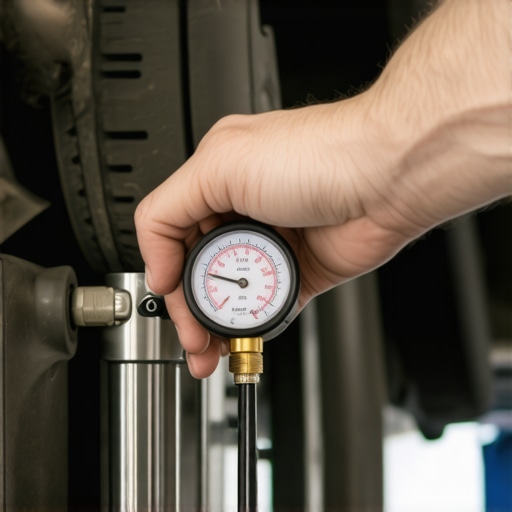
When traditional troubleshooting fails, a seasoned auto repair specialist reaches for the hydraulic pressure gauges. By installing a gauge in-line with the wheel cylinder, you can verify if the pressure is reaching the rear wheels equally. A discrepancy of more than 50 PSI between the left and right sides indicates a restriction in the proportioning valve or a kinked steel line. This empirical data removes the guesswork from the equation. If you have been chasing a pull to one side that new shoes did not fix, it is time to stop guessing and start measuring. This rigorous approach ensures your brake service meets OEM safety standards.
If you are dealing with a mysterious hydraulic issue or want to know which friction material is best for your specific driving style, leave a detailed description of your symptoms in the comments, and our lead technicians will provide a custom diagnostic path for you.
Expert Insights & Advanced Considerations
Stop Corrosion Before it Starts with Nickel-Based Anti-Seize
While standard silver anti-seize is ubiquitous in most garages, high-performance auto repair calls for nickel-based compounds on the hub pilot. Nickel-based lubricants maintain their chemical integrity at much higher temperatures and prevent the galvanic bonding that makes future brake service a nightmare. Applying a thin film specifically to the center hub flange—not the lug studs—ensures the drum slides off effortlessly even after thousands of heat cycles. If you have ever wondered why your brake rotors warp after only 5000 miles, improper hub preparation and uneven lug torque are often the hidden culprits.
Your Front Pads Are Wearing Out Because the Rear Shoes Are Lazy
If your rear drum adjusters are seized or improperly set, the front brakes take on up to 90% of the stopping load. This leads to rapid pad wear, excessive glazing, and dangerous front-end diving during hard stops. A proper tune up of the rear braking system ensures the shoes are just touching the drum, allowing hydraulic pressure to distribute evenly across the entire chassis. Addressing the brake slide pin error that causes uneven pad wear in the front is only half the battle; you must verify that the rear self-adjusters are functional to maintain true brake balance.
Don’t Trust a Brand New Drum Without a Lathe Verification
Many new drums are slightly out-of-round right out of the box due to shipping stresses or casting inconsistencies. A seasoned mechanic will often perform a “clean-up pass” on a brake lathe to ensure the friction surface is perfectly concentric to the hub mounting face. This extra step eliminates the low-frequency vibration that many DIYers mistake for bad tires or a failing suspension. Learning how to stop your brakes from pulsing without buying new rotors starts with verifying the geometry of every new component you install before the wheels ever go back on.
[IMAGE_EXPERT_TOOLS]
Curated Expert Resources
Bendix Brake Training Center: This is the gold standard for understanding friction material science and thermal management. They provide deep dives into metallurgy that go far beyond basic service manuals.
SAE International Technical Papers: For those who want to understand the physics of brake fade and hydraulic leverage, searching SAE papers on “Drum Brake Self-Energizing Characteristics” offers academic-level clarity.
Raybestos Tech Schools: Their troubleshooting guides for “phantom noises” are invaluable for identifying whether a specific sound is coming from a weak spring kit or a failing wheel bearing.
Final Expert Perspective
Mastering a brake service is not about having the biggest hammer; it is about respecting the tight tolerances and thermal realities of the system. By shifting your focus from simple “part swapping” to comprehensive system calibration, you ensure a safer, quieter, and more efficient vehicle. This level of precision in auto repair not only saves you money over the long term but also provides the peace of mind that only a professional-grade tune up can deliver. We have shared our internal brake service secrets—now it is your turn to apply them. Have you encountered a drum that defied all logic, or do you have a specific tool recommendation for the community? Join the discussion below or explore our brake service secrets to further sharpen your technical skills.