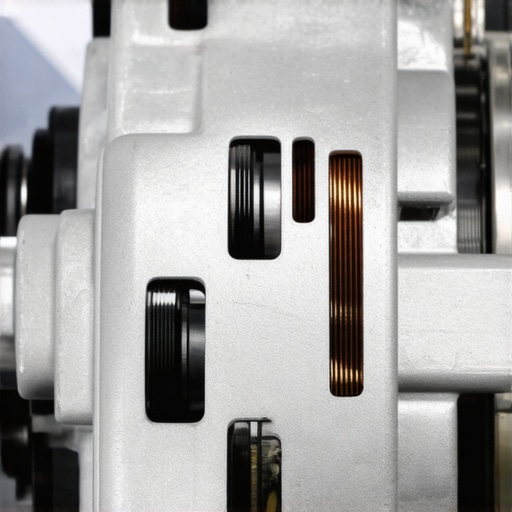
When a vehicle returns to the service bay just seven days after a major charging system overhaul, the immediate instinct is to blame the part. However, professional-grade diagnostics reveal that infant mortality in alternators is rarely a coincidence of manufacturing. It is frequently the result of a domino effect where an unaddressed secondary fault—often within the battery or the harness—overwhelms the new component’s internal voltage regulator or rectifier bridge. To solve this, a mechanic must look past the simple swap-and-go mentality and evaluate the electrical ecosystem as a whole. This analytical approach differentiates a basic part-changer from an expert in auto repair.
Stop Using New Alternators to Charge Dead Batteries
Many DIYers and even some entry-level technicians install a new unit and expect it to revive a battery that has sat at a critically low voltage for weeks. This is a fatal error for the hardware. An alternator is an electrical maintainer, not a high-amperage bulk charger. Forcing the new unit to run at a 100% duty cycle immediately upon startup generates localized heat that can desolder internal connections or fry the diodes. Utilizing a 12-volt multi-meter test before installation ensures the battery is in a state to receive, not just demand, current. If the battery is aged or sulfated, it creates a constant high-load scenario that will kill a replacement unit in days.
Hidden Resistance in the Main Power Cable
Voltage drop is the silent killer of sensitive automotive electronics. If the Big Three cables—battery to chassis, engine to chassis, and alternator to battery—are corroded internally, the alternator has to work significantly harder to overcome that resistance. This often mimics a failing part when the real culprit is a 12-dollar ground wire. According to data from the Battery Council International (BCI), even a minor 0.5V drop in the charging circuit can lead to thermal runaway within the alternator’s housing. [image_placeholder] Expert-level brake service and engine diagnostics both rely on the same principle: ensuring the foundation of the system is sound before trusting the component.
Why Do Remanufactured Units Fail More Often Than OEM?
Quality control in the remanufacturing sector varies wildly. A reman unit might have new brushes but an old, heat-stressed stator or a refurbished regulator that hasn’t been tested at operating temperature. When you invest in a tune up or a charging system repair, sourcing parts from reputable manufacturers is non-negotiable. Lower-tier parts often use sub-standard insulation on the copper windings, leading to internal shorts under heavy load. Understanding how to choose a skilled mechanic can help you avoid these low-quality part traps.
The Pulley and Belt Tension Trap
Mechanical installation errors are equally common culprits. Over-tightening a serpentine belt puts immense lateral load on the alternator’s front bearing, leading to premature mechanical seizure. Conversely, a slipping belt causes erratic voltage spikes that the internal regulator may struggle to dampen. As part of a thorough tune up, technicians must inspect the tensioner pulley for proper alignment and spring tension. If you ignore a faint squeal, you might be missing the warning sign your serpentine belt is about to snap, which often leads to immediate alternator failure via heat soak. Need deeper insights into specific electrical gremlins? Contact our team of experts for a professional diagnostic consultation.
Modern Alternators Take Orders from the PCM
In contemporary vehicle architecture, the alternator has transitioned from a standalone generator to a peripheral controlled by the Engine Control Module (ECM). This smart charging approach allows the vehicle to reduce alternator load during heavy acceleration to improve fuel economy or increase it during deceleration to recapture kinetic energy. If you find your voltage fluctuating wildly, it may not be a hardware failure but a communication error within the local interconnect network. High resistance in the LIN-bus or Pulse Width Modulation (PWM) signal wires can lead to erratic behavior that a standard bench test won’t catch. This is where the 20-dollar scanner that every modern driver should own becomes invaluable, allowing you to view real-time charging commands sent by the PCM and verify if the alternator is actually receiving the signal to excite the field winding.
Stop the Silent AC Ripple Before It Destroys Control Modules
One of the most overlooked aspects of charging system health is the presence of AC ripple. Alternators generate Three-Phase AC current, which is then converted to DC by a diode trio or rectifier bridge. When a single diode fails or starts to leak, it allows dirty AC voltage to enter the DC system. While the battery might still show 14 volts on a basic gauge, the high-frequency AC oscillation can wreak havoc on sensitive microprocessors. According to technical standards from the Society of Automotive Engineers (SAE), excessive electrical noise in the charging circuit is a leading cause of phantom sensor codes and erratic transmission shifting. 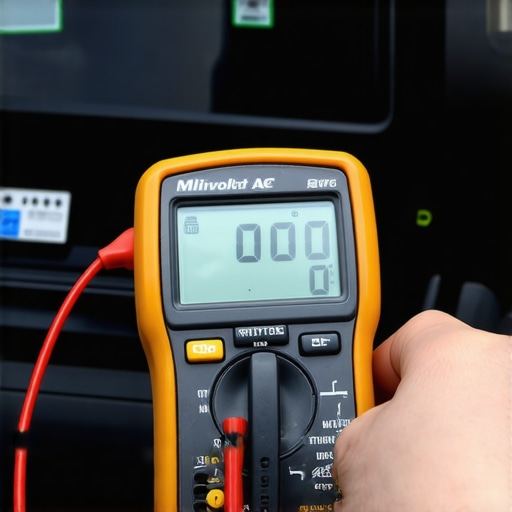 If you are chasing ghost problems that seem to move from one system to another, checking for the 14-dollar ground strap that fixes ghost shifting should be your first step before condemning an expensive computer module or internal wiring harness.
Could a Simple Relay Be Mimicking a Blown Alternator?
Before you commit to an expensive teardown, you must investigate the distribution of power through the primary junction blocks. Many modern vehicles utilize a high-amperage mega-fuse or a specific charging relay to bridge the gap between the alternator output and the main bus bar. A hairline fracture in a fuse or a pitted contact inside the 12-dollar relay that mimics a blown starter motor can create an intermittent no-charge condition. These components often fail under thermal load; they may function perfectly when the engine is cold but open the circuit once the under-hood temperatures rise. Always cross-reference your symptoms with the hidden fuse that controls your entire dashboard to ensure the issue isn’t a simple lack of excitation voltage rather than a mechanical failure of the rotating assembly.
Verify the Airflow or Prepare for Heat Failure
Heat is the primary enemy of electrical efficiency and component longevity. Many high-output alternators are equipped with dedicated plastic cooling ducts that channel fresh air directly into the rear housing where the diodes reside. During a routine tune up, these ducts are often removed to access other components and never reinstalled by careless hands. Operating an alternator without its shroud in a cramped engine bay can increase internal temperatures by up to 50 degrees, drastically shortening the life of the internal voltage regulator. To keep your vehicle’s systems in peak condition, consider reviewing auto repair cost-saving tips from industry experts, which emphasize the importance of retaining all factory heat-shielding. Have you ever noticed your lights flickering only after the engine is fully warmed up? Share your experience in the comments or check out our guide on troubleshooting electrical heat-soak for more DIY solutions.
Your Alternator Case Is a Ground Path Too
While most mechanics focus on the heavy-gauge B+ cable, many forget that the alternator’s return path to the battery is often the housing itself. The metal-to-metal contact between the alternator case and the engine block serves as the negative circuit. If the mounting bracket is caked in oil, road salt, or oxidation, you create a high-resistance junction. This resistance forces current to find alternative, thinner paths through the vehicle’s sensor grounds. This “floating ground” scenario is a nightmare for a 12-dollar ground wire trying to handle 100 amps of return current. 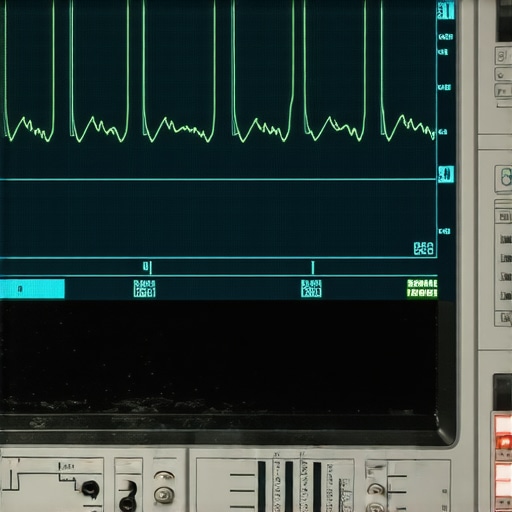 It effectively cooks the wire from the inside out, leading to mysterious stalling or sensor failures that disappear and reappear without logic. Ensuring the mounting ears of the unit are wire-brushed to a shine is a hallmark of expert auto repair. This subtle step prevents the dreaded ‘intermittent ground’ code that keeps cars in the shop for weeks unnecessarily.
Can a bad alternator damage my car’s transmission computer?
Yes, and the mechanism is more complex than just simple low voltage. Modern electronic transmissions rely on precise Pulse Width Modulation (PWM) to control shift solenoids. If your rectifier bridge is leaking AC ripple, that electrical “noise” interferes with the TCM’s (Transmission Control Module) ability to read input and output speed sensors accurately. The result? Harsh shifting, “limp mode,” or even permanent memory corruption within the module. According to research published by the International Organization for Standardization (ISO 16750-2), electrical transients and supply voltage variations in road vehicles can trigger unexpected resets in digital control units if the ripple exceeds specified millivolt thresholds. If you’ve just performed a brake service and suddenly notice the car won’t shift out of second gear, don’t assume it’s mechanical; check the alternator’s health first.
The Multi-meter Isn’t Fast Enough for Modern Charging
To truly diagnose a sophisticated charging system, you have to stop thinking in static numbers and start thinking in frequencies. A standard digital multi-meter (DMM) takes samples at a rate that is far too slow to catch a failing diode’s micro-bursts of AC voltage. By the time the DMM averages the reading, the spike has already come and gone, leaving you with a false sense of security. Professional technicians use an automotive-grade oscilloscope to visualize the waveform in real-time. A healthy alternator produces a clean, repetitive “hunchback” pattern across the screen. If you see a downward spike or a jagged peak, you are looking at a “leaky” diode that is poisoning your electrical ecosystem. This level of precision is why how to choose a skilled mechanic involves asking about their diagnostic tooling. A shop that only owns a test light won’t be able to protect your vehicle’s expensive tune up investments from these invisible electrical surges.
Don’t Ignore the Parasitic Drain Myth
There is a persistent belief that an alternator can simply “overpower” a parasitic drain once the engine is running. In reality, a vehicle with a 500mA draw while parked forces the alternator to work significantly harder the moment the engine turns over to compensate for the lost capacity. This constant cycle of deep discharge and rapid recharge stresses the lead plates in the battery, creating lead sulfate buildup. As the battery’s internal resistance rises, the alternator must increase its output voltage to maintain the target amperage, leading to a “thermal runaway” cycle. If you find yourself needing a the 20-dollar scanner that every modern driver should own to constantly clear low-voltage codes, the problem isn’t the software—it’s a physical breakdown of the electrochemical balance. For a deeper dive into parasitic testing, reach out to our diagnostic specialists today for a guided walkthrough of your vehicle’s amperage draw. Understanding these nuances is what separates a temporary fix from a long-term solution.
The “Field Circuit” Secret Most DIYers Miss
Beyond the main power wire, the smaller multi-pin connector on the back of the unit is where the real communication happens. This connector usually carries the “turn-on” or “excitation” signal. In older cars, this was a simple 12V ignition feed. In newer models, it’s a sophisticated data link. If this wire has a microscopic break or a pin that has backed out of the plastic housing, the alternator will remain dormant even if the belt is spinning at 3,000 RPM. This often occurs after a heavy engine cleaning where high-pressure water forces its way into the seal. Testing this circuit requires knowing if your car uses a pull-up or pull-down resistor logic inside the PCM, which determines whether the field is energized by a positive pulse or a ground path. This hidden circuit is the reason many “perfectly good” alternators end up in the scrap heap when the real fault lies in a three-inch section of the harness…
Why Your New Battery Still Won’t Charge Without a Software Reset
In the era of the ‘smart’ car, mechanical replacement is only half the battle. Most late-model vehicles utilize an Intelligent Battery Sensor (IBS) or a similar Battery Management System (BMS) that monitors the state of health and state of charge. When you install a fresh alternator or battery, the PCM often retains the ‘aging profile’ of the previous, failing component. This results in the computer commanding the new alternator to output a charging profile that is either too aggressive or too weak, leading to immediate overheating or a persistent undercharge condition. Failing to perform a BMS reset via a professional-grade scan tool can truncate the lifespan of a premium alternator by months. If you are handling your own auto repair, ignoring this digital handshake is a recipe for a return visit to the parts store.
When Engine Oil Becomes an Electrical Conductor
A frequently overlooked killer of charging systems is the slow-motion disaster of fluid ingress. In many transverse engine layouts, the power steering pump or the valve cover gasket sits directly above the alternator. A microscopic oil leak doesn’t just make a mess; it acts as a magnet for road grit and carbon dust from the brushes. This slurry creates a semi-conductive bridge across the slip rings, leading to internal arcing and the eventual burnout of the regulator.  Professional brake service technicians often check for these leaks during routine inspections because they know that a fouled alternator is often a symptom of a larger mechanical neglect. If you see a sheen of oil on your alternator casing, the unit is already on borrowed time regardless of its current voltage output.
Can a failing crankshaft pulley mimic a charging system fault?
Absolutely. This is the ‘phantom’ fault that drives even seasoned mechanics to frustration. Modern harmonic balancers are composed of two metal pieces bonded by a rubber dampener. Over time, this rubber bond shears. Under normal idling, the pulley may spin the belt perfectly. However, the moment the alternator demands high amperage—such as when the headlights and AC are engaged—the torque load causes the outer ring of the pulley to slip against the inner hub. This causes the alternator’s RPM to drop momentarily, triggering a ‘check charging system’ light even though the belt appears to be moving. Because there is no audible squeal, many DIYers assume the alternator is weak and replace it, only to find the same erratic voltage with the new part. Validating the integrity of the harmonic balancer is a critical step in any tune up focused on electrical stability.
The Hidden High-Frequency Trap
While a basic multi-meter captures the average DC voltage, it is blind to the high-frequency ‘noise’ that can cripple a vehicle’s communication network. According to technical bulletins from the Auto Care Association, electrical interference from a failing alternator diode can ‘poison’ the CAN-bus, leading to inexplicable errors in the ABS or transmission modules. If you are experiencing ‘ghost’ dashboard lights that disappear after a restart, you aren’t looking for a fuse; you are looking for a rectifier bridge that is leaking AC voltage into a DC world. Don’t let your vehicle’s complex electronics be sacrificed to a mediocre charging system. If these advanced symptoms sound familiar, contact our team of experts for a deep-dive diagnostic session that goes beyond the basic bench test.When a vehicle returns to the service bay just seven days after a major charging system overhaul, the immediate instinct is to blame the part. However, professional-grade diagnostics reveal that infant mortality in alternators is rarely a coincidence of manufacturing. It is frequently the result of a domino effect where an unaddressed secondary fault—often within the battery or the harness—overwhelms the new component’s internal voltage regulator or rectifier bridge. To solve this, a mechanic must look past the simple swap-and-go mentality and evaluate the electrical ecosystem as a whole. This analytical approach differentiates a basic part-changer from an expert in auto repair.
Stop Using New Alternators to Charge Dead Batteries
Many DIYers and even some entry-level technicians install a new unit and expect it to revive a battery that has sat at a critically low voltage for weeks. This is a fatal error for the hardware. An alternator is an electrical maintainer, not a high-amperage bulk charger. Forcing the new unit to run at a 100% duty cycle immediately upon startup generates localized heat that can desolder internal connections or fry the diodes. Utilizing a 12-volt multi-meter test before installation ensures the battery is in a state to receive, not just demand, current. If the battery is aged or sulfated, it creates a constant high-load scenario that will kill a replacement unit in days.
Hidden Resistance in the Main Power Cable
Voltage drop is the silent killer of sensitive automotive electronics. If the Big Three cables—battery to chassis, engine to chassis, and alternator to battery—are corroded internally, the alternator has to work significantly harder to overcome that resistance. This often mimics a failing part when the real culprit is a 12-dollar ground wire. According to data from the Battery Council International (BCI), even a minor 0.5V drop in the charging circuit can lead to thermal runaway within the alternator’s housing. [image_placeholder] Expert-level brake service and engine diagnostics both rely on the same principle: ensuring the foundation of the system is sound before trusting the component.
Why Do Remanufactured Units Fail More Often Than OEM?
Quality control in the remanufacturing sector varies wildly. A reman unit might have new brushes but an old, heat-stressed stator or a refurbished regulator that hasn’t been tested at operating temperature. When you invest in a tune up or a charging system repair, sourcing parts from reputable manufacturers is non-negotiable. Lower-tier parts often use sub-standard insulation on the copper windings, leading to internal shorts under heavy load. Understanding how to choose a skilled mechanic can help you avoid these low-quality part traps.
The Pulley and Belt Tension Trap
Mechanical installation errors are equally common culprits. Over-tightening a serpentine belt puts immense lateral load on the alternator’s front bearing, leading to premature mechanical seizure. Conversely, a slipping belt causes erratic voltage spikes that the internal regulator may struggle to dampen. As part of a thorough tune up, technicians must inspect the tensioner pulley for proper alignment and spring tension. If you ignore a faint squeal, you might be missing the warning sign your serpentine belt is about to snap, which often leads to immediate alternator failure via heat soak. Need deeper insights into specific electrical gremlins? Contact our team of experts for a professional diagnostic consultation.
Modern Alternators Take Orders from the PCM
In contemporary vehicle architecture, the alternator has transitioned from a standalone generator to a peripheral controlled by the Engine Control Module (ECM). This smart charging approach allows the vehicle to reduce alternator load during heavy acceleration to improve fuel economy or increase it during deceleration to recapture kinetic energy. If you find your voltage fluctuating wildly, it may not be a hardware failure but a communication error within the local interconnect network. High resistance in the LIN-bus or Pulse Width Modulation (PWM) signal wires can lead to erratic behavior that a standard bench test won’t catch. This is where the 20-dollar scanner that every modern driver should own becomes invaluable, allowing you to view real-time charging commands sent by the PCM and verify if the alternator is actually receiving the signal to excite the field winding.
Stop the Silent AC Ripple Before It Destroys Control Modules
One of the most overlooked aspects of charging system health is the presence of AC ripple. Alternators generate Three-Phase AC current, which is then converted to DC by a diode trio or rectifier bridge. When a single diode fails or starts to leak, it allows dirty AC voltage to enter the DC system. While the battery might still show 14 volts on a basic gauge, the high-frequency AC oscillation can wreak havoc on sensitive microprocessors. According to technical standards from the Society of Automotive Engineers (SAE), excessive electrical noise in the charging circuit is a leading cause of phantom sensor codes and erratic transmission shifting. If you are chasing ghost problems that seem to move from one system to another, checking for the 14-dollar ground strap that fixes ghost shifting should be your first step before condemning an expensive computer module or internal wiring harness.
Could a Simple Relay Be Mimicking a Blown Alternator?
Before you commit to an expensive teardown, you must investigate the distribution of power through the primary junction blocks. Many modern vehicles utilize a high-amperage mega-fuse or a specific charging relay to bridge the gap between the alternator output and the main bus bar. A hairline fracture in a fuse or a pitted contact inside the 12-dollar relay that mimics a blown starter motor can create an intermittent no-charge condition. These components often fail under thermal load; they may function perfectly when the engine is cold but open the circuit once the under-hood temperatures rise. Always cross-reference your symptoms with the hidden fuse that controls your entire dashboard to ensure the issue isn’t a simple lack of excitation voltage rather than a mechanical failure of the rotating assembly.
Verify the Airflow or Prepare for Heat Failure
Heat is the primary enemy of electrical efficiency and component longevity. Many high-output alternators are equipped with dedicated plastic cooling ducts that channel fresh air directly into the rear housing where the diodes reside. During a routine tune up, these ducts are often removed to access other components and never reinstalled by careless hands. Operating an alternator without its shroud in a cramped engine bay can increase internal temperatures by up to 50 degrees, drastically shortening the life of the internal voltage regulator. To keep your vehicle’s systems in peak condition, consider reviewing auto repair cost-saving tips from industry experts, which emphasize the importance of retaining all factory heat-shielding. Have you ever noticed your lights flickering only after the engine is fully warmed up? Share your experience in the comments or check out our guide on troubleshooting electrical heat-soak for more DIY solutions.
Your Alternator Case Is a Ground Path Too
While most mechanics focus on the heavy-gauge B+ cable, many forget that the alternator’s return path to the battery is often the housing itself. The metal-to-metal contact between the alternator case and the engine block serves as the negative circuit. If the mounting bracket is caked in oil, road salt, or oxidation, you create a high-resistance junction. This resistance forces current to find alternative, thinner paths through the vehicle’s sensor grounds. This “floating ground” scenario is a nightmare for a 12-dollar ground wire trying to handle 100 amps of return current. It effectively cooks the wire from the inside out, leading to mysterious stalling or sensor failures that disappear and reappear without logic. Ensuring the mounting ears of the unit are wire-brushed to a shine is a hallmark of expert auto repair. This subtle step prevents the dreaded ‘intermittent ground’ code that keeps cars in the shop for weeks unnecessarily.
Can a bad alternator damage my car’s transmission computer?
Yes, and the mechanism is more complex than just simple low voltage. Modern electronic transmissions rely on precise Pulse Width Modulation (PWM) to control shift solenoids. If your rectifier bridge is leaking AC ripple, that electrical “noise” interferes with the TCM’s (Transmission Control Module) ability to read input and output speed sensors accurately. The result? Harsh shifting, “limp mode,” or even permanent memory corruption within the module. According to research published by the International Organization for Standardization (ISO 16750-2), electrical transients and supply voltage variations in road vehicles can trigger unexpected resets in digital control units if the ripple exceeds specified millivolt thresholds. If you’ve just performed a brake service and suddenly notice the car won’t shift out of second gear, don’t assume it’s mechanical; check the alternator’s health first.
The Multi-meter Isn’t Fast Enough for Modern Charging
To truly diagnose a sophisticated charging system, you have to stop thinking in static numbers and start thinking in frequencies. A standard digital multi-meter (DMM) takes samples at a rate that is far too slow to catch a failing diode’s micro-bursts of AC voltage. By the time the DMM averages the reading, the spike has already come and gone, leaving you with a false sense of security. Professional technicians use an automotive-grade oscilloscope to visualize the waveform in real-time. A healthy alternator produces a clean, repetitive “hunchback” pattern across the screen. If you see a downward spike or a jagged peak, you are looking at a “leaky” diode that is poisoning your electrical ecosystem. This level of precision is why how to choose a skilled mechanic involves asking about their diagnostic tooling. A shop that only owns a test light won’t be able to protect your vehicle’s expensive tune up investments from these invisible electrical surges.
Don’t Ignore the Parasitic Drain Myth
There is a persistent belief that an alternator can simply “overpower” a parasitic drain once the engine is running. In reality, a vehicle with a 500mA draw while parked forces the alternator to work significantly harder the moment the engine turns over to compensate for the lost capacity. This constant cycle of deep discharge and rapid recharge stresses the lead plates in the battery, creating lead sulfate buildup. As the battery’s internal resistance rises, the alternator must increase its output voltage to maintain the target amperage, leading to a “thermal runaway” cycle. If you find yourself needing a the 20-dollar scanner that every modern driver should own to constantly clear low-voltage codes, the problem isn’t the software—it’s a physical breakdown of the electrochemical balance. For a deeper dive into parasitic testing, reach out to our diagnostic specialists today for a guided walkthrough of your vehicle’s amperage draw. Understanding these nuances is what separates a temporary fix from a long-term solution.
The “Field Circuit” Secret Most DIYers Miss
Beyond the main power wire, the smaller multi-pin connector on the back of the unit is where the real communication happens. This connector usually carries the “turn-on” or “excitation” signal. In older cars, this was a simple 12V ignition feed. In newer models, it’s a sophisticated data link. If this wire has a microscopic break or a pin that has backed out of the plastic housing, the alternator will remain dormant even if the belt is spinning at 3,000 RPM. This often occurs after a heavy engine cleaning where high-pressure water forces its way into the seal. Testing this circuit requires knowing if your car uses a pull-up or pull-down resistor logic inside the PCM, which determines whether the field is energized by a positive pulse or a ground path. This hidden circuit is the reason many “perfectly good” alternators end up in the scrap heap when the real fault lies in a three-inch section of the harness. Identifying these microscopic breaks requires a methodical circuit test rather than a blind component swap.
Expert Insights & Advanced Considerations
The Digital Handshake Prevents Overcharging
When installing a fresh unit, the Engine Control Module must be informed of the change via a software adaptation. Using the 20-dollar scanner that every modern driver should own to reset the battery adaptation values ensures the alternator doesn’t apply an aggressive charging profile meant for an old, sulfated battery. Failure to perform this digital handshake is a leading cause of premature voltage regulator failure in late-model vehicles.
Oil Ingress is a Silent Diode Killer
A weeping valve cover or power steering hose directly above the alternator is a death sentence for the internal electronics. The oil acts as a binder for metallic dust, creating conductive paths that bridge the internal insulators. Professional brake service and safety inspections often catch these leaks before they migrate to the charging system and cause a total electrical failure.
Case Grounds Require a Metal-to-Metal Bite
Voltage drop isn’t just a cable issue; it is often a mechanical mounting issue. If the alternator bracket is oxidized or painted, the return path to the battery is throttled. For a truly professional auto repair, wire-brushing the mounting ears to a shine is more effective than simply replacing a 12-dollar ground wire. This ensures a clean path for the 100+ amps returning to the engine block.
Curated Expert Resources
Society of Automotive Engineers (SAE) Technical Papers: The primary source for understanding the precise limits of electrical noise and AC ripple in automotive DC systems. Battery Council International (BCI) Technical Manuals: These provide the definitive charging profiles for various battery chemistries to prevent thermal runaway. The Motorist Assurance Program (MAP) Diagnostic Guidelines: A standardized resource for identifying the root causes of charging system failures beyond the alternator unit itself.
Modern Electrical Integrity Requires Strategy
The transition from a simple generator to a software-controlled peripheral has changed the landscape of modern auto repair. Success no longer comes from just swapping parts, but from a comprehensive audit of the electrical ecosystem. By addressing grounds, software resets, and ripple voltage, you move from a part-changer to a diagnostic expert. To verify your own vehicle’s health, consult our ultimate tune up checklist for every car owner or contact our team of experts for a professional diagnostic consultation.