Stop Blaming the Master Cylinder for Trapped Air
Hydraulic integrity serves as the cornerstone of automotive safety, yet even a seasoned mechanic can be humbled by a persistent spongy pedal. The prevailing assumption during a standard brake service is that air naturally migrates toward the bleeder screw. However, modern auto repair often encounters a phenomenon known as the ‘hydraulic high-point trap.’ This occurs when a brake line or flexible hose is routed with an upward loop that sits physically higher than the bleeder valve itself. Because air is lighter than glycol-based fluid, it seeks the highest point in the circuit. If that point is not the bleeder screw, no amount of traditional pumping will evacuate the pocket. Professional technicians must recognize that the geometry of the system is just as critical as the pressure applied to it.
Defeating the High-Point Hydraulic Trap
When performing a tune up of the braking system, you must analyze the path of the hard lines and flex hoses under load. In many cases, aftermarket suspension components or incorrectly installed caliper brackets create a ‘gooseneck’ in the line. This mechanical oversight creates a permanent residence for air bubbles. According to data from the Society of Automotive Engineers (SAE), even a minor volume of entrapped air can lead to a 15-20% increase in pedal travel before the pads engage the rotors. To rectify this, the caliper must often be unbolted and rotated so the bleeder screw becomes the absolute highest point in the local circuit during the bleeding process. Understanding brake service secrets like these distinguishes a master technician from a general laborer.
Why Does the Pedal Stay Soft After Three Full Flushes?
If you have cycled two quarts of fluid through the system and the pedal still lacks a firm ‘bite,’ you are likely dealing with air trapped in the ABS hydraulic control unit (HCU) or a line loop error. In some vehicles, the internal valves of the ABS module must be cycled electronically to release air into the primary lines. If you are experiencing this frustration, you might also want to investigate how to stop your brakes from sponging after a long drive, as heat can exacerbate the expansion of these hidden air pockets. This issue is frequently misdiagnosed as a failing master cylinder, leading to unnecessary and expensive auto repair costs. Always verify the physical orientation of the lines before condemning the hydraulics.
For those performing a total system overhaul, ensuring the bench bleeding process is flawless is the next logical step. Learn the master cylinder bench bleeding hack to ensure your foundation is solid before tackling line-routing errors. Have you encountered a routing error that defied logic in your shop? Share your diagnostic breakthroughs with our community of professionals.
Tiny Washers That Cause Massive Diagnostic Headaches
While most mechanics focus on the major components during a brake service, it is the smallest interfaces that often compromise the entire system’s performance. A common culprit for persistent fluid weeping or air intrusion is the improper reuse of crush washers on the banjo bolt. These copper or aluminum rings are designed for a single deformation cycle; once torqued, they conform to the microscopic imperfections of the caliper and the bolt. Reusing them, even with additional torque, rarely creates a perfect seal and can lead to a ‘ghost’ leak where fluid doesn’t visibly drip, but air is slowly drawn in during the pedal release stroke. Mastering the 10 copper washer trick that stops persistent oil drips and brake fluid seepage is an essential skill for any mechanic aiming for a zero-comeback reputation. A secure seal at the banjo bolt ensures that your auto repair remains professional and safe over thousands of miles.
Could Dry Slide Pins Be Tricking Your Foot Into Feeling Air?
It is a mistake to assume every soft pedal is a hydraulic issue. If the caliper slide pins are corroded or lack proper lubrication, the caliper cannot center itself effectively over the rotor. This mechanical drag forces the piston to travel further to compensate for the misalignment, creating a sensation at the pedal that feels remarkably similar to air in the lines. This ‘mechanical sponge’ occurs because the energy intended for clamping is instead wasted on overcoming friction or flexing the caliper bracket. Professional technicians should integrate the 12 caliper pin grease tip that ends persistent brake squeal and restores smooth movement to the assembly. Without this attention to detail, even a fresh tune up of the hydraulics will fail to provide the firm, immediate response a driver expects. 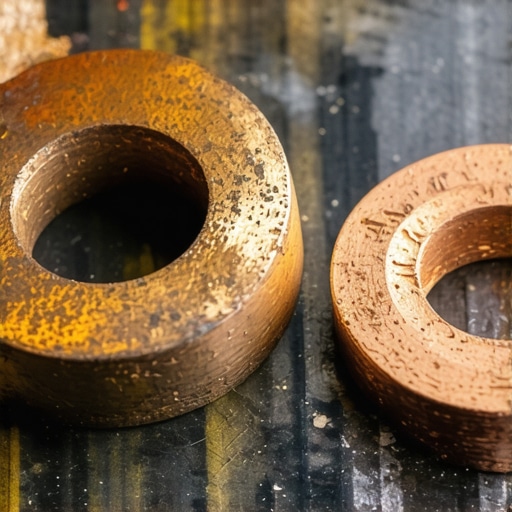
Identify the Internal Hose Failure That Mimics a Seized Caliper
Experienced technicians know that a brake hose can look perfect on the exterior while being completely collapsed internally. Over time, the inner lining of a rubber flex hose can delaminate, creating a one-way flap that acts as a check valve. This allows high-pressure fluid to reach the caliper when you step on the pedal but prevents that fluid from returning to the master cylinder when you let go. This results in a brake that stays partially applied, leading to rapid pad wear and overheating. According to the Car Care Council, internal hose degradation is one of the most overlooked causes of premature brake failure and pull-to-one-side issues. Identifying this requires a nuanced approach: if you crack the bleeder screw and the wheel suddenly spins freely, you have confirmed the restriction is in the hose or higher up, not a seized piston. Implementing brake maintenance hacks to prevent costly failures involves proactively replacing these hoses every decade, regardless of their outward appearance. Sometimes, the simple move that fixes a sticky brake caliper is as straightforward as swapping a ten-dollar hose rather than an eighty-dollar caliper. What is the most elusive brake gremlin you have chased out of a customer’s car? Share your diagnostic breakthroughs with us or suggest which system we should deconstruct next.
Why Your Brake Pedal Feels Like a Brick in the Morning
The vacuum power booster is a master of disguise in the auto repair world. When a driver complains about a ‘hard’ pedal that requires significant leg strength to stop the vehicle, the gut reaction is often to replace the master cylinder. However, the booster acts as a force multiplier; if the internal rubber diaphragm develops a pinhole leak or the vacuum check valve fails, that assistance vanishes. A seasoned mechanic knows the ‘engine-off’ test: pump the pedal four times to deplete the reserve, hold it down, and start the engine. If the pedal doesn’t drop slightly, the booster is likely starved of vacuum. This is often caused by a collapsed vacuum hose or a clogged intake manifold port, issues that a basic tune up might miss if you aren’t looking for the subtle signs of brittle rubber. 
Does a Failing Check Valve Compromise Your Stopping Distance?
A subtle but dangerous issue arises when the one-way check valve on the booster housing begins to stick. Under heavy acceleration, manifold vacuum drops; the check valve’s job is to trap the existing vacuum inside the booster for emergency use. If it leaks, you might lose power assist exactly when you need it most during a panic stop. According to the National Highway Traffic Safety Administration (NHTSA) under FMVSS No. 135, braking systems must meet rigorous performance standards even during partial system failures. A faulty check valve can push a vehicle outside these safety margins, significantly increasing the physical effort required to engage the ABS. If you have ever felt that terrifying moment of a stiff pedal during a quick stop, your brake service should prioritize the vacuum circuit before the hydraulics.
The Proportioning Valve Reset That Everyone Forgets
In many older vehicles and specific heavy-duty trucks, the proportioning valve (or combination valve) contains a pressure differential switch designed to shut off half the system if a leak is detected. This safety feature centers a small piston to trigger the dashboard brake light. However, during an aggressive auto repair involving a pressure bleeder, this piston can get ‘shunted’ to one side, effectively blocking fluid flow to the rear wheels. If you find that the front brakes bleed perfectly but the rears barely produce a trickle, you aren’t dealing with a blockage; you are fighting the safety valve. Resetting this typically requires a specialized tool to hold the piston centered or a very specific pedal-bleeding sequence to equalize the pressure. Have you invested in a proportioning valve lockout tool yet, or are you still doing it the hard way?
The Digital Handshake Required for Modern Rear Brake Service
As we transition into the era of Electronic Parking Brakes (EPB), the mechanic’s role has shifted from purely mechanical to part-software engineer. On many modern European and domestic vehicles, you cannot simply compress the rear caliper pistons with a C-clamp. Attempting to force the piston back without putting the vehicle into ‘Service Mode’ via a diagnostic scan tool will likely strip the internal plastic gears of the electric actuator motor. This is an expensive mistake that turns a routine pad swap into a thousand-dollar auto repair. The EPB motor uses a high-torque worm gear to apply the pads; when Service Mode is engaged, the computer fully retracts the spindle, allowing the piston to be pushed back safely. If you are working on a vehicle where the ‘Electronic Parking Brake’ light is flashing, you must first clear the adaptations before the hydraulics will even respond to a bleed cycle.
Why Do EPB Systems Fail Immediately After a Pad Swap?
The most common cause of post-service EPB failure is a lack of ‘calibration’ once the new pads are installed. The control module needs to learn the new ‘air gap’ between the pad material and the rotor surface. Without this digital relearn, the motor may over-extend or under-apply, leading to a dragging brake that overheats the new components within miles. For those looking to stay ahead of these complexities, understanding brake service secrets regarding electronic integration is non-negotiable. This is particularly critical when dealing with rear calipers that integrate the motor directly onto the housing, as the mechanical tolerances are thinner than ever. When the motor begins its retraction, the sound should be smooth and consistent; any rhythmic clicking is a sign that the internal drive nut is slipping on the threaded spindle, a precursor to total mechanical lockout.
Keep the Invisible Water Out of Your Hydraulic Lines
While a fresh fluid flush looks clean in the reservoir, the chemical reality deep within the lines often tells a different story. Brake fluid is hygroscopic, meaning it actively pulls moisture from the atmosphere through microscopic pores in the rubber hoses. Once that water content exceeds a mere 3%, the boiling point of the fluid can drop by over 100 degrees Fahrenheit. This leads to a terrifying phenomenon where the fluid turns to gas under heavy load, causing a total loss of pedal pressure. A professional mechanic must go beyond visual inspections and utilize refractometers or electronic moisture testers to guarantee the integrity of a high-performance auto repair. The introduction of moisture also triggers the formation of hydrochloric acid, which begins to pit the internal bores of expensive calipers from the inside out, long before you notice a leak on your driveway.
Is Copper Content the Silent Killer of Your ABS Module?
Beyond moisture, the internal chemistry of the braking system degrades as the protective lining of the steel lines wears away over years of use. This process releases copper into the fluid. While copper itself doesn’t lower the boiling point, it acts as a catalyst for electrochemical degradation. High copper concentrations can eventually ‘plate’ onto the delicate solenoid valves within the ABS hydraulic control unit, causing them to stick or fail during an emergency activation. According to technical bulletins from Brembo, maintaining fluid purity is as much about protecting electronic components as it is about hydraulic pressure. 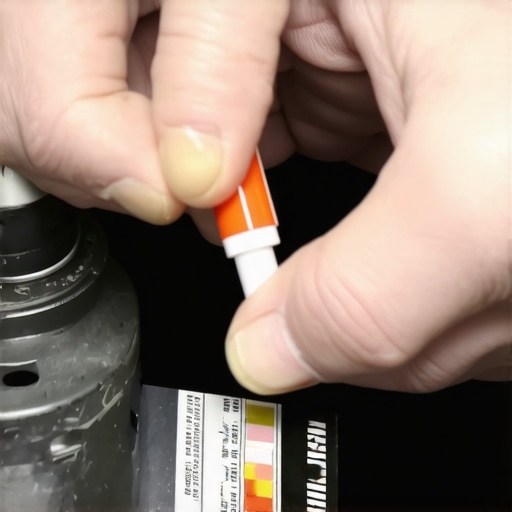 Testing for copper with specialized chemical strips is a non-negotiable step in a comprehensive brake service that many DIY enthusiasts and even some general shops overlook. This proactive measurement can save a vehicle owner thousands in electronic control module replacements by identifying the need for a flush before the valves become sluggish.
Stop Snapping Bleeder Screws With This Anti-Corrosion Strategy
One of the most frustrating moments in any auto repair is the sudden snap of a seized bleeder screw. This usually occurs because of galvanic corrosion, where two dissimilar metals—like a steel screw and an aluminum caliper—exchange electrons in the presence of road salt or moisture. To prevent this mechanical catastrophe, expert technicians apply a minuscule amount of nickel-based anti-seize to the threads, being careful never to let the lubricant touch the fluid-seating surface or contaminate the hydraulic circuit. This proactive measure ensures that the next tune up doesn’t turn into a time-consuming extraction or a costly caliper replacement. Furthermore, using a six-point box-end wrench rather than a generic adjustable tool significantly reduces the risk of rounding off the hex head, a mistake that often necessitates complete component replacement.
Nail the Perfect Transfer Layer Every Time
The final hurdle of a truly professional brake job is the bedding-in process. Simply handing the keys back to a customer after installing new pads is a recipe for ‘brake judder’ and premature wear. For the system to perform correctly, a uniform layer of friction material—the transfer layer—must be thermally bonded to the rotor surface. This requires a specific sequence of near-stops from 60 MPH to 10 MPH to reach the pad’s operating temperature without coming to a complete standstill, which could cause ‘pad imprinting.’ Mastering this thermal cycle ensures a smooth, quiet, and high-performance experience that lasts for the life of the vehicle. If you skip this step, the uneven distribution of friction material will create high spots that cause the pedal to pulse, often misdiagnosed as ‘warped rotors.’ How do you handle the bedding-in process for your high-performance clients? Share your most effective thermal cycling techniques with our community below.
Stop Blaming the Master Cylinder for Trapped Air
Hydraulic integrity serves as the cornerstone of automotive safety, yet even a seasoned mechanic can be humbled by a persistent spongy pedal. The prevailing assumption during a standard brake service is that air naturally migrates toward the bleeder screw. However, modern auto repair often encounters a phenomenon known as the ‘hydraulic high-point trap.’ This occurs when a brake line or flexible hose is routed with an upward loop that sits physically higher than the bleeder valve itself. Because air is lighter than glycol-based fluid, it seeks the highest point in the circuit. If that point is not the bleeder screw, no amount of traditional pumping will evacuate the pocket. Professional technicians must recognize that the geometry of the system is just as critical as the pressure applied to it.
Defeating the High-Point Hydraulic Trap
When performing a tune up of the braking system, you must analyze the path of the hard lines and flex hoses under load. In many cases, aftermarket suspension components or incorrectly installed caliper brackets create a ‘gooseneck’ in the line. This mechanical oversight creates a permanent residence for air bubbles. According to data from the Society of Automotive Engineers (SAE), even a minor volume of entrapped air can lead to a 15-20% increase in pedal travel before the pads engage the rotors. To rectify this, the caliper must often be unbolted and rotated so the bleeder screw becomes the absolute highest point in the local circuit during the bleeding process. Understanding brake service secrets like these distinguishes a master technician from a general laborer.
Why Does the Pedal Stay Soft After Three Full Flushes?
If you have cycled two quarts of fluid through the system and the pedal still lacks a firm ‘bite,’ you are likely dealing with air trapped in the ABS hydraulic control unit (HCU) or a line loop error. In some vehicles, the internal valves of the ABS module must be cycled electronically to release air into the primary lines. If you are experiencing this frustration, you might also want to investigate how to stop your brakes from sponging after a long drive, as heat can exacerbate the expansion of these hidden air pockets. This issue is frequently misdiagnosed as a failing master cylinder, leading to unnecessary and expensive auto repair costs. Always verify the physical orientation of the lines before condemning the hydraulics.
For those performing a total system overhaul, ensuring the bench bleeding process is flawless is the next logical step. Learn the master cylinder bench bleeding hack to ensure your foundation is solid before tackling line-routing errors. Have you encountered a routing error that defied logic in your shop? Share your diagnostic breakthroughs with our community of professionals.
Tiny Washers That Cause Massive Diagnostic Headaches
While most mechanics focus on the major components during a brake service, it is the smallest interfaces that often compromise the entire system’s performance. A common culprit for persistent fluid weeping or air intrusion is the improper reuse of crush washers on the banjo bolt. These copper or aluminum rings are designed for a single deformation cycle; once torqued, they conform to the microscopic imperfections of the caliper and the bolt. Reusing them, even with additional torque, rarely creates a perfect seal and can lead to a ‘ghost’ leak where fluid doesn’t visibly drip, but air is slowly drawn in during the pedal release stroke. Mastering the 10 copper washer trick that stops persistent oil drips and brake fluid seepage is an essential skill for any mechanic aiming for a zero-comeback reputation. A secure seal at the banjo bolt ensures that your auto repair remains professional and safe over thousands of miles.
Could Dry Slide Pins Be Tricking Your Foot Into Feeling Air?
It is a mistake to assume every soft pedal is a hydraulic issue. If the caliper slide pins are corroded or lack proper lubrication, the caliper cannot center itself effectively over the rotor. This mechanical drag forces the piston to travel further to compensate for the misalignment, creating a sensation at the pedal that feels remarkably similar to air in the lines. This ‘mechanical sponge’ occurs because the energy intended for clamping is instead wasted on overcoming friction or flexing the caliper bracket. Professional technicians should integrate the 12 caliper pin grease tip that ends persistent brake squeal and restores smooth movement to the assembly. Without this attention to detail, even a fresh tune up of the hydraulics will fail to provide the firm, immediate response a driver expects. #IMAGE_PLACE_HOLDER_B#
Identify the Internal Hose Failure That Mimics a Seized Caliper
Experienced technicians know that a brake hose can look perfect on the exterior while being completely collapsed internally. Over time, the inner lining of a rubber flex hose can delaminate, creating a one-way flap that acts as a check valve. This allows high-pressure fluid to reach the caliper when you step on the pedal but prevents that fluid from returning to the master cylinder when you let go. This results in a brake that stays partially applied, leading to rapid pad wear and overheating. According to the Car Care Council, internal hose degradation is one of the most overlooked causes of premature brake failure and pull-to-one-side issues. Identifying this requires a nuanced approach: if you crack the bleeder screw and the wheel suddenly spins freely, you have confirmed the restriction is in the hose or higher up, not a seized piston. Implementing brake maintenance hacks to prevent costly failures involves proactively replacing these hoses every decade, regardless of their outward appearance. Sometimes, the simple move that fixes a sticky brake caliper is as straightforward as swapping a ten-dollar hose rather than an eighty-dollar caliper. What is the most elusive brake gremlin you have chased out of a customer’s car? Share your diagnostic breakthroughs with us or suggest which system we should deconstruct next.
Why Your Brake Pedal Feels Like a Brick in the Morning
The vacuum power booster is a master of disguise in the auto repair world. When a driver complains about a ‘hard’ pedal that requires significant leg strength to stop the vehicle, the gut reaction is often to replace the master cylinder. However, the booster acts as a force multiplier; if the internal rubber diaphragm develops a pinhole leak or the vacuum check valve fails, that assistance vanishes. A seasoned mechanic knows the ‘engine-off’ test: pump the pedal four times to deplete the reserve, hold it down, and start the engine. If the pedal doesn’t drop slightly, the booster is likely starved of vacuum. This is often caused by a collapsed vacuum hose or a clogged intake manifold port, issues that a basic tune up might miss if you aren’t looking for the subtle signs of brittle rubber. #IMAGE_PLACE_HOLDER_C#
Does a Failing Check Valve Compromise Your Stopping Distance?
A subtle but dangerous issue arises when the one-way check valve on the booster housing begins to stick. Under heavy acceleration, manifold vacuum drops; the check valve’s job is to trap the existing vacuum inside the booster for emergency use. If it leaks, you might lose power assist exactly when you need it most during a panic stop. According to the National Highway Traffic Safety Administration (NHTSA) under FMVSS No. 135, braking systems must meet rigorous performance standards even during partial system failures. A faulty check valve can push a vehicle outside these safety margins, significantly increasing the physical effort required to engage the ABS. If you have ever felt that terrifying moment of a stiff pedal during a quick stop, your brake service should prioritize the vacuum circuit before the hydraulics.
The Proportioning Valve Reset That Everyone Forgets
In many older vehicles and specific heavy-duty trucks, the proportioning valve (or combination valve) contains a pressure differential switch designed to shut off half the system if a leak is detected. This safety feature centers a small piston to trigger the dashboard brake light. However, during an aggressive auto repair involving a pressure bleeder, this piston can get ‘shunted’ to one side, effectively blocking fluid flow to the rear wheels. If you find that the front brakes bleed perfectly but the rears barely produce a trickle, you aren’t dealing with a blockage; you are fighting the safety valve. Resetting this typically requires a specialized tool to hold the piston centered or a very specific pedal-bleeding sequence to equalize the pressure. Have you invested in a proportioning valve lockout tool yet, or are you still doing it the hard way?
The Digital Handshake Required for Modern Rear Brake Service
As we transition into the era of Electronic Parking Brakes (EPB), the mechanic’s role has shifted from purely mechanical to part-software engineer. On many modern European and domestic vehicles, you cannot simply compress the rear caliper pistons with a C-clamp. Attempting to force the piston back without putting the vehicle into ‘Service Mode’ via a diagnostic scan tool will likely strip the internal plastic gears of the electric actuator motor. This is an expensive mistake that turns a routine pad swap into a thousand-dollar auto repair. The EPB motor uses a high-torque worm gear to apply the pads; when Service Mode is engaged, the computer fully retracts the spindle, allowing the piston to be pushed back safely. If you are working on a vehicle where the ‘Electronic Parking Brake’ light is flashing, you must first clear the adaptations before the hydraulics will even respond to a bleed cycle.
Why Do EPB Systems Fail Immediately After a Pad Swap?
The most common cause of post-service EPB failure is a lack of ‘calibration’ once the new pads are installed. The control module needs to learn the new ‘air gap’ between the pad material and the rotor surface. Without this digital relearn, the motor may over-extend or under-apply, leading to a dragging brake that overheats the new components within miles. For those looking to stay ahead of these complexities, understanding brake service secrets regarding electronic integration is non-negotiable. This is particularly critical when dealing with rear calipers that integrate the motor directly onto the housing, as the mechanical tolerances are thinner than ever. When the motor begins its retraction, the sound should be smooth and consistent; any rhythmic clicking is a sign that the internal drive nut is slipping on the threaded spindle, a precursor to total mechanical lockout.
Keep the Invisible Water Out of Your Hydraulic Lines
While a fresh fluid flush looks clean in the reservoir, the chemical reality deep within the lines often tells a different story. Brake fluid is hygroscopic, meaning it actively pulls moisture from the atmosphere through microscopic pores in the rubber hoses. Once that water content exceeds a mere 3%, the boiling point of the fluid can drop by over 100 degrees Fahrenheit. This leads to a terrifying phenomenon where the fluid turns to gas under heavy load, causing a total loss of pedal pressure. A professional mechanic must go beyond visual inspections and utilize refractometers or electronic moisture testers to guarantee the integrity of a high-performance auto repair. The introduction of moisture also triggers the formation of hydrochloric acid, which begins to pit the internal bores of expensive calipers from the inside out, long before you notice a leak on your driveway.
Is Copper Content the Silent Killer of Your ABS Module?
Beyond moisture, the internal chemistry of the braking system degrades as the protective lining of the steel lines wears away over years of use. This process releases copper into the fluid. While copper itself doesn’t lower the boiling point, it acts as a catalyst for electrochemical degradation. High copper concentrations can eventually ‘plate’ onto the delicate solenoid valves within the ABS hydraulic control unit, causing them to stick or fail during an emergency activation. According to technical bulletins from Brembo, maintaining fluid purity is as much about protecting electronic components as it is about hydraulic pressure. Testing for copper with specialized chemical strips is a non-negotiable step in a comprehensive brake service that many DIY enthusiasts and even some general shops overlook. This proactive measurement can save a vehicle owner thousands in electronic control module replacements by identifying the need for a flush before the valves become sluggish.
Stop Snapping Bleeder Screws With This Anti-Corrosion Strategy
One of the most frustrating moments in any auto repair is the sudden snap of a seized bleeder screw. This usually occurs because of galvanic corrosion, where two dissimilar metals—like a steel screw and an aluminum caliper—exchange electrons in the presence of road salt or moisture. To prevent this mechanical catastrophe, expert technicians apply a minuscule amount of nickel-based anti-seize to the threads, being careful never to let the lubricant touch the fluid-seating surface or contaminate the hydraulic circuit. This proactive measure ensures that the next tune up doesn’t turn into a time-consuming extraction or a costly caliper replacement. Furthermore, using a six-point box-end wrench rather than a generic adjustable tool significantly reduces the risk of rounding off the hex head, a mistake that often necessitates complete component replacement.
Nail the Perfect Transfer Layer Every Time
The final hurdle of a truly professional brake job is the bedding-in process. Simply handing the keys back to a customer after installing new pads is a recipe for ‘brake judder’ and premature wear. For the system to perform correctly, a uniform layer of friction material—the transfer layer—must be thermally bonded to the rotor surface. This requires a specific sequence of near-stops from 60 MPH to 10 MPH to reach the pad’s operating temperature without coming to a complete standstill, which could cause ‘pad imprinting.’ Mastering this thermal cycle ensures a smooth, quiet, and high-performance experience that lasts for the life of the vehicle. If you skip this step, the uneven distribution of friction material will create high spots that cause the pedal to pulse, often misdiagnosed as ‘warped rotors.’ How do you handle the bedding-in process for your high-performance clients? Share your most effective thermal cycling techniques with our community below.
Expert Insights & Advanced Considerations
Chemical Strips Prove What Your Eyes Can’t See
Visual clarity in a master cylinder reservoir is a deceptive metric for health. A professional mechanic knows that copper suspension and pH levels are the true indicators of internal line degradation. Utilizing electrochemical test strips allows you to maximize your brake service efficiency with these tips by pinpointing exactly when the corrosion inhibitors have failed, long before the fluid turns black. This forensic approach prevents the slow destruction of ABS solenoid valves.
Digital Relearns Are Not Optional
In the age of Electronic Braking Systems (EBS), a physical pad swap is only half the job. Without a software-based air-gap calibration, the system may drag or apply uneven pressure, leading to localized overheating. Implementing brake service strategies that save you money and extend brake life requires a scan tool capable of resetting the clamp-force adaptations to match the new friction material thickness.
Wheel Hub Runout Ruins Your Best Work
Even the highest quality rotors will pulse if the mounting surface of the hub has as little as 0.002 inches of lateral runout. Before installing new components, a master technician performs a ‘hub scrub’ to remove all rust and uses a dial indicator to verify the surface is true. Ignoring this mechanical foundation during a tune up results in thickness variation issues that no amount of bedding-in can fix.
Curated Expert Resources
Society of Automotive Engineers (SAE) International: The gold standard for hydraulic fluid specifications and thermal performance testing benchmarks.
ASE Certification Standards: Provides the definitive framework for diagnostic logic and safety protocols in modern auto repair environments.
Brembo Technical Lab: An elite resource for understanding friction material transfer layers and high-performance heat dissipation geometry.
Final Expert Perspective
Navigating the transition from traditional hydraulics to software-integrated braking systems demands a shift in diagnostic philosophy. A comprehensive brake service is no longer just about bleeding air or swapping pads; it is a meticulous verification of fluid chemistry, mechanical tolerances, and digital handshakes. When you prioritize these high-level variables, you ensure every auto repair yields a firm pedal and absolute reliability. Learning how a top-rated mechanic ensures safe auto repairs every time involves mastering these invisible details. What is the most elusive brake gremlin you have encountered in your shop? Connect with our network of professionals to share your most complex diagnostic wins.