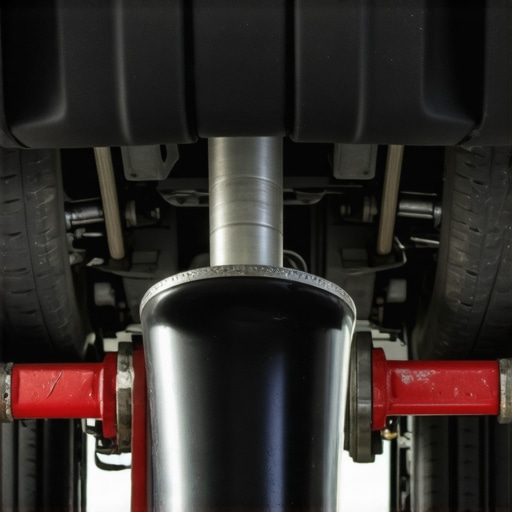
A persistent exhaust rattle after a professional hanger replacement is a classic diagnostic puzzle that separates a standard technician from an expert mechanic. While a traditional tune up usually focuses on the combustion cycle and general auto repair might involve replacing obvious wear items, exhaust noise often stems from deeper NVH (Noise, Vibration, and Harshness) issues. Much like a comprehensive brake service requires precision beyond just changing pads, resolving exhaust rattles requires an analytical approach to the vehicle’s kinetic framework and thermal behavior. When new rubber fails to silence the undercarriage, the issue is rarely the hanger itself but rather the system’s alignment or secondary components that have shifted out of their engineered tolerances.
Why New Rubber Alone Fails to Stop Resonance
Exhaust systems are designed to exist in a state of suspended equilibrium. When you replace a worn hanger, you are restoring the original mounting point, but you may inadvertently be highlighting a different failure point. If the engine mounts are slightly collapsed, the entire powertrain sits lower, putting the exhaust pipe under static tension. This tension bypasses the dampening qualities of the rubber, allowing vibrations to transfer directly into the chassis. To truly solve these mysteries, one must apply mechanic tips for diagnosing common auto problems that look at the vehicle as an interconnected machine rather than a collection of independent parts.
Is your replacement hanger actually the wrong shore hardness for your vehicle?
Not all rubber is created equal. In the world of automotive engineering, the “Shore hardness” or durometer of a rubber mount is calculated to counteract specific engine frequencies. If an aftermarket hanger is too stiff, it acts as a bridge for vibration; if it is too soft, it allows for excessive sway, leading to the pipe striking the frame. Professional-grade diagnostics often involve verifying that the replacement part matches the OEM specifications for energy absorption. If you find that the noise persists specifically during idling, it is highly likely that the material density of the hanger is mismatched to your engine’s harmonic profile.
Thermal Expansion and the Tight Clearance Trap
A common mistake in the auto repair industry is diagnosing a rattle when the car is cold. Exhaust systems can grow by as much as half an inch as they reach operating temperatures due to thermal expansion. A hanger that looks perfectly positioned on a cold lift might allow the pipe to expand directly into a crossmember once the vehicle has been running for twenty minutes. This is why many drivers report that the rattle only appears on the highway. Similar to how technicians must account for heat when performing a brake service to prevent rotor warp, an exhaust specialist must calculate the ‘hot’ path of the pipe. If the clearance is less than 15mm when cold, you are likely looking at a thermal contact issue. For those dealing with persistent metallic pinging, checking the $15 fix for a rattling heat shield can often reveal the true culprit that hangers alone cannot fix.
The Critical Role of Flange Integrity
If the hangers are secure but the rattle sounds like a tin can full of rocks, the problem often lies at the connection points. A slightly loose flange or a degraded gasket can create a high-frequency vibration that mimics a loose hanger. Utilizing the $9 gasket fix for an exhaust leak can often stabilize the joint and eliminate the sympathetic resonance that travels down the line. According to research published by SAE International on exhaust system acoustics, even a 1% deviation in flange alignment can significantly increase the decibel level of mechanical drone within the cabin. If you are struggling with a noise that seems to move, it may be time to apply the $12 brake line bracket hack logic to your exhaust heat shields or secondary brackets to ensure every inch of the system is dampened. If you have experienced a similar ghost-noise, we encourage you to share your diagnostic process with our community of experts.
Sometimes the most frustrating rattles are not external at all, but rather internal structural failures within the exhaust components themselves. A common oversight during a routine tune up is neglecting the internal integrity of the muffler or resonator. Over years of thermal cycling, the internal baffles—designed to direct gas flow and dampen sound—can corrode and break free from their welds. When this happens, the component acts like a resonator box for a loose piece of sheet metal. Even with brand-new hangers, the sound will persist because the vibration is contained within the shell of the exhaust itself. In such cases, utilizing the $6 clamp fix for a noisy exhaust pipe can sometimes provide temporary relief by applying external pressure to the shell, but internal failure usually signals it is time for a component replacement.
Internal Baffles Often Mimic Loose Hangers
Distinguishing between an external hanger rattle and an internal baffle failure requires a tactile approach. If you can hear the noise while the car is idling, try safely applying pressure to the exhaust tip with a gloved hand or a piece of wood. If the noise stops, the problem is likely external alignment or a hanger issue. If the rattle continues unabated despite the pipe being held still, the harmonic frequency is coming from inside the metal housing. This nuanced level of troubleshooting is what separates basic auto repair from true master-level diagnostics. Professionals often find that after years of moisture buildup—a byproduct of combustion—the lowest points of the exhaust system suffer the most from this internal rot.
Does your catalytic converter pass the rubber mallet “tap test”?
One of the most effective ways to identify a hidden rattle is the rubber mallet test. While the vehicle is cold and safely supported on jack stands, gently tap the catalytic converter and the muffler. If you hear a sound like marbles in a tin can, the ceramic honeycomb inside the converter has likely shattered. This is a critical distinction because a failing converter can lead to backpressure issues, eventually causing the engine to struggle, much like why your check engine light keeps coming back after you clear it. This internal degradation is often mistaken for a loose heat shield or a faulty hanger because the sound travels through the metal piping with ease.
Torque and Drivetrain Sway Can Bypass New Rubber
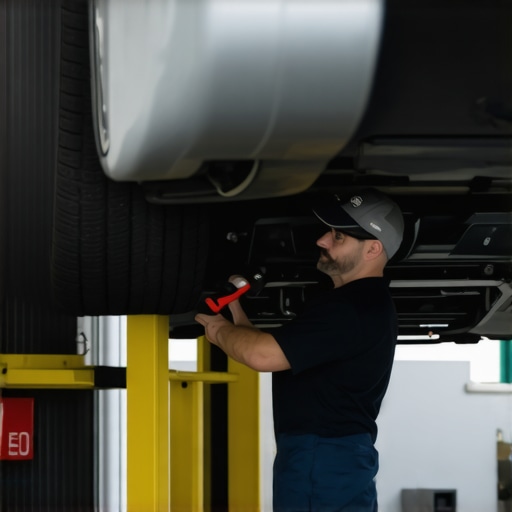
Another factor that frequently undermines new hangers is the movement of the engine under load. Every time you accelerate, the engine tilts on its mounts, pulling the entire exhaust system forward or backward. If your engine mounts are worn, this movement becomes excessive. Fresh hangers might hold the pipe perfectly while the car is on a lift, but the moment you put it in gear, the exhaust may shift enough to contact the rear subframe or a suspension component. This is a common reason why drivers notice a rattle only when reversing or accelerating hard from a stop. To diagnose this, a technician should look for shiny ‘witness marks’ on the exhaust pipe where the metal has been rubbing against the chassis. Understanding these kinetic relationships is as vital as knowing how to find the source of a mystery suspension clunk when the standard checks fail.
Don’t Overlook the Stainless Steel Flex Section Fatigue
The flex pipe is the unsung hero of the exhaust system, absorbing the engine’s movement so the rest of the pipe remains stationary. However, the braided stainless steel mesh can fray or the inner bellows can crack. When the flex pipe begins to fail, it creates a raspy, metallic vibration that is easily confused with a loose hanger near the front of the vehicle. According to the National Institute for Automotive Service Excellence (ASE), diagnostic competency in NVH issues requires checking the flex section for soot marks, which indicate a leak that often accompanies the vibration. If you have tried the mallet test and still cannot find the source, we suggest reading more about our mechanic tips for diagnosing common auto problems to broaden your search and ensure your vehicle remains quiet and efficient.
Why Oversized Exhaust Tips Act Like Tuning Forks
Many performance enthusiasts opt for larger, heavier stainless steel tips to improve the aesthetic of their auto repair projects, but this added mass at the very end of the leverage arm can wreak havoc on harmonic balance. A tip that weighs significantly more than the OEM equivalent changes the natural frequency of the entire tailpipe section. When this occurs, even brand-new rubber hangers may find themselves overwhelmed by the increased momentum of the exhaust swinging during a tune up road test. This “tuning fork” effect means the pipe continues to vibrate long after the initial bump, leading to a rhythmic tapping against the rear bumper cutout or the frame rails.
The Phantom Vibration of a De-laminated Heat Shield
Sometimes the rattle isn’t coming from the pipe hitting the car, but from the car’s own skin hitting itself. Modern vehicles use multi-layered aluminum heat shields that are crimped or spot-welded together. Over time, road salt and moisture can cause these layers to de-laminate. You might grab the shield and find it feels tight against the chassis, yet it still emits a high-pitched “zing” at exactly 2,500 RPM. This is a classic NVH challenge that requires a more aggressive diagnostic approach than a standard brake service. Professionals often use a smoke machine or an ultrasonic leak detector to find these micro-vibrations that occur only under specific exhaust flow pressures.
How much movement should you actually see in a healthy exhaust system?
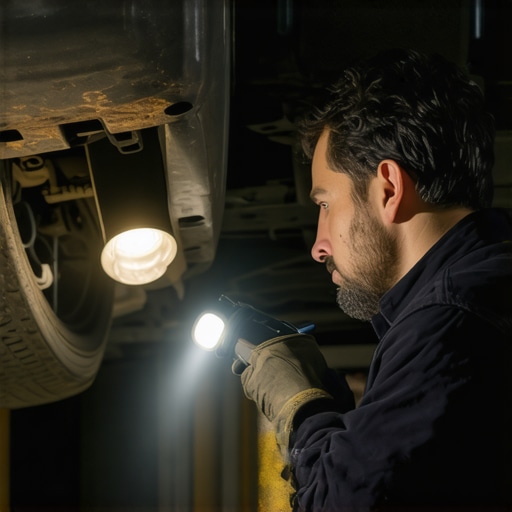
A common point of confusion for DIYers is the acceptable range of “play” in the system. Ideally, you should be able to move the cold exhaust about half an inch in any direction with moderate hand pressure, and it should return to center immediately without any metallic contact. If the system feels “locked” or bottomed out against the hanger pins, it is pre-loaded, which is a recipe for vibration transfer. According to technical data compiled by the National Highway Traffic Safety Administration (NHTSA), improper mounting of exhaust hardware is a frequent contributor to long-term structural fatigue in mid-pipe hangers. If your system lacks this necessary buoyancy, the hangers are not doing their job, regardless of how new they look.
Stop the Leverage Effect of Worn Torque Strut Mounts
If your mechanic has replaced every hanger and the rattle only persists during gear changes, the culprit is likely the torque strut mount, often called the “dog bone” mount. This component is designed to limit the rocking motion of the engine. When it softens, the engine tilts further than intended, using the exhaust system as a literal crowbar against the rear hangers. This puts immense lateral load on the rubber, causing it to stretch and allow the pipe to strike the floor pan. Before committing to more expensive exhaust work, performing a quick visual check on the engine’s pitch during a “power brake” test can save hours of frustration. If you have managed to solve a mystery rattle that other shops missed, we invite you to share your specific fix with our community of specialists.
The Critical Frequency of Resonator Internal Fatigue
While we often look at the external components, the resonator itself can develop “skin fatigue.” This occurs when the outer shell of the resonator thins due to internal corrosion, allowing the metal to vibrate like a drumhead. This sound is frequently misdiagnosed as a loose bracket. A master technician knows to look for “bluing” or localized heat discoloration on the resonator body, which indicates an internal restriction or a breakdown of the sound-deadening material. If the shell has lost its structural rigidity, the only permanent solution is replacement, as no amount of hanger adjustment will silence the thrumming of thin, fatigued metal. This brings us to the complex relationship between exhaust backpressure and the physical stability of the pipework during high-load scenarios.
One of the most overlooked variables in auto repair is the sequence of assembly and its impact on static stress. Technicians often secure the manifold or downpipe flanges first, then force the rest of the exhaust into place at the rear hangers. This creates a ‘pre-load’ condition where the rubber isolators are constantly stretched to their limit before the car even moves. When the engine begins to vibrate during a standard tune up, these pre-loaded hangers have no remaining travel to absorb energy, causing the vibration to bypass the rubber entirely and enter the cabin. A seasoned mechanic knows that the entire system should be hung loosely first, allowed to find its natural center of gravity, and only then tightened from front to back to ensure zero-stress seating.
Why Pre-Loading Your Hangers Ruins the Quiet Ride
When an exhaust system is under constant tension, it behaves more like a structural member of the chassis than a suspended accessory. This tension changes the resonant frequency of the metal tubing, often shifting it into the audible range of human hearing. If you find that your replacement hangers are failing prematurely—cracking or stretching within months—you are likely fighting a geometry issue rather than a component quality problem. Just as a precision brake service requires checking for hub run-out to prevent future pulsation, exhaust installation requires verifying that the hangers sit vertically at rest. If they are angled sharply toward the front or rear, the system is fighting itself, and no amount of new rubber will provide a permanent silence.
Can a misaligned O2 sensor bung actually trigger a harmonic drone?
It sounds improbable, but the localized mass of an Oxygen sensor and its heavy-duty mounting bung can act as a counterweight that inadvertently tunes the pipe to a frustrating frequency. In some high-performance or thin-walled stainless systems, the weight of the sensor sitting at the end of a long, unsupported run creates a ‘pendulum effect.’ During a diagnostic tune up, if the rattle seems linked to a specific, narrow RPM band, an expert might look for these localized mass imbalances. Repositioning a clamp or adding a small dampening mass near the sensor can sometimes break the harmonic cycle, providing a solution that standard auto repair manuals rarely document.
Hunt Down Ghosts with Electronic Chassis Ears
When the mallet test and visual inspections yield no results, the modern master technician turns to electronic acoustics. Multi-channel chassis ears allow for the placement of sensitive microphones at various points along the exhaust path, from the manifold to the tailpipe. By monitoring these channels while the vehicle is on a dynamometer or during a road test, the technician can pinpoint exactly where the vibration amplitude is highest. 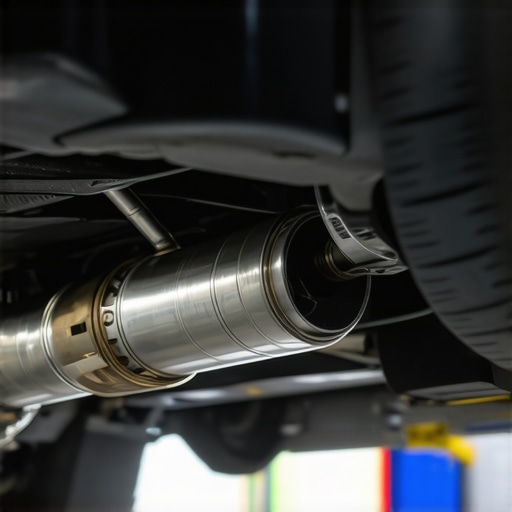 This level of precision is the gold standard for resolving NVH issues that only occur under load or at specific aerodynamic pressures. According to technical literature from the American Society of Mechanical Engineers (ASME), identifying the ‘node’ or the point of zero vibration in a standing wave is essential for placing hangers effectively. If a hanger is placed at an ‘anti-node’—the point of maximum movement—it will be overwhelmed by the energy it is trying to suppress.
Don’t Let Wrap and Coatings Mask Structural Decay
Heat wraps and ceramic coatings are excellent for managing engine bay temperatures, but they can hide the early warning signs of metal fatigue. A hairline crack forming under a layer of exhaust wrap will eventually lead to a raspy vibration that mimics a loose hanger. Moisture trapped between the wrap and the pipe accelerates localized corrosion, weakening the metal until it begins to flex excessively. This flex changes the entire system’s kinetic behavior, putting unexpected stress on the rest of the mounting hardware. Much like how a thorough brake service involves inspecting the flexible lines for internal collapse, an exhaust specialist must look beneath the surface of aftermarket additions to find the root cause of a noise. If you have tackled a ‘ghost’ rattle that defied every conventional fix, we invite you to share your diagnostic breakthrough with our community of experts.
A persistent exhaust rattle after a professional hanger replacement is a classic diagnostic puzzle that separates a standard technician from an expert mechanic. While a traditional tune up usually focuses on the combustion cycle and general auto repair might involve replacing obvious wear items, exhaust noise often stems from deeper NVH (Noise, Vibration, and Harshness) issues. Much like a comprehensive brake service requires precision beyond just changing pads, resolving exhaust rattles requires an analytical approach to the vehicle’s kinetic framework and thermal behavior. When new rubber fails to silence the undercarriage, the issue is rarely the hanger itself but rather the system’s alignment or secondary components that have shifted out of their engineered tolerances.
Why New Rubber Alone Fails to Stop Resonance
Exhaust systems are designed to exist in a state of suspended equilibrium. When you replace a worn hanger, you are restoring the original mounting point, but you may inadvertently be highlighting a different failure point. If the engine mounts are slightly collapsed, the entire powertrain sits lower, putting the exhaust pipe under static tension. This tension bypasses the dampening qualities of the rubber, allowing vibrations to transfer directly into the chassis. To truly solve these mysteries, one must apply mechanic tips for diagnosing common auto problems that look at the vehicle as an interconnected machine rather than a collection of independent parts.
Is your replacement hanger actually the wrong shore hardness for your vehicle?
Not all rubber is created equal. In the world of automotive engineering, the “Shore hardness” or durometer of a rubber mount is calculated to counteract specific engine frequencies. If an aftermarket hanger is too stiff, it acts as a bridge for vibration; if it is too soft, it allows for excessive sway, leading to the pipe striking the frame. Professional-grade diagnostics often involve verifying that the replacement part matches the OEM specifications for energy absorption. If you find that the noise persists specifically during idling, it is highly likely that the material density of the hanger is mismatched to your engine’s harmonic profile.
Thermal Expansion and the Tight Clearance Trap
A common mistake in the auto repair industry is diagnosing a rattle when the car is cold. Exhaust systems can grow by as much as half an inch as they reach operating temperatures due to thermal expansion. A hanger that looks perfectly positioned on a cold lift might allow the pipe to expand directly into a crossmember once the vehicle has been running for twenty minutes. This is why many drivers report that the rattle only appears on the highway. Similar to how technicians must account for heat when performing a brake service to prevent rotor warp, an exhaust specialist must calculate the ‘hot’ path of the pipe. If the clearance is less than 15mm when cold, you are likely looking at a thermal contact issue. For those dealing with persistent metallic pinging, checking the $15 fix for a rattling heat shield can often reveal the true culprit that hangers alone cannot fix.
The Critical Role of Flange Integrity
If the hangers are secure but the rattle sounds like a tin can full of rocks, the problem often lies at the connection points. A slightly loose flange or a degraded gasket can create a high-frequency vibration that mimics a loose hanger. Utilizing the $9 gasket fix for an exhaust leak can often stabilize the joint and eliminate the sympathetic resonance that travels down the line. According to research published by SAE International on exhaust system acoustics, even a 1% deviation in flange alignment can significantly increase the decibel level of mechanical drone within the cabin. If you are struggling with a noise that seems to move, it may be time to apply the $12 brake line bracket hack logic to your exhaust heat shields or secondary brackets to ensure every inch of the system is dampened. If you have experienced a similar ghost-noise, we encourage you to share your diagnostic process with our community of experts.
Sometimes the most frustrating rattles are not external at all, but rather internal structural failures within the exhaust components themselves. A common oversight during a routine tune up is neglecting the internal integrity of the muffler or resonator. Over years of thermal cycling, the internal baffles—designed to direct gas flow and dampen sound—can corrode and break free from their welds. When this happens, the component acts like a resonator box for a loose piece of sheet metal. Even with brand-new hangers, the sound will persist because the vibration is contained within the shell of the exhaust itself. In such cases, utilizing the $6 clamp fix for a noisy exhaust pipe can sometimes provide temporary relief by applying external pressure to the shell, but internal failure usually signals it is time for a component replacement.
Internal Baffles Often Mimic Loose Hangers
Distinguishing between an external hanger rattle and an internal baffle failure requires a tactile approach. If you can hear the noise while the car is idling, try safely applying pressure to the exhaust tip with a gloved hand or a piece of wood. If the noise stops, the problem is likely external alignment or a hanger issue. If the rattle continues unabated despite the pipe being held still, the harmonic frequency is coming from inside the metal housing. This nuanced level of troubleshooting is what separates basic auto repair from true master-level diagnostics. Professionals often find that after years of moisture buildup—a byproduct of combustion—the lowest points of the exhaust system suffer the most from this internal rot.
Does your catalytic converter pass the rubber mallet “tap test”?
One of the most effective ways to identify a hidden rattle is the rubber mallet test. While the vehicle is cold and safely supported on jack stands, gently tap the catalytic converter and the muffler. If you hear a sound like marbles in a tin can, the ceramic honeycomb inside the converter has likely shattered. This is a critical distinction because a failing converter can lead to backpressure issues, eventually causing the engine to struggle, much like why your check engine light keeps coming back after you clear it. This internal degradation is often mistaken for a loose heat shield or a faulty hanger because the sound travels through the metal piping with ease.
Torque and Drivetrain Sway Can Bypass New Rubber
Another factor that frequently undermines new hangers is the movement of the engine under load. Every time you accelerate, the engine tilts on its mounts, pulling the entire exhaust system forward or backward. If your engine mounts are worn, this movement becomes excessive. Fresh hangers might hold the pipe perfectly while the car is on a lift, but the moment you put it in gear, the exhaust may shift enough to contact the rear subframe or a suspension component. This is a common reason why drivers notice a rattle only when reversing or accelerating hard from a stop. To diagnose this, a technician should look for shiny ‘witness marks’ on the exhaust pipe where the metal has been rubbing against the chassis. Understanding these kinetic relationships is as vital as knowing how to find the source of a mystery suspension clunk when the standard checks fail.
Don’t Overlook the Stainless Steel Flex Section Fatigue
The flex pipe is the unsung hero of the exhaust system, absorbing the engine’s movement so the rest of the pipe remains stationary. However, the braided stainless steel mesh can fray or the inner bellows can crack. When the flex pipe begins to fail, it creates a raspy, metallic vibration that is easily confused with a loose hanger near the front of the vehicle. According to the National Institute for Automotive Service Excellence (ASE), diagnostic competency in NVH issues requires checking the flex section for soot marks, which indicate a leak that often accompanies the vibration. If you have tried the mallet test and still cannot find the source, we suggest reading more about our mechanic tips for diagnosing common auto problems to broaden your search and ensure your vehicle remains quiet and efficient.
Why Oversized Exhaust Tips Act Like Tuning Forks
Many performance enthusiasts opt for larger, heavier stainless steel tips to improve the aesthetic of their auto repair projects, but this added mass at the very end of the leverage arm can wreak havoc on harmonic balance. A tip that weighs significantly more than the OEM equivalent changes the natural frequency of the entire tailpipe section. When this occurs, even brand-new rubber hangers may find themselves overwhelmed by the increased momentum of the exhaust swinging during a tune up road test. This “tuning fork” effect means the pipe continues to vibrate long after the initial bump, leading to a rhythmic tapping against the rear bumper cutout or the frame rails.
The Phantom Vibration of a De-laminated Heat Shield
Sometimes the rattle isn’t coming from the pipe hitting the car, but from the car’s own skin hitting itself. Modern vehicles use multi-layered aluminum heat shields that are crimped or spot-welded together. Over time, road salt and moisture can cause these layers to de-laminate. You might grab the shield and find it feels tight against the chassis, yet it still emits a high-pitched “zing” at exactly 2,500 RPM. This is a classic NVH challenge that requires a more aggressive diagnostic approach than a standard brake service. Professionals often use a smoke machine or an ultrasonic leak detector to find these micro-vibrations that occur only under specific exhaust flow pressures.
How much movement should you actually see in a healthy exhaust system?
A common point of confusion for DIYers is the acceptable range of “play” in the system. Ideally, you should be able to move the cold exhaust about half an inch in any direction with moderate hand pressure, and it should return to center immediately without any metallic contact. If the system feels “locked” or bottomed out against the hanger pins, it is pre-loaded, which is a recipe for vibration transfer. According to technical data compiled by the National Highway Traffic Safety Administration (NHTSA), improper mounting of exhaust hardware is a frequent contributor to long-term structural fatigue in mid-pipe hangers. If your system lacks this necessary buoyancy, the hangers are not doing their job, regardless of how new they look.
Stop the Leverage Effect of Worn Torque Strut Mounts
If your mechanic has replaced every hanger and the rattle only persists during gear changes, the culprit is likely the torque strut mount, often called the “dog bone” mount. This component is designed to limit the rocking motion of the engine. When it softens, the engine tilts further than intended, using the exhaust system as a literal crowbar against the rear hangers. This puts immense lateral load on the rubber, causing it to stretch and allow the pipe to strike the floor pan. Before committing to more expensive exhaust work, performing a quick visual check on the engine’s pitch during a “power brake” test can save hours of frustration. If you have managed to solve a mystery rattle that other shops missed, we invite you to share your specific fix with our community of specialists.
The Critical Frequency of Resonator Internal Fatigue
While we often look at the external components, the resonator itself can develop “skin fatigue.” This occurs when the outer shell of the resonator thins due to internal corrosion, allowing the metal to vibrate like a drumhead. This sound is frequently misdiagnosed as a loose bracket. A master technician knows to look for “bluing” or localized heat discoloration on the resonator body, which indicates an internal restriction or a breakdown of the sound-deadening material. If the shell has lost its structural rigidity, the only permanent solution is replacement, as no amount of hanger adjustment will silence the thrumming of thin, fatigued metal. This brings us to the complex relationship between exhaust backpressure and the physical stability of the pipework during high-load scenarios.
One of the most overlooked variables in auto repair is the sequence of assembly and its impact on static stress. Technicians often secure the manifold or downpipe flanges first, then force the rest of the exhaust into place at the rear hangers. This creates a ‘pre-load’ condition where the rubber isolators are constantly stretched to their limit before the car even moves. When the engine begins to vibrate during a standard tune up, these pre-loaded hangers have no remaining travel to absorb energy, causing the vibration to bypass the rubber entirely and enter the cabin. A seasoned mechanic knows that the entire system should be hung loosely first, allowed to find its natural center of gravity, and only then tightened from front to back to ensure zero-stress seating.
Why Pre-Loading Your Hangers Ruins the Quiet Ride
When an exhaust system is under constant tension, it behaves more like a structural member of the chassis than a suspended accessory. This tension changes the resonant frequency of the metal tubing, often shifting it into the audible range of human hearing. If you find that your replacement hangers are failing prematurely—cracking or stretching within months—you are likely fighting a geometry issue rather than a component quality problem. Just as a precision brake service requires checking for hub run-out to prevent future pulsation, exhaust installation requires verifying that the hangers sit vertically at rest. If they are angled sharply toward the front or rear, the system is fighting itself, and no amount of new rubber will provide a permanent silence.
Can a misaligned O2 sensor bung actually trigger a harmonic drone?
It sounds improbable, but the localized mass of an Oxygen sensor and its heavy-duty mounting bung can act as a counterweight that inadvertently tunes the pipe to a frustrating frequency. In some high-performance or thin-walled stainless systems, the weight of the sensor sitting at the end of a long, unsupported run creates a ‘pendulum effect.’ During a diagnostic tune up, if the rattle seems linked to a specific, narrow RPM band, an expert might look for these localized mass imbalances. Repositioning a clamp or adding a small dampening mass near the sensor can sometimes break the harmonic cycle, providing a solution that standard auto repair manuals rarely document.
Hunt Down Ghosts with Electronic Chassis Ears
When the mallet test and visual inspections yield no results, the modern master technician turns to electronic acoustics. Multi-channel chassis ears allow for the placement of sensitive microphones at various points along the exhaust path, from the manifold to the tailpipe. By monitoring these channels while the vehicle is on a dynamometer or during a road test, the technician can pinpoint exactly where the vibration amplitude is highest. This level of precision is the gold standard for resolving NVH issues that only occur under load or at specific aerodynamic pressures. According to technical literature from the American Society of Mechanical Engineers (ASME), identifying the ‘node’ or the point of zero vibration in a standing wave is essential for placing hangers effectively. If a hanger is placed at an ‘anti-node’—the point of maximum movement—it will be overwhelmed by the energy it is trying to suppress.
Don’t Let Wrap and Coatings Mask Structural Decay
Heat wraps and ceramic coatings are excellent for managing engine bay temperatures, but they can hide the early warning signs of metal fatigue. A hairline crack forming under a layer of exhaust wrap will eventually lead to a raspy vibration that mimics a loose hanger. Moisture trapped between the wrap and the pipe accelerates localized corrosion, weakening the metal until it begins to flex excessively. This flex changes the entire system’s kinetic behavior, putting unexpected stress on the rest of the mounting hardware. Much like how a thorough brake service involves inspecting the flexible lines for internal collapse, an exhaust specialist must look beneath the surface of aftermarket additions to find the root cause of a noise. If you have tackled a ‘ghost’ rattle that defied every conventional fix, we invite you to share your diagnostic breakthrough with our community of experts.
Expert Insights & Advanced Considerations
Avoid the Pre-Load Trap with Zero-Stress Seating
When performing a comprehensive auto repair, many technicians overlook the static stress induced during installation. If the hangers are stretched at rest, they lose their ability to dampen. A master mechanic ensures the system finds its own center before tightening the flanges. This practice prevents the vibration from bypassing the rubber and entering the cabin.
Why Gasket Crush Depth Dictates Harmonic Silence
The interface between sections isn’t just about sealing gas; it’s about mechanical isolation. Using the $9 gasket fix for an exhaust leak is vital because a compressed, hardened gasket acts as a vibration bridge. Restoring the ‘squish’ factor ensures that high-frequency resonances are contained within the pipe material rather than vibrating the entire chassis.
Leverage Your Suspension Geometry for Exhaust Clearance
Exhaust systems don’t live in a vacuum; they interact with your car’s movement. Just as you’d check brake maintenance hacks to prevent costly failures, you must check exhaust clearance during full suspension compression. A rattle that only happens over bumps is often a clearance issue that only appears when the rear axle moves to its limit.
Curated Expert Resources
SAE International Technical Papers: The definitive resource for automotive acoustics and material science. These documents provide the engineering data behind frequency resonance and vibration damping in modern exhaust systems.
ASE NVH Diagnostic Bulletins: Essential for refining your mechanic tips for diagnosing common auto problems, specifically focusing on advanced noise and vibration isolation techniques.
NHTSA Safety Research Database: A critical tool for checking model-specific structural fatigue patterns that standard service manuals might overlook during a routine tune up.
ASME Noise Control Division: Offers deep technical analysis of mechanical wave propagation, helping high-level technicians understand how energy moves through different metal alloys.
Final Expert Perspective
Resolving a persistent exhaust rattle requires moving beyond basic part replacement and into the discipline of kinetic analysis. Whether you are conducting a seasonal tune up or a complex auto repair, the goal is always to restore the vehicle’s original harmonic balance. By applying the same diagnostic rigor used in a professional brake service to your exhaust alignment, you can eliminate the subtle vibrations that most shops ignore. If you find your vehicle still makes mystery noises, learning how to choose a skilled mechanic you can trust is the first step toward a quiet cabin. We invite you to share your diagnostic breakthroughs and professional insights with our growing community of automotive specialists.