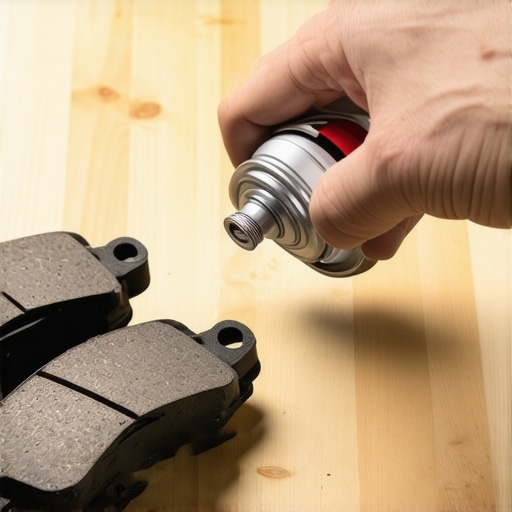
In the realm of advanced auto repair, the difference between a mediocre brake service and a professional-grade installation often comes down to the management of surface chemistry. Every veteran mechanic understands that friction is not just a mechanical interaction but a thermal and chemical one. When installing new components, many enthusiasts overlook the fact that manufacturers coat rotors in a persistent anti-corrosive oil to prevent oxidation during storage. Failing to neutralize this barrier before the first stop can lead to vitrification—a state where the friction material turns into a hardened, glass-like surface, drastically reducing the mu-coefficient and compromising safety.
Strip the Anti-Corrosive Film to Protect Your New Pads
The presence of shipping oil on a rotor surface is the primary catalyst for premature pad failure. When these lubricants are heated during the initial bedding-in process, they liquefy and permeate the porous structure of the friction material. This contamination prevents the establishment of a proper transfer layer, which is essential for consistent braking performance. High-level brake service requires the use of a specialized solvent to ensure the metal is chemically clean. By utilizing brake service strategies that save you money, technicians can avoid the costly necessity of replacing glazed pads shortly after installation. According to industry standards established by the National Institute for Automotive Service Excellence (ASE), the cleanliness of the friction surface is as critical as the torque of the caliper bolts.
Why Do Brand New Brake Pads Squeak Despite Proper Installation?
Noise in a braking system is often a symptom of uneven material transfer rather than mechanical loose-play. If the rotor surface is not degreased, the pad material cannot adhere uniformly to the iron, leading to microscopic ‘hot spots.’ These spots undergo localized hardening, resulting in high-frequency vibrations that the driver hears as a squeal. Implementing brake maintenance hacks to prevent costly failures involves more than just swapping parts; it requires an analytical approach to surface prep. If you notice a pungent scent during your first drive, it may be a sign of why your new brake pads are smoking, a clear indicator that volatile organic compounds are burning off the friction surface.
Eliminate Contaminants to Achieve a Perfect Transfer Layer
The goal of any high-performance auto repair is to facilitate an adherent friction mechanism. This occurs when pad material is evenly deposited on the rotor, allowing pad-on-pad contact at a molecular level. Contaminants like grease, fingerprints, or shipping oils disrupt this deposition, causing ‘judder’ or pedal pulsation. Much like a detailed engine tune up optimizes combustion, a thorough cleaning of the hub and rotor face optimizes stopping torque. Professionals often use brake service secrets to boost safety and longevity to ensure the system operates within its intended thermal envelope. If you are aiming for professional results, consider the precision involved in how a top-rated mechanic ensures safe auto repairs every time. Small investments in chemical prep today prevent the massive expense of hardware failure tomorrow.
Clean the Hub to Avoid the Infamous Pedal Pulse
Precision in auto repair is often measured in thousandths of an inch. While many focus solely on the rotors and pads, the interface between the wheel hub and the rotor is where most latent vibrations begin. Even a microscopic layer of rust or scale on the hub can prevent the rotor from sitting perfectly true, leading to lateral runout. When the rotor wobbles—even slightly—it makes intermittent contact with the pads, creating uneven heat distribution and thickness variation over time. This is often misdiagnosed as ‘warping,’ but it is actually the result of poor mechanical seating. Implementing the 15 hub clean-up that fixes steering wheel shake is a non-negotiable step for any technician aiming for a vibration-free finish. Without this preparation, even the highest quality components will eventually succumb to pulsation.
Why Does Your Brake Pedal Feel Spongy After a Long Mountain Descent?
This phenomenon is rarely a mechanical failure of the pads themselves but rather a thermal failure of the hydraulic medium. Brake fluid is hygroscopic, meaning it actively absorbs moisture from the atmosphere through microscopic pores in rubber hoses and the master cylinder reservoir. As water content increases, the boiling point of the fluid plummet. According to technical standards from SAE International, a mere 3.7% water contamination can reduce the boiling point of DOT 4 fluid from 446°F to just 311°F. When you demand heavy performance, this water turns into steam, which is compressible, leading to a terrifying ‘soft’ pedal. To prevent this, consult the brake fluid color chart to determine when your system is compromised. Understanding why your brake pedal goes to the floor after a long drive is the first step in moving from basic maintenance to expert-level vehicle safety management.
Master the Thermal Cycle to Bed Your Pads Like a Pro
The final, and perhaps most critical, stage of a professional brake service is the burnishing or bedding-in procedure. This is not a casual test drive; it is a controlled thermal application designed to transfer a uniform layer of friction material from the pad to the rotor surface. Without this transfer layer, the brakes will operate in an abrasive friction mode, which accelerates wear and increases noise. To maximize your brake service efficiency, you must perform a series of progressive stops that elevate temperatures without reaching the point of thermal shock. This process stabilizes the resins within the pads and ensures the friction coefficient remains consistent across various temperature ranges. If you skip this, you risk the dreaded ‘cementite’ buildup, which explains why your brake rotors warp after only 5000 miles. High-level performance is earned through these finishing touches. Have you ever encountered a ‘mystery’ brake squeal that refused to go away? Share your diagnostic journey in the comments below, or read our guide on how to stop your brakes from pulsing without new parts to refine your technique further.
Corroded Brackets Are the Silent Killer of New Pads
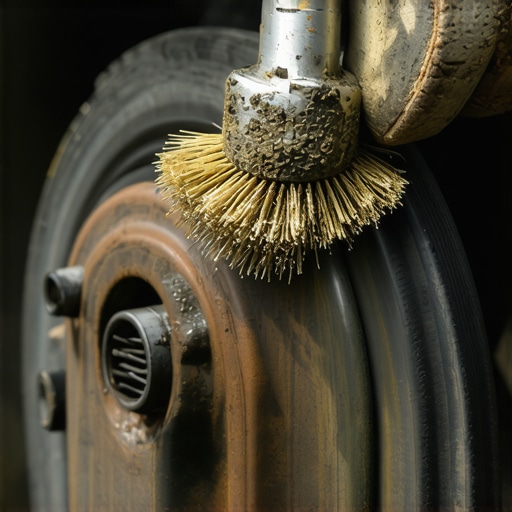
Even with a surgically clean rotor, your brake service will fail if the caliper’s ability to slide is compromised. Over time, the cast iron brackets develop layers of oxidation underneath the stainless steel abutment clips. This rust ‘growth’—often called rust jacking—tightens the tolerances, pinning the brake pads against the rotor even when your foot is off the pedal. A professional mechanic doesn’t just swap clips; they use a file or a wire wheel to strip the bracket down to bare metal before applying a thin coat of Moly-graphite lubricant. Failing to address this leads to excessive heat soak and a significant drop in fuel economy, as the engine must constantly fight the parasitic drag of a ‘hanging’ caliper. If you find your inner pad is significantly thinner than the outer, you are witnessing the direct result of bracket neglect.
Why Silicone Grease is the Only Safe Choice for Sliding Pins
The choice of lubricant in auto repair is governed by material science, specifically the compatibility of elastomers. Most caliper slide pin boots are made of EPDM (Ethylene Propylene Diene Monomer) rubber. If you apply a standard petroleum-based chassis grease, the rubber will absorb the hydrocarbons, swell to twice its size, and eventually tear or seize the pin entirely. This is a common mistake during a DIY tune up. To maintain a truly responsive pedal, professionals utilize high-dielectric silicone or synthetic PAG-based lubricants that remain stable at temperatures exceeding 400°F. 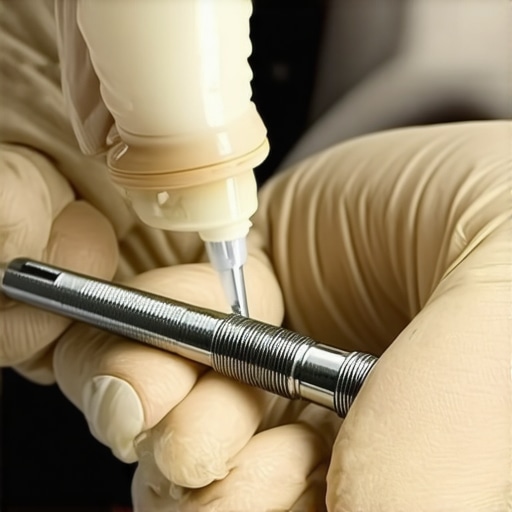 By ensuring the caliper can float freely, you distribute clamping force equally across both sides of the rotor, preventing the uneven thermal loading that causes long-term structural deformation.
Can Excess Hub Runout Actually Push Your Brake Pistons Back?
One of the most elusive issues in advanced braking systems is ‘piston knock-back.’ This occurs when a worn wheel bearing or a poorly seated rotor creates excessive lateral runout. As the rotor wobbles, it physically pushes the caliper pistons back into their bores. The next time you press the pedal, the first half of the stroke is spent merely moving the pistons back into contact with the rotor, resulting in a terrifying ‘long’ pedal. This is often misdiagnosed as air in the lines. To avoid this, use a dial indicator to measure runout; the Society of Automotive Engineers (SAE) generally recommends a maximum lateral runout of no more than 0.05mm for modern high-performance vehicles. If you’re struggling with a low pedal after aggressive cornering, diagnosing piston knock-back in performance cars might reveal the mechanical culprit behind your hydraulic symptoms.
The Critical Physics of Kinetic-to-Thermal Energy Conversion
Every time you slow down, you are essentially a scientist managing a massive energy transfer. Brakes are heat sinks designed to convert kinetic energy into thermal energy. If the system cannot dissipate this heat—due to clogged cooling vanes in the rotor or old, moisture-laden fluid—the friction material reaches its ‘fade point.’ According to a technical study published by the National Highway Traffic Safety Administration (NHTSA), a significant percentage of brake-related accidents are attributed to degraded component performance rather than total system failure. This highlights the importance of using high-carbon rotors which offer superior thermal conductivity and dampening characteristics. For those looking to push their vehicle’s limits safely, the pros and cons of high-carbon brake rotors provides a deeper dive into how metallurgy affects your stopping distance under extreme stress. As we look closer at the interaction between the master cylinder and the ABS module…
…the interaction between the master cylinder and the ABS module reveals a sophisticated dance of hydraulic logic. The Hydraulic Control Unit (HCU) acts as the central nervous system of the vehicle’s safety array, where solenoid valves cycle dozens of times per second to prevent wheel lockup. When a mechanic performs a standard fluid flush, they often miss the stagnant fluid trapped within these microscopic valve pathways. To truly clear the system during a professional brake service, a bidirectional scan tool is often mandatory to electronically command the ABS pump to cycle. This process ‘dumps’ the old, potentially corrosive fluid from the internal HCU reservoirs into the main lines for extraction. Neglecting this specialized step leaves the most expensive component in the braking system vulnerable to internal pitting and eventual solenoid failure.
Stop the Internal Rot in Your ABS Modulator
Corrosion within the ABS unit isn’t just about moisture; it is about the chemical breakdown of the fluid’s pH buffers. As these additives deplete, the fluid becomes acidic, attacking the zinc plating and aluminum housings within the modulator. High-tier auto repair protocols now involve testing for copper content—a leading indicator that the internal brake lines are beginning to oxidize. By maintaining a proactive tune up schedule that includes these chemical checks, you prevent the ‘mushy’ pedal feel that often persists even after multiple traditional bleeds. According to technical bulletins from the Automotive Service Association (ASA), failing to cycle the HCU during service is one of the primary causes of premature ABS module replacement in modern vehicles.
Why Is a Scan Tool Non-Negotiable for Modern Brake Bleeding?
Standard gravity or pedal-pump bleeding methods cannot overcome the check valves located inside the ABS block. If air becomes trapped in the secondary circuit—often due to a master cylinder replacement or a dry-run reservoir—it will remain there indefinitely, causing an inconsistent pedal height. The scan tool initiates an ‘Automated Bleed’ sequence, which pulses the intake and outlet valves in a specific order while the pump runs.  This high-pressure agitation is the only way to dislodge stubborn air bubbles from the intricate labyrinth of the HCU. For enthusiasts attempting a DIY brake service, ignoring this electronic requirement often leads to a vehicle that stops safely but lacks the crisp, immediate bite of a factory-fresh system.
Force the Air Out with Pressure Rather Than Vacuum
While vacuum bleeders are popular for their convenience, they are inherently flawed when dealing with high-performance auto repair. Vacuum systems pull air across the threads of the bleeder screw, which can introduce ‘false’ bubbles into the clear tubing, making it impossible to tell when the system is truly air-free. A professional mechanic prefers pressure bleeding, which attaches a pressurized reservoir of fresh fluid directly to the master cylinder. This method mimics the natural operation of the brake system, pushing fluid through the lines and ensuring that every pocket of air is forced out through the calipers. This technique is particularly vital for vehicles equipped with Electronic Brake-force Distribution (EBD), where the balance between front and rear line pressures is managed with extreme precision. Have you ever felt your brakes ‘tighten up’ after a professional service? That is the result of a perfectly executed pressure bleed. We invite you to share your experiences with electronic bleeding tools or ask our experts about your specific vehicle’s requirements in the comments section below.
Master the Nuances of Electronic Brake Force Distribution
The EBD system has largely replaced the mechanical proportioning valves of the past, using the ABS sensors to detect subtle changes in vehicle load and weight transfer. During aggressive braking, the EBD logic restricts pressure to the rear wheels to prevent ‘tail-happy’ skids before the ABS even needs to intervene. However, this system relies on perfect signal integrity. A light layer of metallic dust on a wheel speed sensor can cause the EBD to miscalculate, leading to uneven pad wear and unexpected nose-dive. Integrating sensor cleaning into your regular tune up routine ensures that the hydraulic logic remains sharp. As we move further into the mechanics of master cylinder bore sizes and their impact on mechanical advantage…
determines the fundamental ‘feel’ of the system. A smaller bore increases hydraulic pressure for the same amount of leg effort but requires a longer pedal stroke, whereas a larger bore provides a firmer, shorter stroke at the cost of higher required input force. Professional-grade auto repair involves matching these characteristics to the driver’s needs and the vehicle’s intended use.
Expert Insights & Advanced Considerations
Don’t Ignore the Master Cylinder Bore Ratio
When upgrading to multi-piston calipers, many enthusiasts overlook the hydraulic leverage ratio. If the total piston area increases significantly without a corresponding change in the master cylinder bore size, you will experience excessive pedal travel. This ‘long’ pedal is often misdiagnosed as air in the lines, but it is actually a mechanical mismatch. Expert brake service requires calculating the displacement to ensure the stroke remains within the optimal range for the ABS pump to maintain its safety threshold.
Why Your New Pads Might Wear Diagonally
Uneven pressure isn’t always about the pins; sometimes it’s the bracket casting itself. Over years of thermal cycles, the metal can experience microscopic warping. Even a millimeter of deviation can cause why your new brake pads wear down unevenly, leading to a decrease in initial bite. Addressing the 20 brake slide pin error that causes uneven pad wear is step one, but inspecting the flatness of the abutment surfaces is what separates a quick swap from a true brake service.
#IMAGE_PLACEHOLDER_E#
ABS Feedback is Your Best Diagnostic Tool
Modern safety systems use the braking hardware as their primary actuator. If your traction control is intervening prematurely or feels ‘crunchy’ during light cornering, it’s rarely a software glitch. It’s often a physical lag in the caliper piston return. A mechanic should verify that the piston retraction distance is within spec; if the piston is lazy, the ABS logic will overcompensate, creating a jerky driving experience that mimics a failing transmission.
Curated Expert Resources
SAE International Technical Papers: These documents provide the foundational research on the metallurgy of friction materials and the fluid dynamics of DOT 5.1 systems, essential for those wanting to go beyond the basics of auto repair.
ASE Certification Study Guides: The A5 Brakes series is a premier resource for any mechanic looking to master the electrical-hydraulic interface of modern electronic stability control systems.
NHTSA Safety Research Portal: This database offers critical technical insights into real-world brake system failure modes, helping technicians anticipate issues before they lead to catastrophic component loss.
Final Expert Perspective
Achieving professional-grade results in a brake service is a journey through material science, hydraulic logic, and digital calibration. It is no longer sufficient to simply swap parts; you must manage the thermal environment and ensure the electronic brain of the vehicle can communicate effectively with the mechanical hardware. From how to properly torque lug nuts without a professional gun to utilizing the 20 scanner that every modern driver should own for ABS cycling, precision remains your greatest asset in auto repair. We challenge you to look beyond the surface—how has your approach to hydraulic maintenance evolved as vehicles become more software-dependent? Share your technical breakthroughs or diagnostic hurdles in our community section.