Brake pulsation is frequently the most misunderstood phenomenon in the modern service bay. While most drivers and even some technicians immediately condemn rotors to the scrap bin, a nuanced analytical approach reveals that true mechanical warping is extremely rare. Instead, what we feel as a rhythmic kick through the pedal is usually the result of cementite formation or uneven friction material deposition. By addressing the root cause—often a lack of cleanliness during the initial brake service—you can restore pedal feel without spending a dime on new hardware.
Identify Friction Material Buildup Before Replacing Rotors
The sensation of pulsing is most often Disc Thickness Variation (DTV). This occurs when brake pads leave a layer of material on the rotor in some spots but not others. This is a common issue for those who do not follow a proper bedding-in procedure after a tune up. According to engineering standards published by SAE International, even microscopic variations in surface depth can trigger the anti-lock braking system (ABS) sensors or create a tactile vibration. Instead of seeking a full replacement, professional mechanics often suggest a series of aggressive stops to scrub the rotors clean or using an abrasive pad to manually remove the buildup.
Why Does My Steering Wheel Shake Even After an Alignment?
If you feel the vibration in the steering wheel rather than the pedal, the issue likely stems from Lateral Run Out (LRO). This isn’t always a defect in the metal itself but can be caused by rust or debris trapped between the rotor hat and the wheel hub. Professionals use the 10-hub scrub that stops brake vibrations to ensure the mating surfaces are perfectly flat. If the rotor does not sit flush against the hub, it will wobble as it spins, creating a pulsing sensation that mimics a warped rotor. Simply removing the rotor, cleaning the hub face with a wire brush, and re-torquing the lug nuts in a star pattern can often solve the problem for free.
Eliminate Run-Out at the Source
In many cases, the pulsation is a symptom of a sticking component rather than a surface issue. A frozen slider pin or a dragging caliper can cause localized overheating, which leads to why your new brake rotors warped in less than six months. Ensuring that the caliper hardware is lubricated with high-temperature silicone grease allows the pads to retract fully, preventing the heat-soak that causes DTV. If you are performing your own auto repair, pay close attention to the condition of the rubber boots and the free movement of the piston.
If you’re unsure about your technical skills or lack the specific diagnostic tools to measure run-out, always consult a skilled mechanic you can trust to ensure your vehicle’s safety systems remain uncompromised.
The Hub Scrub Technique for Professionals
Using the 15-hub clean up that fixes steering wheel shake is a high-level tactic that addresses the interface between the rotor and the vehicle. By using a specialized hub cleaning tool to remove every trace of corrosion, you ensure that the rotor’s lateral run-out is within the manufacturer’s specification (usually less than .002 inches). This level of precision is what separates an amateur pad-slap from a professional-grade brake job that lasts for years without vibration.
The mechanical integrity of the brake caliper is often the silent killer of rotor longevity. When a slide pin loses its lubrication, the caliper cannot float freely, leading to a constant, light application of one pad against the rotor surface. This creates a hotspot that eventually alters the metal’s molecular structure. You can learn how to rescue a seized brake caliper slide pin to prevent this cycle of heat damage. The square-cut piston seal within the caliper is also a vital component; it deforms slightly when you press the pedal and ‘springs’ back to retract the piston. When this rubber loses its elasticity due to age or heat, the pad remains in light contact, causing the localized overheating that leads to thickness variation.
Could Your Suspension Be Fooling You into a Brake Job?
It is a common pitfall to assume every vibration during braking originates in the braking system. In reality, the increased load during deceleration can amplify existing weaknesses in your suspension. Worn control arm bushings or a failing ball joint may stay quiet during cruising but oscillate wildly when the vehicle’s weight shifts forward. Identifying these mechanical ghosts requires a systematic approach, often involving a check for how to diagnose a mystery clunk in your front end. If your car exhibits a steering pull only when the anchors are dropped, you might be dealing with a localized suspension failure rather than a hydraulic issue, a distinction that clarifies why your car pulls under braking but not while coasting.
The Thermal Limits of Brake Fluid Quality
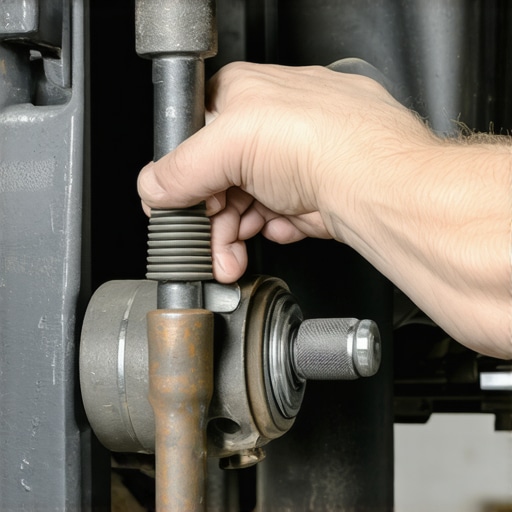
Beyond the mechanical components, the hydraulic medium itself plays a vital role in consistent pedal feedback. Over time, glycol-based brake fluid absorbs moisture from the atmosphere, which lowers its boiling point significantly. Under heavy braking, this water turns to steam, creating a spongy pedal or a sensation of fading that many mistake for rotor failure. It is essential to know how to test your brake fluid for water content at home to avoid dangerous situations where the brake pedal goes to the floor after a long drive. According to technical documentation from Brembo, the global leader in high-performance braking systems, contaminated fluid is a primary contributor to ‘pedal travel’ issues that mimic mechanical hardware defects but are actually chemical failures.
Stop Friction Fade Before It Starts
The final piece of the puzzle is the chemical compatibility between the pad and the rotor. Modern ceramic and semi-metallic pads require a specific ‘transfer layer’ to function correctly. If this layer is stripped away—perhaps by harsh chemical cleaners or sudden temperature spikes before the pads are properly seasoned—the friction becomes abrasive rather than adherent. Incorporating brake maintenance hacks to prevent costly failures into your routine can save hundreds in premature replacements. Have you ever successfully solved a vibration issue by simply cleaning your components instead of replacing them? Share your experience in the comments below or let us know what mystery noise you are currently chasing in your own garage.
Stop Over-Tightening Your Wheels with Impact Wrenches
The most overlooked variable in the battle against brake vibration is often the most basic: wheel installation torque. Many enthusiasts and rushed lube technicians reach for a high-powered pneumatic impact wrench and hammer the lug nuts home without a second thought. This brute-force approach is a recipe for disaster. When lug nuts are tightened unevenly, the hub-centric mounting of the rotor is compromised, introducing lateral stress that can lead to Disc Thickness Variation (DTV) under thermal load. To prevent this, the Tire Industry Association (TIA) emphasizes the RIST procedure—Remove debris, Inspect components, Snug in a pattern, and Torque to specification—as a non-negotiable standard for wheel service. If you aren’t using a calibrated torque wrench to finish every job, you are likely the primary cause of your own pedal pulsation.
#IMAGE_PLACE_HOLDER_C#
Does a Stuck Rear Caliper Cause Front End Pulsation?
While it seems counterintuitive, the answer is often yes. Modern vehicles utilize sophisticated Electronic Brakeforce Distribution (EBD) systems that constantly adjust the hydraulic pressure between the front and rear axles. If a rear caliper is seized or dragging, the front brakes are forced to compensate for the lost braking torque. This leads to extreme thermal spikes in the front rotors, accelerating the formation of cementite—a hard, brittle iron carbide—which feels like a physical warp but is actually a metallurgical change in the rotor face. If you’ve replaced your front rotors twice in a year, it’s time to stop ignoring the rear of the car. Identifying these systemic imbalances is a key part of any advanced brake service strategy.
Master the Thermal Cycle to Toughen Your Rotors
Rotors are essentially heat sinks designed to convert kinetic energy into thermal energy. However, the way you manage that heat during the first 200 miles determines the component’s lifespan. Most premium rotors come with a specialized coating or are high-carbon castings that require a specific burnishing phase. This isn’t just about mating the surfaces; it’s about heat-treating the metal through controlled cycles. If you’re unsure whether your current vibration is a mechanical failure or a bedding-in issue, grab a non-contact infrared thermometer. Checking for significant temperature deltas across the rotor face can reveal hotspots before they become permanent. What temperatures are you seeing on your hubs after a spirited drive? Share your findings with the community to see if you’re within the normal operating range.
The Role of Rotor Run-Out Tolerances
Precision is the difference between a job that lasts and a comeback. Even a brand-new rotor can have lateral run-out straight out of the box. Using a dial indicator to measure the wobble as the rotor spins is the only way to ensure the face is perfectly perpendicular to the hub. If the run-out exceeds .002 inches, you will likely feel it in the pedal within weeks of a fresh auto repair. This brings us to the often-ignored role of the brake backing plate. These thin metal shields are frequently bent during suspension work, leading to intermittent scraping sounds that mimic a failing wheel bearing or a warped rotor rubbing against the pad…
While a bent backing plate is a minor annoyance, the silent havoc of a failing wheel bearing is far more insidious. If a bearing has developed excessive axial play, the entire hub-and-rotor assembly will tilt under cornering or heavy braking loads. This movement causes the rotor to strike the pads unevenly, creating a stochastic vibration that even a brand-new set of components cannot fix.
Root Out Play in the Wheel Bearing
Experienced technicians know that checking for bearing play is the first step in a truly professional diagnostic sequence. Even a minute amount of movement at the hub center is amplified at the outer edge of the 12-inch rotor. This geometric reality means that what feels like a warped rotor is often just a hub that no longer rotates on a true axis. Before you blame the cast iron, use a dial indicator to verify that the hub itself is within the manufacturer’s tight tolerances. Failure to address a sloppy bearing will cause your new rotors to develop Disc Thickness Variation (DTV) within weeks as they constantly ‘kiss’ the pads during normal rotation.
Is Your Wheel Bearing Spoiling the Perfect Brake Job?
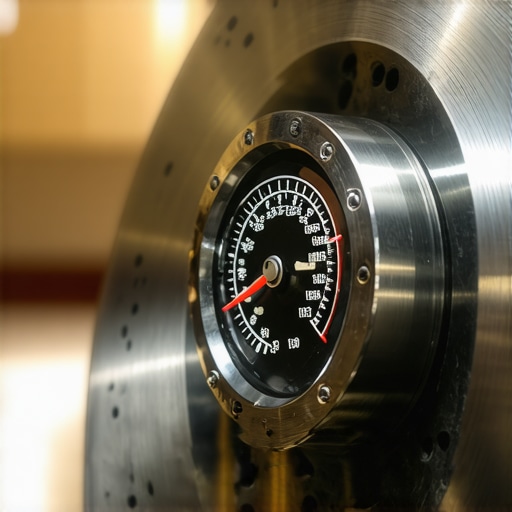
To differentiate between a rotor issue and a bearing failure, perform a run-out test with the rotor both on and off the vehicle. If the run-out persists on the bare hub, the bearing or the hub face is the culprit. According to technical training resources from Bendix Brakes, ensuring the hub is free of run-out is the single most important factor in preventing ‘comebacks’ for brake vibration. Professional-grade digital dial indicators can detect variations as small as .0005 inches, allowing you to catch a failing bearing long before it begins to growl or show obvious physical looseness.
Modern Pistons Require More Than Brute Force
The evolution of the Electronic Parking Brake (EPB) has added a layer of complexity to the standard rear brake service. You can no longer simply use a C-clamp to compress the caliper piston; doing so can shatter the internal plastic gears of the electromechanical actuator. These systems require a specific ‘service mode’ command via a scan tool or a dashboard sequence to retract the parking brake motor. Forcing the piston without disengaging the electronic mechanism is a common cause of internal caliper damage, leading to uneven pressure and subsequent pulsation. This is a critical nuance in brake service efficiency that separates modern specialists from old-school mechanics.
Why the On-Car Lathe Wins Every Time
In the past, removing rotors to ‘turn’ them on a bench lathe was standard practice. However, this method fails to account for the stacked tolerances of the hub and bearing. The modern solution is the on-car brake lathe, which resurfaces the rotor while it is mounted to the vehicle’s hub. This process ensures the rotor is perfectly ‘indexed’ to the specific hub it lives on, effectively neutralizing any minor hub run-out. By machining the rotor in its actual operating environment, you achieve a level of parallelism that a bench lathe simply cannot match. If you are struggling with a vibration that won’t go away, it’s time to seek out a shop that utilizes this high-precision technology. Have you ever experienced a vibration that survived multiple parts replacements? Tell us your most frustrating diagnostic story in the comments and let’s help each other find the fix.
Expert Insights & Advanced Considerations
Stop Chasing Shadows with Bench Lathes
While many shops still rely on the old bench lathe, the true professional knows that the rotor must be indexed to the hub. Shifting to an on-car lathe is often the only way to account for the minute variations in the wheel bearing and hub assembly. If you want to master brake service strategies that save you money and extend brake life, you must prioritize the hub-to-rotor relationship over simple surface smoothing.
Why .002 Inches is the Hard Limit for Safety
Modern braking systems are increasingly sensitive to lateral run-out. A variation that you can barely see with the naked eye is enough to trigger a rhythmic pulse that disrupts the ABS and ruins the driving experience. Ensuring that your technician uses a dial indicator to measure the assembly is a hallmark of how a top-rated mechanic ensures safe auto repairs every time. Precision isn’t optional; it is the foundation of modern vehicle safety.
Heat Cycles Determine Your Rotor’s Destiny
The first few hundred miles after a brake job are a chemical and metallurgical furnace. If the driver doesn’t perform a proper burnishing procedure, the friction material won’t transfer evenly to the rotor face. This leads to the very Disc Thickness Variation (DTV) issues that feel like warping but are actually surface irregularities. Advanced diagnostics often reveal that “defective” parts were simply never heat-treated correctly on the road.
#IMAGE_PLACEHOLDER_E#
Curated Expert Resources
SAE International Technical Papers: The gold standard for understanding the physics of Disc Thickness Variation and cementite formation. Essential for those who want to move beyond the “warped” terminology and understand the metallurgy of braking.
Bendix Brake Education Center: This resource provides deep dives into hydraulic integrity and caliper piston retraction physics, helping DIYers understand the “spring-back” phenomenon of square-cut seals.
TIA RIST Training Modules: The Tire Industry Association offers detailed protocols for wheel installation that prevent the uneven torque loads that frequently cause vibration issues through improper lug nut sequences.
Final Expert Perspective
Solving brake pulsation requires a shift from part-swapping to true engineering analysis. By understanding that a smooth pedal depends more on hub cleanliness and thermal management than the thickness of the iron, you can achieve a higher level of safety and performance. Consistent why regular brake service is key to car safety and longevity ensures that these minor variations never escalate into costly repairs. We invite you to share your most difficult vibration diagnosis in the comments or consult our technical guides for your next project.