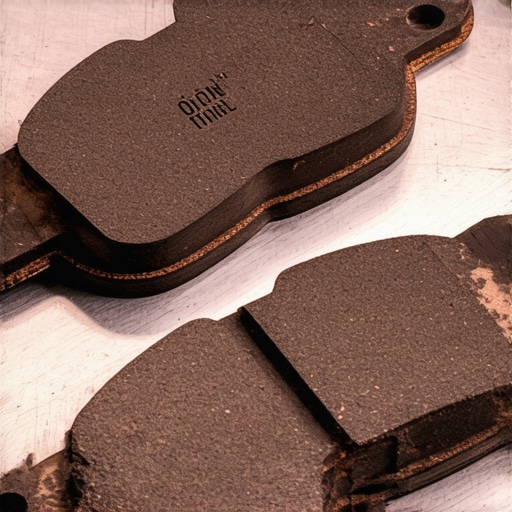
The Physics of Asymmetrical Friction Material Depletion
In the realm of automotive engineering, a brake system is a study in controlled friction and thermal energy management. When a technician installs fresh pads, the expectation is a uniform decay of the friction material across the axle. However, as an experienced mechanic will attest, uneven wear is a diagnostic red flag indicating a disruption in the system’s equilibrium. This phenomenon rarely stems from the pads themselves; rather, it is usually a symptom of a failing brake service component or a hydraulic discrepancy that forces one pad to work harder or remain engaged longer than its counterpart. When the kinetic energy isn’t distributed evenly, the resulting heat spikes can lead to glazed surfaces and compromised safety.
Slide Pins Often Dictate the Lifespan of Your Friction Material
Floating caliper systems rely on a set of precision-engineered slide pins to ensure the caliper housing moves freely. When these pins succumb to corrosion or lubrication breakdown, the caliper ‘sticks,’ preventing the outboard pad from retracting fully. This results in constant parasitic drag, which generates excessive heat and accelerates wear. If you suspect your hardware is failing, you might need to learn how to rescue a seized brake caliper slide pin before the new friction material is permanently compromised. Experts in the field, such as those contributing to SAE International research, highlight that even minor friction within the caliper guides can lead to significant thermal imbalances that distort the rotor over time.
Hydraulic Restricted Flow and Pressure Retention Issues
Uneven wear isn’t always caused by a mechanical obstruction; sometimes the culprit is hidden within the hydraulic lines. A collapsed inner liner of a rubber brake hose can act as a one-way check valve, allowing high-pressure fluid to engage the piston but preventing it from returning to the master cylinder when the pedal is released. This trapped pressure keeps the pad pressed against the rotor, leading to rapid thinning of the friction material on one side of the vehicle. During a comprehensive auto repair, diagnosing this requires a professional touch to differentiate between a physical seize and a hydraulic lock. This is why a periodic tune up of the entire braking system—including a fluid flush—is paramount for longevity.
Could Your Brake Fluid Contamination Be Driving Mechanical Failure?
Over time, brake fluid absorbs moisture through a process called hygroscopy, leading to internal corrosion of the caliper piston bore. This oxidation creates a rough surface that prevents the piston from sliding smoothly back into its ‘at-rest’ position after a braking event. For those dealing with persistent issues, reviewing the brake fluid color chart can provide immediate visual confirmation of system degradation. Furthermore, external surface issues like rotors rusting overnight can create an abrasive environment that further complicates the initial bedding-in process of new pads, leading to jagged wear patterns.
Ensuring your vehicle maintains its stopping power requires more than just swapping parts; it demands a deep understanding of system synchronization. If you find your braking performance lacking after a recent change, consider choosing a skilled mechanic you can trust to perform a holistic system analysis. Addressing these root causes now will save you from another premature replacement cycle and ensure your safety on the road.
Stop Ignoring the Hub Flange During Rotor Installation
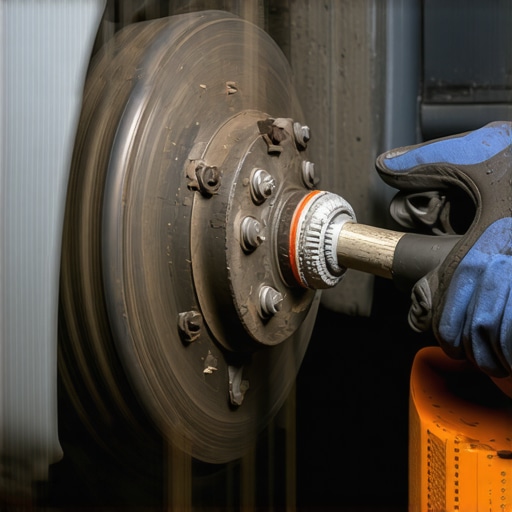
When most enthusiasts tackle a brake job, they focus entirely on the calipers and pads, often neglecting the mating surface of the wheel hub. A microscopic layer of rust or scale on the hub flange can prevent the rotor from sitting perfectly true. This creates lateral runout—a slight ‘wobble’ as the rotor spins. While you might not feel it initially through the pedal, this oscillation causes the rotor to intermittently strike the pads while the vehicle is in motion, leading to disc thickness variation (DTV). Ensuring a pristine mating surface is essential; in fact, performing a 15-minute hub clean-up is the secret to preventing that annoying steering wheel shake and ensuring the friction material wears evenly across its entire surface area.
Is Your Vehicle’s Stability Control Secretly Eating Your Brakes?
Modern drivers often forget that their brake system is no longer just a manual hydraulic loop controlled by their right foot. Electronic Stability Control (ESC) and Traction Control systems frequently intervene by applying individual brakes to manage wheel spin or correct steering yaw. If you drive aggressively or frequently navigate slippery terrain, these systems may engage one specific corner more than others to maintain vehicle pathing. According to technical documentation from the National Highway Traffic Safety Administration (NHTSA), the integration of electronic braking aids has significantly improved safety, but it has also introduced new wear variables that traditional diagnostic methods might miss. If you find your rear-right pad is consistently thinner than the left, it may be a sign of an overactive stability program rather than a mechanical failure.
The Critical Role of Proper Bedding-In Procedures
Installing high-quality components is only half the battle; the thermal ‘seasoning’ of the pads and rotors determines their long-term viability. A failure to properly bed-in your new brakes—a process of controlled heating and cooling to transfer a layer of friction material onto the rotor—can lead to uneven deposits. These ‘hot spots’ create areas of high friction that wear down the pad unevenly and can even lead to structural changes in the rotor metal. If you notice a strange odor or light haze after your first drive, don’t panic immediately; understanding why your new brake pads are smoking can help you distinguish between the normal curing of resins and a genuine mechanical drag issue. Skipping this step often results in a ‘pulsating’ pedal that many incorrectly diagnose as a warped rotor.
How Your Alignment and Tires Sabotage a Perfect Brake Job
The relationship between your suspension and your braking system is symbiotic. A vehicle with significant alignment issues or worn suspension bushings will dive or pull under heavy braking, shifting the load distribution away from its intended balance. This uneven loading forces specific calipers to work under higher pressure than they were designed for in that specific maneuver. Furthermore, if you are seeing odd wear patterns on your rubber, such as tires cupping, the resulting vibration can cause the caliper hardware to rattle and vibrate, leading to tapered pad wear. To ensure you aren’t wasting money on premium parts only for them to be ruined by poor chassis geometry, we recommend reviewing our brake service secrets to identify the subtle warning signs that your vehicle’s foundation is compromising your stopping power. Have you noticed one side of your car gathering more brake dust than the other? Share your experience in the comments or let us know if you’ve found a hidden culprit in your own diagnostic journey.
Stop Blaming the Pads: The Invisible Influence of Hub Play
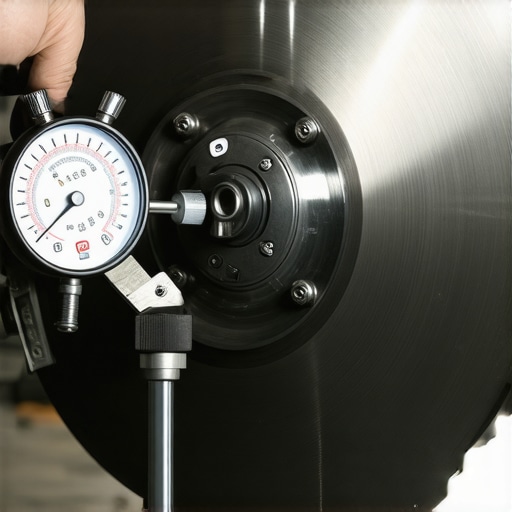
Precision is the silent partner of every effective braking system, and even the slightest deviation can lead to catastrophic wear patterns. While most mechanics reach for a bigger pry bar when investigating drag, the most seasoned experts reach for a dial indicator. A worn wheel bearing or a slightly bent hub flange can introduce lateral runout that is undetectable to the naked eye. This microscopic ‘wobble’ causes the rotor to oscillate as it spins, effectively slapping the brake pads back into the caliper bores. This phenomenon, known as piston knock-back, creates a spongy pedal feel and uneven friction material depletion as the pads are forced to engage at an angle rather than perfectly flush. If you are seeing tapered wear where one end of the pad is thinner than the other, stop looking at the caliper and start measuring the hub’s runout. Even 0.003 inches of play can translate into significant Disc Thickness Variation (DTV) over several thousand miles.
Why Does My Car Pull to One Side Only During Braking?
This is one of the most common PAA-style queries that confuses DIYers and professionals alike. When a vehicle pulls under braking, it is rarely an alignment issue—it is a friction or hydraulic imbalance. A pull to the left often indicates that the right-side caliper is underperforming, perhaps due to a seized piston or a restricted brake hose. Conversely, if one side is ‘grabbing’ too aggressively, it could be the result of a contaminated friction surface or a sticking slide pin that refuses to let go. Identifying the root cause requires a systematic approach: check the temperature of both rotors after a brief drive. The hotter side is either doing all the work or is failing to retract, while the cooler side might not be contributing its fair share to the vehicle’s deceleration. Addressing this early is vital; otherwise, the overworked side will suffer from rapid thermal degradation.
The Silent Sabotage of the Friction Transfer Layer
Chemistry governs how your car stops just as much as physics does. During the bedding-in process, a microscopic layer of friction material is intended to bond with the rotor surface. This is known as the transfer layer. When this layer is inconsistent—due to improper break-in procedures or poor-quality pads—it creates ‘patchy’ friction zones. According to technical standards maintained by the Friction Materials Standards Institute (FMSI), the uniformity of this adhesive friction is critical for preventing vibration and ensuring even pad wear across the entire axle. If the transfer layer becomes uneven, the pads will essentially ‘skip’ across the rotor, leading to localized hot spots that can permanently alter the metallurgy of the cast iron. These spots become harder than the surrounding metal, creating a cycle of uneven wear that no amount of pad-slapping will ever fix. You must ensure the rotor is surfaced or replaced to provide a clean slate for a new chemical bond.
Confirm Your Diagnosis with a Hydraulic Pressure Test
If mechanical checks come up empty, the final frontier is the hydraulic pressure test. By installing a pressure gauge into the bleeder screw port, a technician can verify exactly how much force is reaching the piston compared to the master cylinder’s output. It is not uncommon to find a 200 PSI discrepancy caused by a kinked hard line or an internal failure in the ABS modulator valve. This type of ‘ghost’ restriction will cause one caliper to apply significantly less force than its counterpart, leading to lopsided wear that looks like a mechanical failure but is actually a fluid delivery issue. Have you ever seen a pressure differential of more than 50 PSI between two calipers? It’s a tell-tale sign that your hydraulic system is compromised from within. Exploring these deeper hydraulic nuances is the only way to ensure a permanent fix for vehicles that seem to ‘eat’ one pad faster than the rest. The key lies in verifying the actual clamping force before assuming the hardware is at fault.
The Square-Cut Seal Is Your Piston’s Only Way Back Home
While mechanical hardware and hydraulic pressure are common suspects, the microscopic behavior of the caliper piston seal often eludes even seasoned technicians. This square-cut rubber ring does more than prevent leaks; it acts as a return spring. When you apply the brakes, the seal deforms under pressure, gripping the piston and stretching slightly toward the rotor. Once you release the pedal, the elasticity of the rubber pulls the piston back just enough to create a necessary air gap. Over thousands of heat cycles, this rubber loses its memory and elasticity, failing to retract the piston fully. This leads to a persistent, light drag that isn’t strong enough to be felt as a ‘pull’ while driving but is more than enough to shave millimeters off your friction material prematurely. This subtle failure is a primary reason why a comprehensive brake service must involve inspecting the condition of the piston boots and the responsiveness of the seals themselves.
When the Proportioning Valve Starves Your Rear Axle
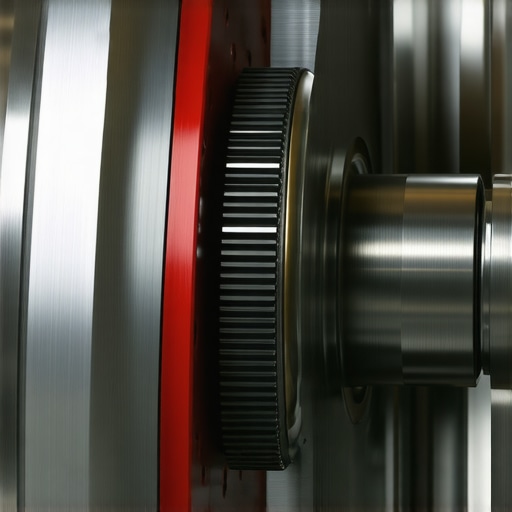
In vehicles that lack fully integrated electronic brakeforce distribution, a mechanical proportioning valve still dictates how much hydraulic pressure reaches the rear versus the front. If this valve becomes partially restricted or the internal spring fatigues, it can cause a significant pressure imbalance across the vehicle’s diagonal braking circuits. This results in one side of the vehicle doing the heavy lifting during moderate stops, while the other side barely engages. Professional auto repair diagnostics often overlook this because the vehicle might still stop straight under panic conditions when the valve is fully open. However, during daily commuting, this imbalance manifests as one wheel’s pads wearing at twice the rate of its counterpart. Reference data from the ISO 21069 standards for heavy vehicle braking systems emphasizes that pressure distribution accuracy is critical to avoiding localized thermal overloading and catastrophic component failure.
Does Your Master Cylinder Suffer from Internal Bypass Leaks?
An expert-level query often arises: can a master cylinder cause wear on just one side? The answer lies in the dual-circuit design. Most modern master cylinders use a primary and secondary piston to split the hydraulic load. If an internal cup seal fails on just one circuit, pressure can ‘bypass’ the piston and return to the reservoir rather than moving toward the wheels. This causes one set of brakes (usually a diagonal pair) to underperform. The driver compensates by pressing the pedal harder, which over-pressurizes the healthy circuit and accelerates the wear on those specific pads. If your tune up routine doesn’t include a static pressure test of the master cylinder, you might be treating the symptom of uneven wear rather than the hydraulic source.
Why Heavy Aftermarket Rims Punish Your Outer Brake Pads
The physics of unsprung mass and wheel offset can inadvertently sabotage even the best mechanic‘s work. Swapping factory wheels for heavy, oversized aftermarket rims changes the leverage applied to the wheel bearings and the thermal venting characteristics of the wheel well. Heavier wheels have more rotational inertia, requiring the brakes to work harder to achieve the same deceleration. This increased thermal load can cause the caliper housing to flex more than intended. If the offset is incorrect, the caliper may not align perfectly with the rotor under high-load conditions, causing the outer pad to take the brunt of the initial contact. This ‘tapered’ wear is a physical consequence of the caliper twisting under the immense torque required to stop a heavier-than-stock wheel assembly. To ensure your safety and component longevity, we invite you to share your specific vehicle setup in the comments—have you noticed a change in pad life after upgrading your wheels? Engaging with these high-level diagnostic nuances is how you transform a standard repair into a precision performance optimization.
Expert Insights and Advanced Considerations
Map Heat Signatures with an Infrared Thermometer
A simple laser thermometer is the fastest way to confirm a hydraulic restriction. After a short drive without aggressive braking, a temperature delta of more than 50 degrees Fahrenheit between wheels on the same axle points directly to a caliper that isn’t doing its job or one that is dragging. This data-driven approach removes the guesswork that often plagues a standard brake service.
Inspect the Backing Plate for High-Frequency Wear Marks
If you see shiny spots or witness marks on the metal ears of the brake pad where they sit in the caliper bracket, the hardware is moving too much. This usually means the clips have lost their tension. Even if the pads have life left, failing to replace these clips during an auto repair will lead to noise and tapered wear patterns that no amount of grease can fix.
Factor in Hub Runout Before Bolting Down New Rotors
Most enthusiasts assume a new rotor is perfectly flat, but it is actually only as flat as the surface it is bolted to. If you do not clean the hub, you are just installing a wobble. You should learn how to properly torque lug nuts without a professional gun to ensure even clamping force across the entire hub assembly.
Curated Expert Resources
ASE Study Guides and Technical Bulletins
The National Institute for Automotive Service Excellence provides the gold standard for diagnostic logic. Their technical bulletins often cover rare edge cases involving master cylinder bypass and ABS valve internal failures that lead to uneven pressure.
SAE International Brake Friction Research
For those who want to understand the metallurgy of rotors and the chemical transfer layer of pads, the Society of Automotive Engineers offers peer-reviewed papers explaining how heat cycles transform friction surfaces at a molecular level.
FMSI Brake Pad Application Catalogs
The Friction Materials Standards Institute provides the standardized numbering system used by every major manufacturer. Referencing their data ensures you are using the correct pad compound for your vehicle’s weight and heat dissipation requirements.
A Professional Approach to Friction Management
Solving uneven pad wear requires moving beyond the parts changer mentality. It demands an investigation into hydraulic pressure, mechanical freedom, and the precision of the mating surfaces. A truly effective mechanic looks at the entire chassis as a single unit where tires, suspension, and hydraulics intersect. By incorporating these brake service secrets into your maintenance routine, you ensure that every stop is as smooth and safe as the first. Whether you are performing a seasonal tune up or a complete overhaul, following the essential guide to auto repair will keep your vehicle performing at its peak. We invite you to share your most difficult braking diagnosis in the comments below or reach out for more advanced technical discussions.