The Fluid Barrier Failure That Destroys Engines
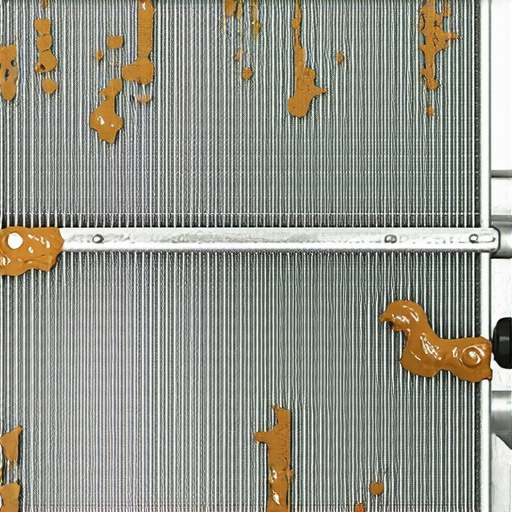
When a professional mechanic encounters a cooling system filled with a viscous, opaque brown sludge, the immediate concern is fluid intermix. In the high-stakes environment of an internal combustion engine, the cooling and lubrication systems must remain hermetically sealed from one another. When the ‘chocolate milk’ appearance manifests, it signifies that engine oil has breached these boundaries and emulsified with the coolant. This is not merely an aesthetic issue; the resulting sludge loses the thermal conductivity required for heat exchange and the lubricity necessary for protection. If left unaddressed, the acidic nature of the emulsion begins to swell rubber seals and degrade internal components, leading to a cascade of auto repair requirements that could have been avoided with early detection. Identifying the exact failure point—be it a head gasket, an oil cooler, or a structural crack in the block—is the first step in advanced diagnostics. If you have already inspected your dipstick and found that your engine oil looks like a milkshake, the diagnosis of a breached head gasket is almost certain.
Could Your Transmission Cooler Be the Silent Saboteur?
While most drivers associate sludge with engine oil, it is essential to distinguish between different types of contamination. In vehicles where the transmission cooler is integrated into the radiator, a rupture in the internal heat exchanger can cause transmission fluid to mix with coolant. This often results in a pinkish-brown ‘strawberry milkshake’ appearance rather than the darker ‘chocolate’ look. According to technical documentation from SAE International, cross-contamination in the radiator is a leading cause of premature clutch failure in automatic gearboxes. If you have noticed that your automatic shifter feels notchy or the vehicle hesitates to engage, the cooling system might be the unexpected source of your transmission woes. Expert-level diagnostics involve pressure testing the radiator and checking for coolant traces in the gearbox fluid using specialized test strips. Assessing this early can prevent the need for a total transmission overhaul.
Immediate Actions to Prevent Catastrophic Bearing Seizure
The moment you identify an emulsion in the reservoir, the vehicle should be decommissioned. Driving with contaminated fluid risks pumping sludge into the small oil galleries of the engine, which can starve the crankshaft and camshaft bearings of lubrication. This leads to a ‘spun bearing,’ an event that typically necessitates a complete engine replacement. To save your vehicle, you must perform a comprehensive system purge. Simply draining the radiator is insufficient; you need to follow the correct way to flush your coolant using chemical degreasers specifically designed to break down oil molecules within a water jacket. Additionally, a brake service or a general tune up should be postponed until the primary fluid leak is resolved, as the thermal stress from a failing cooling system can mask or exacerbate other mechanical issues. Professional intervention is required to perform a chemical block test, which detects the presence of CO2 in the cooling system—a definitive sign of a failed head gasket. If you’re dealing with mystery symptoms, exploring our mechanic tips for diagnosing common auto problems can help you narrow down the culprit before committing to a major teardown.
Stop Guessing and Start Testing for Combustion Gases
While visual inspection provides a preliminary warning, professional-grade diagnostics require verifying the presence of exhaust gases within the cooling system. A chemical block test uses a specialized fluid that changes color from blue to yellow or green when exposed to carbon dioxide. This test is the gold standard for confirming a breached combustion seal, particularly when you are trying to determine why your coolant level drops without a visible leak. Relying solely on the ‘milkshake’ appearance can be misleading, as condensation in the valve cover can sometimes mimic the look of intermix without a systemic failure. According to the National Institute for Automotive Service Excellence (ASE), secondary tests like cylinder leak-down tests are essential to isolate which specific cylinder has lost integrity. By pressurizing the combustion chamber while the piston is at top dead center, a skilled mechanic can observe bubbles in the radiator, confirming the exact location of the failure.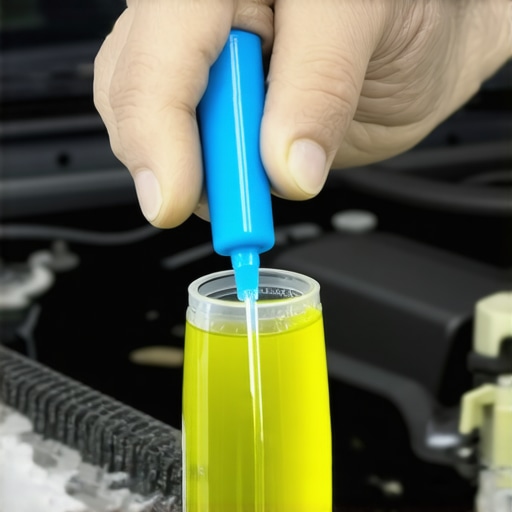
Does a Bone-Dry Engine Block Rule Out an Internal Breach?
Many DIY enthusiasts assume that if the exterior of the engine is dry and free of oil seepage, the head gasket must be intact. This is a dangerous misconception. Head gaskets often fail internally between the combustion chamber and the water jacket or between an oil passage and a coolant passage. In these scenarios, there is no external evidence of a leak; the engine remains pristine on the outside while the internal fluids are undergoing a catastrophic merger. You might even find that your radiator cap is holding pressure perfectly, yet the engine continues to overheat because of localized steam pockets created by combustion gas displacement. If you suspect an internal failure but see no drips on your driveway, learning how to detect a blown head gasket with soapy water or a pressure tester can provide the definitive proof you need to stop driving before the damage becomes irreversible.
Replace Your Hoses Before They Turn Into Mush
One of the most overlooked aspects of oil-coolant intermix is the chemical damage dealt to the cooling system’s rubber components. Engine oil is a petroleum-based lubricant that is highly aggressive toward the EPDM (Ethylene Propylene Diene Monomer) rubber used in standard radiator and heater hoses. Once oil saturates these hoses, it causes the rubber to swell and lose its structural rigidity, a process known as ‘sponging.’ Even after a successful flush, these hoses are prone to sudden, explosive failure because the internal walls have been compromised. If your vehicle has suffered a major intermix event, you must factor the replacement of all primary coolant hoses into your auto repair cost-saving tips strategy. Failing to do so often leads to a secondary overheating event weeks later when a softened hose bursts under pressure. In extreme cases where the engine was hydro-locked by coolant, you may need to look into the 20 move to save a drowned engine to clear the cylinders and prevent bent connecting rods. Have you ever dealt with a ‘milkshake’ engine only to have a hose blow out shortly after the repair? Share your experience in the comments or let us know which diagnostic tool you trust most for finding hidden leaks.
Stop the Corrosion Before Electrolysis Eats Your Engine
When oil and coolant marry into that dreaded emulsion, the chemical fallout extends far beyond just losing lubrication. Coolant is not merely a heat transfer fluid; it is a carefully balanced chemical soup designed to prevent galvanic corrosion between dissimilar metals like aluminum heads and iron blocks. When engine oil or transmission fluid breaches the system, it disrupts the sacrificial inhibitors, often turning the entire cooling system into a massive battery. This phenomenon, known as electrolysis, occurs when the coolant’s electrical conductivity spikes due to contamination and pH shifts. If you have already confirmed your diagnosis using mechanic tips for diagnosing common auto problems, you must act before the electrical current begins physically moving metal ions from your radiator or heater core into the fluid. This process can create microscopic pinholes in expensive components in a matter of days. According to the ASTM D3306 standards, maintaining the correct reserve alkalinity is critical for preventing the pitting of aluminum cylinder heads—a protection that is completely neutralized once oil sludge takes over.
Why Does Contaminated Coolant Speed Up Metal Erosion?
The answer lies in the breakdown of the protective oxide layer that normally coats the internal passages of your engine. In a healthy system, the coolant maintains a passive film on metal surfaces. However, the acidic byproducts of oxidized engine oil strip this film away, leaving the raw metal vulnerable. As the water pump continues to circulate the grit-heavy sludge, it performs a dual-action assault: chemical erosion from the acidity and mechanical abrasion from the suspended particles. This is why a simple drain-and-fill is never enough. If you’re unsure if your system is actually clean, reviewing our guide on the correct way to flush your coolant can prevent a repeat failure and stop the electrolytic process in its tracks.
Your Water Pump’s Mechanical Seal is the Next Victim
The abrasive nature of the ‘milkshake’ sludge acts like liquid sandpaper against the most delicate parts of your cooling system. The mechanical seal of your water pump—usually a precision-ground ceramic or carbon interface—cannot survive the grit found in emulsified oil. This seal relies on a microscopic film of clean coolant for lubrication; when it is forced to process thick, oily sludge, the seal faces overheat and score. Once the seal is compromised, coolant will begin to weep from the pump’s tell-tale hole, signaling an imminent total failure. Many drivers focus so much on the engine oil looks like a milkshake issue that they ignore the water pump until the bearings seize. If you are already performing a tune up after a head gasket repair, it is standard professional practice to replace the water pump proactively. The cost of the part is negligible compared to the labor of going back in a month later when the seal finally gives out.
Don’t Forget the Heater Core Trap
Cleaning the engine block is one thing, but the heater core is a different beast entirely. Because the heater core consists of tiny, narrow passages designed for maximum surface area, it acts as a secondary filter for the cooling system. Sludge often settles here, where flow rates are lower, creating a thick plug that resists standard flushing. This is often the reason why, even after a successful auto repair, your cabin heat feels lukewarm or nonexistent. To truly clear a contaminated heater core, professional technicians often use a pulsating flush tool that combines air and water pressure to dislodge the heavy emulsion. Neglecting this step means leaving a reservoir of acidic sludge in your car, which will slowly contaminate your fresh coolant and lead to future leaks behind the dashboard. Understanding the nuance of flow dynamics is what separates a DIY fix from a skilled mechanic‘s long-term solution. Beyond the physical blockage, the thermal expansion of the sludge can put immense pressure on the heater core’s plastic end tanks.
Pressure Differentials Dictate the Flow of Destruction
The physics of fluid intermix are governed by a simple rule: high pressure seeks low pressure. In most modern internal combustion engines, the oil pump generates between 40 and 60 PSI at operating speeds, while the cooling system is strictly capped at roughly 15 PSI by the radiator cap. This is why oil typically enters the coolant first, creating the initial sludge you see in the expansion reservoir. However, once the engine is deactivated, the oil pressure drops to zero while the cooling system remains pressurized during the ‘heat soak’ phase. This is the critical window where the roles reverse, and coolant is forced back into the oil pan. Understanding this oscillation is vital for a skilled mechanic to determine if the breach is active during operation or only during the cooling cycle, a distinction that can point directly to a failing oil cooler rather than a head gasket. 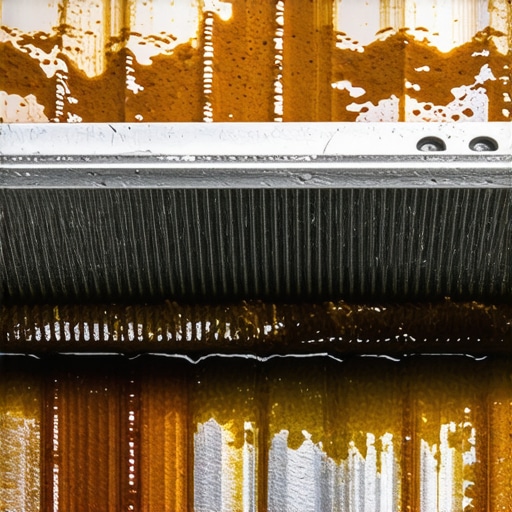
How Much Glycol Can Your Catalytic Converter Actually Survive?
When a head gasket fails internally, the damage often extends far beyond the oil pan and radiator. If the engine is ‘burning’ coolant through a combustion chamber breach, the exhaust stream becomes a delivery system for silicates and phosphates. These chemicals are designed to protect engine metals, but inside the high-heat environment of a catalytic converter, they form a glass-like glaze over the precious metal washcoat. According to technical bulletins from the Environmental Protection Agency (EPA) regarding emissions system durability, even a brief period of coolant consumption can reduce catalyst efficiency by over 50% due to chemical poisoning. If you have resolved your ‘milkshake’ issue but now face a recurring check engine light for catalyst efficiency, the cooling system failure likely claimed your exhaust system as a secondary victim. This is why a comprehensive tune up after a major repair must include a live-data scan of the oxygen sensors to ensure they haven’t become chemically ‘lazy.’
Reversing the Flow to Evict Stubborn Contaminants
The most effective way to clear a sludge-choked cooling system after a breach is the back-flush. Traditional flushes follow the normal direction of coolant flow, which often further compresses the thick emulsion into the narrow tubes of the radiator and heater core. By disconnecting the heater hoses and forcing high-volume water in the opposite direction of normal operation, you use hydrostatic pressure to lift the sludge away from the internal restrictors. This advanced auto repair technique is often the only way to restore cabin heat without replacing the entire dash-mounted core. If you find the process daunting, our technical guide on the correct way to flush your coolant provides the tactical roadmap needed to ensure no air pockets remain to cause localized hotspots during the first post-repair drive.
Detect Latent Metal Stress Before the Next Thermal Cycle
Aluminum cylinder heads are prone to a phenomenon often described as thermal memory. When an engine overheats because of an engine oil looks like a milkshake scenario, the metal expands at uneven rates, potentially warping the head or compromising the casting’s interstitial integrity. Even after the primary leak is sealed, the head may harbor micro-cracks that are invisible to the naked eye. Professional engine builders use fluorescent dye penetrants or hot-tank pressure testing to verify that the metal hasn’t suffered catastrophic fatigue. Don’t wait for the next breakdown to confirm your engine’s health; have your cooling system professionally pressure tested today and share your findings in the comments below to help other enthusiasts identify hidden cracks before they lead to total engine failure.
Expert Insights & Advanced Considerations
Pressure Tests Won’t Catch Every Micro-Crack
While a standard pressure test is a staple of auto repair, it often fails to simulate the dynamic thermal expansion of a running engine. A skilled mechanic knows that aluminum heads expand significantly more than cast iron blocks. If you only test the system cold, you might miss a breach that only opens when the metal reaches 210 degrees Fahrenheit. Always verify results with a hot-engine block test to be certain. #IMAGE_PLACEHOLDER_E#
High-Detergent Oils Can Reveal Pre-Existing Gasket Weakness
Switching to a high-mileage synthetic oil isn’t always a magic fix. In fact, the aggressive detergents can sometimes strip away the very carbon deposits that were “sealing” a failing gasket. This often explains why an engine oil looks like a milkshake shortly after a routine service. If you’re planning to tune up your car like a pro, inspect the oil quality first to ensure you aren’t about to expose a hidden failure.
The Chemical Aftermath Extends to Your Oxygen Sensors
Most technicians focus on the mechanical fix, but the chemical contamination of the exhaust stream is a silent killer. When glycol enters the combustion chamber, it coats the zirconium dioxide element of your O2 sensors. This leads to “lazy” sensors that don’t trigger a code immediately but cause poor fuel economy. When getting the most from your mechanic, ask specifically for a fuel trim analysis after any head gasket work.
Curated Expert Resources
SAE International Technical Papers: This is the gold standard for understanding the tribology of emulsified lubricants and how they destroy journal bearings under load. ASE Study Guides: Specifically the A1 (Engine Repair) and A8 (Engine Performance) modules provide the diagnostic flowcharts used by master technicians to differentiate between head gasket failures and oil cooler breaches. OEM Factory Service Manuals (FSM): Unlike generic guides, an FSM provides the exact torque-to-yield specs and sequence required to prevent a repeat failure, which is why following them is one of those auto repair myths debunked for those who think hand-tightening is sufficient. ASTM D3306 Standards: Essential reading for anyone wanting to understand the chemistry of coolant inhibitors and how they react to petroleum contamination.
Final Expert Perspective
Resolving the scenario where your engine oil looks like a milkshake requires more than just a new gasket and a bucket of fresh fluid; it demands a forensic approach to the entire cooling and lubrication ecosystem. From identifying the primary breach to mitigating the secondary effects on rubber hoses and catalytic converters, success lies in the details. Don’t let a “simple” fix turn into a repeat disaster by ignoring the latent chemical damage. For those looking to dive deeper into system health, check out the essential guide to auto repair or share your own diagnostic success stories in the comments below. Have you ever found a hidden crack that everyone else missed? Let’s discuss the professional tools you swear by.