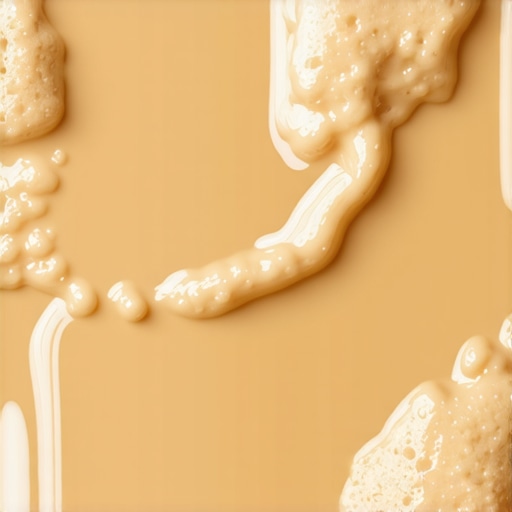
The appearance of an opaque, frothy emulsion on your oil filler cap or dipstick—commonly referred to in the industry as ‘the milkshake’—is more than a visual oddity; it is a clinical symptom of a compromised thermal management system. In the high-pressure environment of an internal combustion engine, the distinct paths for lubrication and cooling are designed to remain hermetically isolated. When these barriers fail, the resulting mixture of ethylene glycol and hydrocarbon-based lubricants creates a non-Newtonian fluid that lacks the viscosity required to protect critical metal surfaces. This structural breakdown of the oil is often the final warning before a catastrophic engine failure occurs, requiring extensive auto repair to rectify.
Why Oil and Water Finally Decide to Mix
The primary driver behind the ‘milkshake’ phenomenon is the emulsification of engine oil with water or coolant. Under normal operating temperatures, any trace amounts of moisture from condensation are evaporated and purged through the PCV system. However, when a significant volume of coolant enters the crankcase, the rapid churning of the crankshaft acts like a giant whisk, whipping the two incompatible liquids into a thick, beige sludge. This emulsion is highly problematic because it drastically reduces the fluid’s ability to flow through narrow oil galleries. High-level diagnostics by a professional mechanic are essential here, as the presence of this sludge indicates that the oil’s film strength has been decimated, leaving main bearings and cam lobes vulnerable to metal-on-metal contact.
The Hidden Culprits Beyond the Head Gasket
While most enthusiasts immediately point toward a blown head gasket, an expert analysis reveals several other sophisticated failure points. In many modern turbocharged or high-performance engines, an internal oil-to-coolant heat exchanger (oil cooler) can develop microscopic cracks. When the oil pressure exceeds the cooling system pressure, oil enters the radiator; conversely, when the engine is shut down and the cooling system remains pressurized, coolant is forced into the oiling system. Additionally, certain engine architectures utilize an intake manifold that carries coolant. A failure in the manifold gasket can lead to a slow, insidious leak that mimics a head gasket failure. Distinguishing between these requires more than a visual check; it often involves using a specialized test kit that stops head gasket panic by detecting the presence of CO2 in the expansion tank.
Could a Failed Oil Cooler Be Tricking You?
It is a common diagnostic trap to assume the worst-case scenario. If you find the milkshake consistency primarily in the radiator rather than the oil pan, the oil cooler is your most likely suspect. This component is designed to maintain thermal equilibrium, but thermal cycling eventually fatigues the internal brazing. To confirm this, a technician must pressure test the oil cooler independently of the engine block. Ignoring this nuance can lead to unnecessary and expensive engine teardowns when a simpler component replacement would have sufficed. For those performing a periodic tune up, always inspect the clarity of both fluids to catch these cross-contamination events early.
Save the Block Before the Bearings Seize
Once the ‘milkshake’ is present, the clock is ticking. The chemical additives in modern coolants are highly corrosive to the lead-tin-copper overlays found on engine bearings. According to technical standards from SAE International, even a 1% concentration of coolant in engine oil can increase wear rates by several hundred percent. The acidity of the mixture begins to etch the surfaces of the crankshaft journals almost immediately. If you suspect a breach, stop the engine and consult our guide on identifying a valve cover gasket issue versus internal structural leaks. Prompt intervention can mean the difference between a gasket replacement and a complete engine rebuild. Action Item: If you see creamy residue on your dipstick, do not attempt to ‘flush’ the engine with fresh oil until the source of the coolant entry is sealed and the cooling system is pressure-verified.
Don’t Ignore the Pink Sludge in Your Transmission
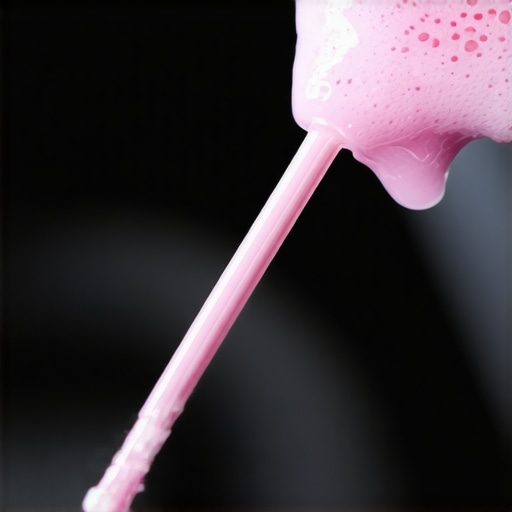
While the ‘beige milkshake’ in the engine is a nightmare, a ‘strawberry milkshake’ in your gearbox is equally catastrophic. This occurs when the internal cooler inside the radiator ruptures, allowing pressurized coolant to invade the transmission fluid circuit. Unlike engine oil, automatic transmission fluid (ATF) is highly sensitive to water; it can cause the friction material on clutch plates to delaminate almost instantly. If you notice a pink, foamy residue on your transmission dipstick, you must learn how to save your transmission after a radiator leak before the internal seals swell and fail. This is often where the dirty secret about lifetime transmission fluid comes into play—regular inspections might have caught the early signs of rust or scaling in the radiator before the breach occurred.
Is Your PCV Valve Mimicking a Blown Gasket?
It is vital to distinguish between a systemic failure and simple atmospheric condensation. In cold climates, vehicles driven on short trips often fail to reach full operating temperature for long enough to boil off moisture. This results in a thin layer of yellowish gunk on the bottom of the oil fill cap. Before you panic, check the dipstick; if the oil on the stick is clear but the cap is messy, you likely have a ventilation issue. Understanding how a clogged PCV valve can blow out your rear main seal is crucial here, as a restricted vent system traps that moisture, accelerating the sludge build-up. An expert mechanic will perform a crankcase pressure test to ensure the system is breathing correctly before recommending expensive head work.
Stop Guessing and Start Pressure Testing
Definitive diagnostics require more than just a flashlight and a prayer. A cooling system pressure tester is the gold standard for identifying exactly where the ‘milkshake’ is originating. By pressurizing the radiator to its rated cap pressure while the engine is off, a technician can listen for hissing or watch for fluid trickling into the cylinders or oil pan. These mechanic tips for diagnosing common auto problems often save hours of labor. According to the National Institute for Automotive Service Excellence (ASE), proper diagnostic sequencing—starting with a pressure test and following with a chemical block test—is the only way to avoid ‘parts cannon’ repairs that fail to fix the root cause.
Why Your Sensors Fail When Fluids Mix
The secondary damage of fluid cross-contamination extends to the vehicle’s electronic nervous system. When glycol burns in the combustion chamber, it coats the oxygen sensors and catalytic converter in a white, silicious residue that renders them sluggish or dead. This often triggers a cascade of trouble codes. You might find that the $12 sensor that fixes your rough idle is actually just the first victim of a much larger cooling leak. If you’ve been wondering about the real reason your check engine light keeps coming back on, it could be the chemical remnants of an old ‘milkshake’ event that was never properly cleaned from the exhaust stream. If you’re currently dealing with a suspected leak, share your symptoms in the comments below or read our guide on choosing a technician to ensure the job is done right the first time.
Why Glycol and ZDDP are a Lethal Combination
The chemical fallout from a ‘milkshake’ event goes deeper than mere thickening. When ethylene glycol enters the crankcase, it aggressively reacts with Zinc Dialkyldithiophosphate (ZDDP), the primary anti-wear additive in modern motor oils. This reaction forms abrasive salts and spherical ‘balls’ of sludge that are microscopic but devastating. These precipitates act as an abrasive paste, polishing away the cross-hatch pattern on cylinder walls and clogging the fine mesh screens of the oil pickup tube. This is why a simple oil change is rarely a permanent fix; the chemical remnants of the glycol continue to degrade the new oil’s additive package almost immediately upon contact. Experts in high-end auto repair know that neutralizing these acids requires a specialized chemical flush before the engine can be safely returned to service.
Chase the Glow to Find the Leak
When a pressure test remains inconclusive—often the case with hairline cracks that only expand under specific thermal loads—technicians turn to fluorescent tracer dyes. By adding a solvent-based UV dye to the cooling system and running the engine to operating temperature, you can use a high-intensity blacklight to spot the exact point of exit. This method is particularly effective for identifying cracks in the cylinder head casting or leaks behind the timing cover that drain directly into the oil pan. Unlike a standard visual inspection, the dye doesn’t lie; it provides a glowing trail that leads directly to the source of the contamination, allowing a mechanic to differentiate between a porous casting and a failed gasket. 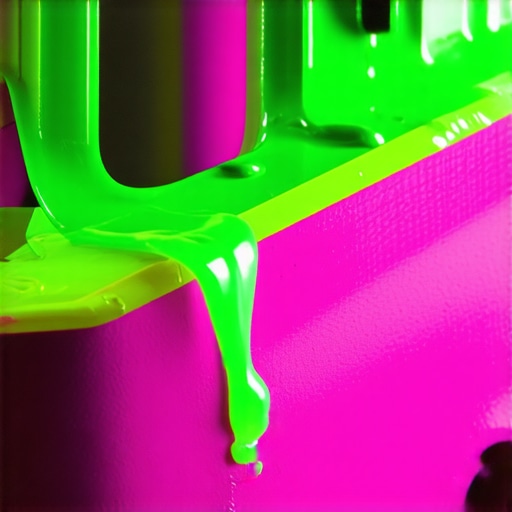
Does a ‘Milkshake’ Always Mean the Engine is Totaled?
The short answer depends entirely on the duration of exposure and the load the engine carried while contaminated. If the milky residue was caught during a routine tune up and the engine never overheated, the internal components might still be salvageable. However, if the vehicle was driven under heavy load, the loss of hydrodynamic lubrication likely caused the rod bearings to ‘wipe’ or transfer material to the crankshaft. To know for sure, you should pull the oil filter and cut it open; if you see sparkling metallic flakes—often called ‘gold dust’—the damage is already internal, and a rebuild is imminent. For a more scientific approach, professional labs use the ASTM D7922 standard to precisely measure the concentration of glycol, giving you a data-driven look at how much life your bearings have left.
Is Your Variable Valve Timing Already Suffocating?
Modern engines rely on Variable Valve Timing (VVT) solenoids and cam phasers that operate using ultra-thin oil passages, some no wider than a needle. The ‘milkshake’ sludge is the natural enemy of these systems. Even a small amount of emulsified oil can jam the spool valves within a VVT solenoid, leading to erratic idling, loss of power, and those dreaded P0011 or P0021 codes. This is often misdiagnosed as a sensor failure when it is actually a mechanical blockage caused by coolant entry. If you’ve been struggling with a rough idle, don’t just swap the sensor; check the oil quality first. The hydraulic complexity of modern engines means that the ‘milkshake’ doesn’t just hurt the bottom end; it cripples the engine’s ability to breathe and time its combustion events correctly. If you have experienced a sudden loss of power along with a cloudy dipstick, your first step should be a dedicated crankcase inspection to see if the VVT screens are already plugged with debris.
The Critical Role of Oil Analysis in Post-Repair Verification
Once the primary leak—be it a head gasket, oil cooler, or intake manifold—is repaired, the job isn’t finished. Residual moisture and glycol can hide in the oil galleries and oil pump for weeks. Professional engine builders recommend a ‘short-cycle’ oil change: run the engine for 30 minutes, then drain and refill again. After 500 miles, sending a sample to a lab like Blackstone or Polaris is the only way to ensure the ‘milkshake’ hasn’t left a lingering chemical footprint. This forensic look at your engine’s health can detect PPM (parts per million) levels of potassium and sodium, which are tell-tale signs of coolant. If these levels don’t drop after the second change, you may be facing a secondary leak or a cracked block that was missed during the initial teardown. Have you ever had a repair fail shortly after you thought it was fixed? Tell us your story in the comments so we can help troubleshoot the possible oversight.
The transition from a high-performance lubricant to a destructive slurry often involves more than a simple mechanical breach; it frequently signals a total failure of the engine’s metallurgical integrity. Beyond the obvious structural failures, we must examine the role of thermal shock—a phenomenon where rapid, uneven cooling causes aluminum cylinder heads to warp or crack. This is particularly prevalent in modern, lightweight alloy engines that utilize thin-wall castings to save weight. When a thermostat sticks or a cooling fan fails, the resulting hot spots can lead to localized boiling, creating internal pressures that force coolant past even the most robust multi-layer steel (MLS) gaskets. This isn’t just a failure of a seal; it is a fundamental shift in the engine’s geometry that requires a precision mechanic to measure with a machinist’s straightedge during any teardown.
Electrolysis is the Silent Chemical Thief Eating Your Gaskets
Perhaps the most overlooked cause of the ‘milkshake’ is the presence of stray electrical current within the cooling system. As coolant ages, its pH level drops and its sacrificial inhibitors are depleted, turning the fluid into a weak electrolyte. According to technical bulletins from the Motor & Equipment Manufacturers Association (MEMA), if an engine ground is loose or a high-draw component like an alternator is failing, electricity will find the path of least resistance through the coolant. This galvanic action literally erodes the metal surfaces of the radiator, heater core, and head gaskets from the inside out. Over time, this creates pinhole leaks that allow coolant to seep into the oiling circuit. Detecting this requires a digital multimeter; any reading over 0.3 volts between the coolant and the negative battery terminal indicates a system that is actively self-destructing. 
Can a High-Voltage Leak in Your Cooling System Mimic a Blown Gasket?
The short answer is yes, and it is a diagnostic nightmare for those who rely solely on visual inspections. When electrolysis compromises the integrity of a gasket, the resulting leak is often microscopic and intermittent, appearing only when the system is under specific electrical loads. This can lead to a ‘phantom milkshake’ that disappears after a simple oil change, only to return a month later. If you are performing a tune up and notice a slight discoloration in the coolant, do not ignore it. A chemical flush and a dedicated ground strap installation are significantly cheaper than a full auto repair involving a cylinder head replacement.
Purge the Ghost of Glycol with Specialized Alkaline Flushes
Once the source of the contamination is sealed, you face the Herculean task of removing the ‘milkshake’ residue. Standard motor oil is not designed to carry water in suspension, and traditional detergents are easily overwhelmed by glycol. Using a generic solvent or kerosene—a common ‘old school’ trick—can actually damage modern rubber seals and cause them to swell. Instead, professional technicians utilize aqueous alkaline cleaners specifically formulated to break the molecular bond between the oil and the water. This ensures that the VVT screens and oil pump pickups are completely clear of the sticky, acidic varnish left behind by the emulsion. Without this step, your new oil will be contaminated before you even finish your first test drive. If you’ve ever dealt with a recurring sludge issue despite multiple oil changes, tell us about the symptoms you’re seeing in the comments below; it might be time for a more aggressive chemical decontamination approach.
The appearance of an opaque, frothy emulsion on your oil filler cap or dipstick—commonly referred to in the industry as ‘the milkshake’—is more than a visual oddity; it is a clinical symptom of a compromised thermal management system. In the high-pressure environment of an internal combustion engine, the distinct paths for lubrication and cooling are designed to remain hermetically isolated. When these barriers fail, the resulting mixture of ethylene glycol and hydrocarbon-based lubricants creates a non-Newtonian fluid that lacks the viscosity required to protect critical metal surfaces. This structural breakdown of the oil is often the final warning before a catastrophic engine failure occurs, requiring extensive auto repair to rectify.
Why Oil and Water Finally Decide to Mix
The primary driver behind the ‘milkshake’ phenomenon is the emulsification of engine oil with water or coolant. Under normal operating temperatures, any trace amounts of moisture from condensation are evaporated and purged through the PCV system. However, when a significant volume of coolant enters the crankcase, the rapid churning of the crankshaft acts like a giant whisk, whipping the two incompatible liquids into a thick, beige sludge. This emulsion is highly problematic because it drastically reduces the fluid’s ability to flow through narrow oil galleries. High-level diagnostics by a professional mechanic are essential here, as the presence of this sludge indicates that the oil’s film strength has been decimated, leaving main bearings and cam lobes vulnerable to metal-on-metal contact.
The Hidden Culprits Beyond the Head Gasket
While most enthusiasts immediately point toward a blown head gasket, an expert analysis reveals several other sophisticated failure points. In many modern turbocharged or high-performance engines, an internal oil-to-coolant heat exchanger (oil cooler) can develop microscopic cracks. When the oil pressure exceeds the cooling system pressure, oil enters the radiator; conversely, when the engine is shut down and the cooling system remains pressurized, coolant is forced into the oiling system. Additionally, certain engine architectures utilize an intake manifold that carries coolant. A failure in the manifold gasket can lead to a slow, insidious leak that mimics a head gasket failure. Distinguishing between these requires more than a visual check; it often involves using a specialized test kit that stops head gasket panic by detecting the presence of CO2 in the expansion tank.
Could a Failed Oil Cooler Be Tricking You?
It is a common diagnostic trap to assume the worst-case scenario. If you find the milkshake consistency primarily in the radiator rather than the oil pan, the oil cooler is your most likely suspect. This component is designed to maintain thermal equilibrium, but thermal cycling eventually fatigues the internal brazing. To confirm this, a technician must pressure test the oil cooler independently of the engine block. Ignoring this nuance can lead to unnecessary and expensive engine teardowns when a simpler component replacement would have sufficed. For those performing a periodic tune up, always inspect the clarity of both fluids to catch these cross-contamination events early.
Save the Block Before the Bearings Seize
Once the ‘milkshake’ is present, the clock is ticking. The chemical additives in modern coolants are highly corrosive to the lead-tin-copper overlays found on engine bearings. According to technical standards from SAE International, even a 1% concentration of coolant in engine oil can increase wear rates by several hundred percent. The acidity of the mixture begins to etch the surfaces of the crankshaft journals almost immediately. If you suspect a breach, stop the engine and consult our guide on identifying a valve cover gasket issue versus internal structural leaks. Prompt intervention can mean the difference between a gasket replacement and a complete engine rebuild. Action Item: If you see creamy residue on your dipstick, do not attempt to ‘flush’ the engine with fresh oil until the source of the coolant entry is sealed and the cooling system is pressure-verified.
Don’t Ignore the Pink Sludge in Your Transmission
While the ‘beige milkshake’ in the engine is a nightmare, a ‘strawberry milkshake’ in your gearbox is equally catastrophic. This occurs when the internal cooler inside the radiator ruptures, allowing pressurized coolant to invade the transmission fluid circuit. Unlike engine oil, automatic transmission fluid (ATF) is highly sensitive to water; it can cause the friction material on clutch plates to delaminate almost instantly. If you notice a pink, foamy residue on your transmission dipstick, you must learn how to save your transmission after a radiator leak before the internal seals swell and fail. This is often where the dirty secret about lifetime transmission fluid comes into play—regular inspections might have caught the early signs of rust or scaling in the radiator before the breach occurred.
Is Your PCV Valve Mimicking a Blown Gasket?
It is vital to distinguish between a systemic failure and simple atmospheric condensation. In cold climates, vehicles driven on short trips often fail to reach full operating temperature for long enough to boil off moisture. This results in a thin layer of yellowish gunk on the bottom of the oil fill cap. Before you panic, check the dipstick; if the oil on the stick is clear but the cap is messy, you likely have a ventilation issue. Understanding how a clogged PCV valve can blow out your rear main seal is crucial here, as a restricted vent system traps that moisture, accelerating the sludge build-up. An expert mechanic will perform a crankcase pressure test to ensure the system is breathing correctly before recommending expensive head work.
Stop Guessing and Start Pressure Testing
Definitive diagnostics require more than just a flashlight and a prayer. A cooling system pressure tester is the gold standard for identifying exactly where the ‘milkshake’ is originating. By pressurizing the radiator to its rated cap pressure while the engine is off, a technician can listen for hissing or watch for fluid trickling into the cylinders or oil pan. These mechanic tips for diagnosing common auto problems often save hours of labor. According to the National Institute for Automotive Service Excellence (ASE), proper diagnostic sequencing—starting with a pressure test and following with a chemical block test—is the only way to avoid ‘parts cannon’ repairs that fail to fix the root cause.
Why Your Sensors Fail When Fluids Mix
The secondary damage of fluid cross-contamination extends to the vehicle’s electronic nervous system. When glycol burns in the combustion chamber, it coats the oxygen sensors and catalytic converter in a white, silicious residue that renders them sluggish or dead. This often triggers a cascade of trouble codes. You might find that the $12 sensor that fixes your rough idle is actually just the first victim of a much larger cooling leak. If you’ve been wondering about the real reason your check engine light keeps coming back on, it could be the chemical remnants of an old ‘milkshake’ event that was never properly cleaned from the exhaust stream. If you’re currently dealing with a suspected leak, share your symptoms in the comments below or read our guide on choosing a technician to ensure the job is done right the first time.
Why Glycol and ZDDP are a Lethal Combination
The chemical fallout from a ‘milkshake’ event goes deeper than mere thickening. When ethylene glycol enters the crankcase, it aggressively reacts with Zinc Dialkyldithiophosphate (ZDDP), the primary anti-wear additive in modern motor oils. This reaction forms abrasive salts and spherical ‘balls’ of sludge that are microscopic but devastating. These precipitates act as an abrasive paste, polishing away the cross-hatch pattern on cylinder walls and clogging the fine mesh screens of the oil pickup tube. This is why a simple oil change is rarely a permanent fix; the chemical remnants of the glycol continue to degrade the new oil’s additive package almost immediately upon contact. Experts in high-end auto repair know that neutralizing these acids requires a specialized chemical flush before the engine can be safely returned to service.
Chase the Glow to Find the Leak
When a pressure test remains inconclusive—often the case with hairline cracks that only expand under specific thermal loads—technicians turn to fluorescent tracer dyes. By adding a solvent-based UV dye to the cooling system and running the engine to operating temperature, you can use a high-intensity blacklight to spot the exact point of exit. This method is particularly effective for identifying cracks in the cylinder head casting or leaks behind the timing cover that drain directly into the oil pan. Unlike a standard visual inspection, the dye doesn’t lie; it provides a glowing trail that leads directly to the source of the contamination, allowing a mechanic to differentiate between a porous casting and a failed gasket.
Does a ‘Milkshake’ Always Mean the Engine is Totaled?
The short answer depends entirely on the duration of exposure and the load the engine carried while contaminated. If the milky residue was caught during a routine tune up and the engine never overheated, the internal components might still be salvageable. However, if the vehicle was driven under heavy load, the loss of hydrodynamic lubrication likely caused the rod bearings to ‘wipe’ or transfer material to the crankshaft. To know for sure, you should pull the oil filter and cut it open; if you see sparkling metallic flakes—often called ‘gold dust’—the damage is already internal, and a rebuild is imminent. For a more scientific approach, professional labs use the ASTM D7922 standard to precisely measure the concentration of glycol, giving you a data-driven look at how much life your bearings have left.
Is Your Variable Valve Timing Already Suffocating?
Modern engines rely on Variable Valve Timing (VVT) solenoids and cam phasers that operate using ultra-thin oil passages, some no wider than a needle. The ‘milkshake’ sludge is the natural enemy of these systems. Even a small amount of emulsified oil can jam the spool valves within a VVT solenoid, leading to erratic idling, loss of power, and those dreaded P0011 or P0021 codes. This is often misdiagnosed as a sensor failure when it is actually a mechanical blockage caused by coolant entry. If you’ve been struggling with a rough idle, don’t just swap the sensor; check the oil quality first. The hydraulic complexity of modern engines means that the ‘milkshake’ doesn’t just hurt the bottom end; it cripples the engine’s ability to breathe and time its combustion events correctly. If you have experienced a sudden loss of power along with a cloudy dipstick, your first step should be a dedicated crankcase inspection to see if the VVT screens are already plugged with debris.
The Critical Role of Oil Analysis in Post-Repair Verification
Once the primary leak—be it a head gasket, oil cooler, or intake manifold—is repaired, the job isn’t finished. Residual moisture and glycol can hide in the oil galleries and oil pump for weeks. Professional engine builders recommend a ‘short-cycle’ oil change: run the engine for 30 minutes, then drain and refill again. After 500 miles, sending a sample to a lab like Blackstone or Polaris is the only way to ensure the ‘milkshake’ hasn’t left a lingering chemical footprint. This forensic look at your engine’s health can detect PPM (parts per million) levels of potassium and sodium, which are tell-tale signs of coolant. If these levels don’t drop after the second change, you may be facing a secondary leak or a cracked block that was missed during the initial teardown. Have you ever had a repair fail shortly after you thought it was fixed? Tell us your story in the comments so we can help troubleshoot the possible oversight.
The transition from a high-performance lubricant to a destructive slurry often involves more than a simple mechanical breach; it frequently signals a total failure of the engine’s metallurgical integrity. Beyond the obvious structural failures, we must examine the role of thermal shock—a phenomenon where rapid, uneven cooling causes aluminum cylinder heads to warp or crack. This is particularly prevalent in modern, lightweight alloy engines that utilize thin-wall castings to save weight. When a thermostat sticks or a cooling fan fails, the resulting hot spots can lead to localized boiling, creating internal pressures that force coolant past even the most robust multi-layer steel (MLS) gaskets. This isn’t just a failure of a seal; it is a fundamental shift in the engine’s geometry that requires a precision mechanic to measure with a machinist’s straightedge during any teardown.
Electrolysis is the Silent Chemical Thief Eating Your Gaskets
Perhaps the most overlooked cause of the ‘milkshake’ is the presence of stray electrical current within the cooling system. As coolant ages, its pH level drops and its sacrificial inhibitors are depleted, turning the fluid into a weak electrolyte. According to technical bulletins from the Motor & Equipment Manufacturers Association (MEMA), if an engine ground is loose or a high-draw component like an alternator is failing, electricity will find the path of least resistance through the coolant. This galvanic action literally erodes the metal surfaces of the radiator, heater core, and head gaskets from the inside out. Over time, this creates pinhole leaks that allow coolant to seep into the oiling circuit. Detecting this requires a digital multimeter; any reading over 0.3 volts between the coolant and the negative battery terminal indicates a system that is actively self-destructing.
Can a High-Voltage Leak in Your Cooling System Mimic a Blown Gasket?
The short answer is yes, and it is a diagnostic nightmare for those who rely solely on visual inspections. When electrolysis compromises the integrity of a gasket, the resulting leak is often microscopic and intermittent, appearing only when the system is under specific electrical loads. This can lead to a ‘phantom milkshake’ that disappears after a simple oil change, only to return a month later. If you are performing a tune up and notice a slight discoloration in the coolant, do not ignore it. A chemical flush and a dedicated ground strap installation are significantly cheaper than a full auto repair involving a cylinder head replacement.
Purge the Ghost of Glycol with Specialized Alkaline Flushes
Once the source of the contamination is sealed, you face the Herculean task of removing the ‘milkshake’ residue. Standard motor oil is not designed to carry water in suspension, and traditional detergents are easily overwhelmed by glycol. Using a generic solvent or kerosene—a common ‘old school’ trick—can actually damage modern rubber seals and cause them to swell. Instead, professional technicians utilize aqueous alkaline cleaners specifically formulated to break the molecular bond between the oil and the water. This ensures that the VVT screens and oil pump pickups are completely clear of the sticky, acidic varnish left behind by the emulsion. Without this step, your new oil will be contaminated before you even finish your first test drive. If you’ve ever dealt with a recurring sludge issue despite multiple oil changes, tell us about the symptoms you’re seeing in the comments below; it might be time for a more aggressive chemical decontamination approach.
Expert Insights & Advanced Considerations
Check Operating-Temperature Pressure on Alloy Heads
Many technicians rely on a machinist’s straightedge to check for warpage, but modern aluminum alloys can hide porous ‘micro-coring’ caused by thermal shock. A head that appears flat at room temperature may lose its metallurgical integrity and leak only under operational heat. Advanced auto repair facilities now prioritize hot-pressure testing to identify these hairline failures before reassembly.
The Risk of Acidic Ghosting in Variable Valve Timing
Residual glycol forms a sticky varnish that standard oil flushes often miss. This residue frequently hides in the microscopic screens of VVT solenoids, leading to ‘phantom’ timing codes long after the main repair. If your engine stumbles post-fix, the issue is likely a chemical remnant rather than a failed sensor.
Why High-Ethanol Environments Worsen Emulsification
Fuel with high ethanol content produces significantly more moisture during combustion. In a compromised engine, this extra humidity acts as a catalyst, accelerating the ‘milkshake’ formation. Ensuring your tune up includes a thorough PCV inspection is vital to prevent atmospheric moisture from compounding a minor internal leak.
Curated Expert Resources
Blackstone Laboratories Fluid Analysis
Essential for forensic engine health tracking. Their reports detect PPM markers of coolant (potassium and sodium) long before the oil turns cloudy, allowing for preventative intervention.
ASE Advanced Engine Performance Specialist (L1) Guides
The definitive resource for understanding the complex electronic triggers caused by fluid cross-contamination, including oxygen sensor poisoning and catalytic efficiency codes.
SAE Technical Paper Library
Academic research on ZDDP depletion. These papers provide the chemical proof of why glycol and engine oil additives create abrasive precipitates that destroy crankshaft journals.
Final Expert Perspective
Navigating the ‘milkshake’ phenomenon requires moving beyond basic visual checks and embracing deep-system forensics. The chemical interaction between glycol and engine oil creates a destructive environment that threatens the very core of your vehicle’s longevity. Whether you are dealing with electrolysis eating your gaskets from the inside out or a ruptured internal cooler, the priority remains a precise, data-driven auto repair. Don’t let a slurry of contaminated fluids compromise your engine’s future. For more advanced troubleshooting or to find a technician who understands these complexities, explore our latest mechanic tips for diagnosing common auto problems or reach out to our community for expert guidance.