
Every seasoned mechanic understands that the most complex electrical failures often have the simplest root causes. Intermittent no-start issues, where the car clicks or remains silent one moment and fires up perfectly the next, are rarely caused by a catastrophic starter failure. Instead, they are frequently the result of microscopic gaps and oxidation layers between the battery post and the terminal clamp. This phenomenon, known as high-resistance contact, creates a voltage drop that starves the ignition system during the high-amperage demand of a cold crank. Professional auto repair isn’t just about replacing parts; it’s about restoring the electrical integrity of the entire circuit before recommending a costly tune up or component replacement.
Resistance Is the Silent Killer of Modern Ignition Systems
In the world of automotive diagnostics, we often look at the ‘big three’: air, fuel, and spark. However, the foundation of all three is a stable 12.6V supply. Even a thin layer of lead sulfate or oxidation on the battery terminals acts as an insulator. When you turn the key, the starter motor attempts to draw 150 to 250 amps. If the connection is compromised, that current is converted into heat at the terminal rather than kinetic energy at the flywheel. This is why you might see your dash lights dim or flicker when attempting to start the vehicle. While you are checking your electrical connections, it is also the perfect time to evaluate your safety systems; for example, regular brake service is another critical pillar of vehicle longevity that many owners overlook until it’s too late.
Why Micro-Corrosion Trumps Tightness
Many drivers assume that because a terminal is ‘tight’ and cannot be moved by hand, the connection is solid. This is a common misconception in the garage. Lead is a soft metal, and over time, heat cycles cause the terminals to expand and contract, allowing moisture to seep into the interface. According to technical documentation from the Society of Automotive Engineers (SAE), even a 0.1-ohm increase in resistance can cause a significant voltage drop that prevents the engine control module (ECM) from authorizing a start. If your car exhibits these symptoms, don’t ignore other subtle warnings, such as mystery electrical gremlins that often stem from similar grounding issues.
Stop Chasing Phantoms With a Precision Cleaning Routine
The fix takes less than ten minutes but requires more than a simple wipe-down. First, disconnect the negative terminal, followed by the positive. Use a dedicated terminal brush to scour the posts until they shine like polished silver. This removes the ‘glaze’ that prevents electron flow. Before reconnecting, apply a thin layer of dielectric grease or a terminal protector spray. This doesn’t just improve current flow; it seals out the oxygen that fuels future oxidation. While you have the hood up, check your other fluids and belts to ensure you aren’t missing the signs that a more comprehensive tune up is necessary to maintain peak performance.
Why Does Your Car Start in the Morning but Fail After a Drive?
This is a classic ‘heat soak’ scenario. Heat increases electrical resistance. A terminal connection that is ‘just good enough’ to start a cold engine may fail once the engine bay reaches operating temperature. The metal expands, the resistance peaks, and suddenly you are stranded at a gas station with a car that won’t turn over. If you find yourself frequently dealing with these inconsistencies, you might need to use this 10-multimeter trick to see if your alternator is actually the culprit behind the weak charge. Are you struggling with a specific electrical mystery? Join our community of experts and share your diagnostic story in the comments below to help others stay on the road.
Look Beyond the Battery to the Chassis Ground
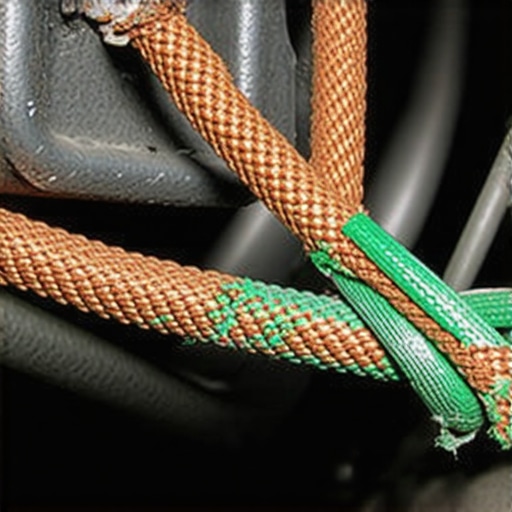
Modern vehicles rely on the metallic chassis itself as a massive return path for electricity. If the battery is the heart of the car, the ground straps are the veins that allow the lifeblood of current to return and circulate. Over years of driving in humid or salt-heavy environments, the connection points where these braided cables meet the frame often suffer from invisible oxidation. When this happens, the return path is restricted, forcing electricity to find alternative, “dirty” routes through throttle cables, transmission linkages, or delicate sensor wiring. If your vehicle experiences a rough idle that defies standard fixes, the culprit might not be a faulty sensor at all, but a single loose ground bolt hidden under the battery tray.
Could a Rusty Bolt Be Fooling Your Transmission Sensors?
The answer is a resounding yes. Modern automatic transmissions use electromagnetic solenoids that are incredibly sensitive to voltage fluctuations. When a ground strap becomes frayed or brittle, the transmission control module (TCM) may receive “noisy” electrical signals that it interprets as mechanical data. This results in harsh shifting, delayed engagement, or the dreaded limp mode. Technical experts at ASE (Automotive Service Excellence) emphasize that diagnosing a transmission fault should always begin with a voltage drop test on the ground circuit before assuming internal mechanical failure. Many car owners spend thousands on rebuilds when the $15 ground strap fix would have solved the erratic shifting behavior instantly.
Keep Your High-Tech Components Safe During Service
While performing any auto repair involving the electrical system, the sequence of operations is paramount. Most modern vehicles house dozens of networked computers that communicate via the CAN-bus system. A sudden surge or an improper jump-start can permanently damage a communication module. When you are looking for expert mechanic tips for diagnosing problems, always prioritize using a memory saver tool if you must disconnect the battery for long periods. This keeps the keep-alive memory (KAM) intact for the engine control module (ECM). Without it, your car might “forget” its idle trim values and shift points, leading to poor fuel economy and awkward drivability for the first fifty miles after the repair.
In the same vein, a dirty Mass Air Flow (MAF) sensor can cause the computer to miscalculate the air-to-fuel ratio, leading to a “ghost” lean condition that triggers a check engine light. Before you spend hundreds on a replacement part, consider the $10 cleaning move that restores sensor accuracy. These small, precision steps are what separate a professional-grade tune up from a “parts cannon” approach where components are replaced blindly. Low voltage doesn’t just affect the starter; it can cripple your timing. Many modern engines use Variable Valve Timing (VVT) solenoids that rely on precise pulses of current to adjust oil flow. If your battery or alternator is weak, these solenoids may lag, triggering codes that look like a mechanical catastrophe. Using quality oil and maintaining voltage are the two best ways to keep these systems functional and avoid expensive teardowns.
Have you ever fixed a major engine issue by simply tightening a loose wire? Tell us about your most surprising “easy fix” in the comments, or share this guide with a friend who is currently battling a mystery car problem to help them save on unnecessary repairs!
Even with clean terminals and solid grounds, a battery can still fail overnight if a parasitic draw is at play. In the modern auto repair landscape, vehicles never truly turn off; they enter a sleep mode where current consumption should drop to less than 50 milliamps. However, a single stuck relay or a malfunctioning infotainment module can keep the CAN-bus awake, draining the battery’s reserve capacity. To diagnose this, you must perform a fuse-by-fuse voltage drop test rather than pulling fuses one by one, which can accidentally wake up sleeping modules and provide a false reading. If you’ve recently had a tune up and the car still struggles after sitting for two days, a parasitic draw is the likely culprit.
Does a ‘Good’ Voltage Reading Guarantee a Healthy Alternator?
Many DIYers believe that a reading of 14.2V at the battery means the charging system is perfect. This is a dangerous assumption. An alternator’s job is to convert Alternating Current (AC) into Direct Current (DC) via a diode bridge. If one of those diodes fails, the alternator may still output the correct DC voltage, but it will also leak AC ripple into the system. This dirty electricity acts like static on a radio, interfering with the high-speed data packets sent between the engine and transmission controllers. According to the Bosch Automotive Handbook, any AC ripple exceeding 500mV can cause erratic sensor behavior and eventually degrade the internal capacitors of the ECM.
Kill the AC Ripple Before It Fries Your Electronics
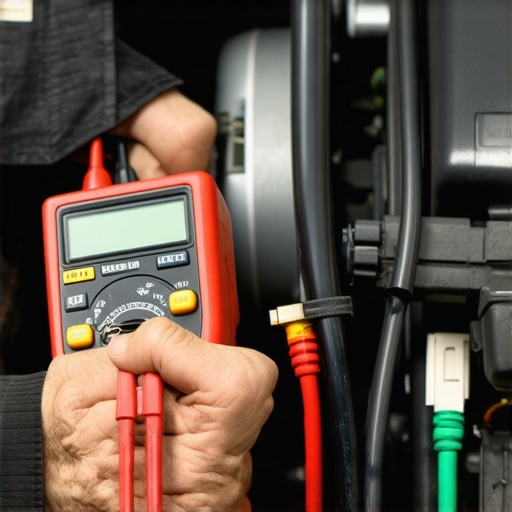
Detecting this hidden killer requires switching your multimeter to the AC voltage setting while the engine is running. If you see a climbing AC value, your alternator is effectively poisoning your car’s brain. This is a common reason why some mechanics struggle with intermittent stalling or no communication codes that seem to disappear and reappear without logic. Replacing a failing alternator before the diode bridge completely collapses is a proactive step that protects every other electronic component in the car. For those looking to dive deeper into component health, checking your charging system health early can prevent a tow truck bill later this winter.
Why Connector Pin Tension Is Your Final Frontier
Sometimes the wires and the battery are fine, but the connection inside the plastic harness fails. Over time, vibration and heat cause the female pins within a connector to spread apart, losing their spring tension. This creates a high-resistance point that a visual inspection will never find. Experienced technicians use a pin drag test to ensure that the male terminal fits snugly. If the pin slides out too easily, the intermittent connection will cause the sensor to send erratic data to the computer, often resulting in a check engine light that won’t go away even after a tune up. Next time you’re under the hood, give your main harness connectors a gentle wiggle; if the engine stumbles, you’ve found your ghost.
Master the Voltage Drop Test to Stop Guessing
While a continuity test tells you if a wire is broken, only a voltage drop test tells you if a wire can actually carry a load. Imagine a garden hose with a tiny pinhole; it might still let a trickle of water through, but it won’t power a pressure washer. Similarly, a battery cable with 90% of its strands corroded will still show 12V on a meter, but it will fail the moment the starter demands 200 amps. By measuring the voltage difference between the battery post and the starter terminal while cranking, a mechanic can pinpoint exactly where energy is being lost. Any drop higher than 0.5V across a main power cable indicates a failure that no amount of cleaning will fix. This precision approach is especially vital when dealing with the high-amperage circuits of electric power steering racks, which can pull massive current during tight maneuvers.
While cleaning your battery terminals is a vital first step, a professional auto repair strategy must also account for the chemical war happening at every grounding point. Galvanic corrosion occurs when two dissimilar metals—like a copper ground lug and an aluminum engine block—are joined in the presence of an electrolyte, such as road salt or humidity. This electrochemical reaction creates an insulating layer of aluminum oxide that appears as a fine white powder. Because aluminum oxide is a non-conductive ceramic, it can effectively isolate your engine from the battery’s negative terminal while the bolt still feels perfectly tight to a wrench. To combat this, elite mechanics use specialized conductive grease formulated to prevent oxidation between dissimilar alloys, ensuring the tune up you performed remains effective through the harshest winter months.
Stop Dissimilar Metals From Silently Rotting Your Engine Grounds
The danger of galvanic corrosion is its invisibility; the outer surface of the connection may look clean while the interface between the lug and the block is completely compromised. This creates an intermittent high-resistance path that can fluctuate with engine vibration. When you are performing a comprehensive tune up, it is standard practice to remove the ground bolt entirely, sand both surfaces to bare metal, and apply an anti-corrosive barrier. This simple step prevents the electrical ‘noise’ that often triggers false sensor readings in the powertrain control module (PCM). For those dealing with high-mileage vehicles, this level of attention to detail is what separates a long-lasting fix from a temporary patch.

How Does a Faulty Ignition Switch Mimic a Dead Battery?
An ignition switch is more than just a mechanical tumbler; it is a high-current distributor designed to route power to multiple critical circuits simultaneously. Over years of operation, the internal copper contacts can pit, arc, and carbonize due to the constant load. This leads to a scenario where you turn the key and hear nothing—no click, no fuel pump prime—mimicking a completely dead battery. Because the symptoms are nearly identical to a loose terminal or a failed starter, many owners replace expensive components unnecessarily. A quick diagnostic involves checking for 12V at the ‘S’ terminal of the starter solenoid while the key is in the ‘start’ position. According to the Institute of Electrical and Electronics Engineers (IEEE), specifically within their technical guidelines for power quality in mobile environments (IEEE Std 1100), maintaining low-impedance pathways at these switching points is critical for preventing thermal runaway and signal degradation in modern automotive control modules.
Shield the Five-Volt Reference Loop Against Internal Sensor Shorts
Advanced auto repair requires a shift in perspective: seeing the car not just as a mechanical assembly, but as a sensitive electronic network. Most sensors, from the throttle position sensor (TPS) to the manifold absolute pressure (MAP) sensor, share a common 5V reference signal provided by the PCM. If a single sensor, such as a shorted-out A/C pressure switch or a crank position sensor with internal moisture, pulls this 5V line to ground, the entire engine management system will crash. This often presents as a ‘no communication’ fault when trying to connect a scan tool. Instead of assuming the PCM is dead, a skilled tech will unplug sensors one by one until the 5V reference returns on the multimeter. This methodical isolation is the hallmark of a high-level tune up that prioritizes logic over guesswork.
Verify Communication Integrity at the Data Link Connector
When your dashboard lights up with multiple warning lamps and your transmission enters ‘limp mode,’ the issue might be a physical break in the data stream rather than a mechanical failure. Modern vehicles communicate via a Twisted Pair network called the Controller Area Network (CAN). This system relies on two 120-ohm terminating resistors wired in parallel, which should result in a total network resistance of 60 ohms. By probing pins 6 and 14 on your OBD-II port with the battery disconnected, you can verify the physical health of the communication backbone. A reading of 120 ohms suggests a broken wire or a failed gateway module, while 0 ohms indicates a direct short. Mastering these data-layer diagnostics ensures that your auto repair solutions address the root cause of ‘phantom’ codes rather than just clearing them temporarily. Are you tired of chasing intermittent electrical failures that only appear when it rains? Share your diagnostic struggles with our community of experts in the comments below, and let’s solve your car’s electrical mysteries together.
Expert Insights & Advanced Considerations
Thermal Scans Catch Hidden Hotspots Before They Melt
A seasoned mechanic knows that resistance generates heat. By using a thermal imaging camera during a heavy engine crank, you can instantly see glowing connections that indicate internal corrosion. This is a far more efficient method of auto repair than manual disassembly, as it pinpoints exactly where the circuit is choking under load before components fail completely.
Resting Voltage Results Hide the Truth About Battery Health
A battery showing 12.6V on a multimeter can still fail instantly under a 200-amp load. True diagnostic mastery requires a carbon pile load tester or an electronic conductance tester. If you are performing a tune up, never rely on a resting voltage; always observe the voltage drop during the starting event to ensure the lead plates can still move electrons at scale. Many drivers overlook this, making it one of the most common auto repair myths debunked in professional shops.
Precision Shunts Beat Traditional Ammeters for Parasitic Draw
Opening a circuit to insert a standard ammeter can accidentally wake up the vehicle’s modules, ruining your diagnostic baseline. Experts use a precision shunt or measure the millivolt drop across individual fuses. This non-intrusive technique allows you to identify the specific circuit draining power without disturbing the car’s sleep state. For more DIY-friendly methods, check out 3 ways to test your battery without any tools to get a head start on your diagnosis.
Curated Expert Resources
ASE Technical Bulletins: These provide the gold standard for specific vehicle electrical schematics and known factory defects that mimic common battery failures. They are essential for a professional-grade tune up of the electrical system.
The Bosch Automotive Handbook: A deep-dive technical manual that explains the physics of AC ripple and diode bridge failure in excruciating detail, a must-read for anyone serious about auto repair.
ScannerDanner Waveform Library: This is an incredible resource for visual learners who want to see how a failing alternator affects the CAN-bus data stream on an oscilloscope.
Final Expert Perspective
Electrical integrity is the bedrock of modern vehicle performance. Whether you are performing a routine tune up or a complex brake service that involves electronic calipers, the quality of your grounds and the cleanliness of your terminals dictate the success of the repair. Don’t let a $15 part trick you into a $1,500 replacement. By mastering voltage drop tests and identifying ghost resistance, you ensure your auto repair remains permanent rather than a temporary patch. If you are still hunting for the source of your car’s erratic behavior, consider how to choose a skilled mechanic you can trust who uses these advanced diagnostic tools. What is the most frustrating electrical gremlin you have ever faced? Connect with our team at our contact page or share your story below to help our community stay informed. #IMAGE_PLACEHOLDER_E#