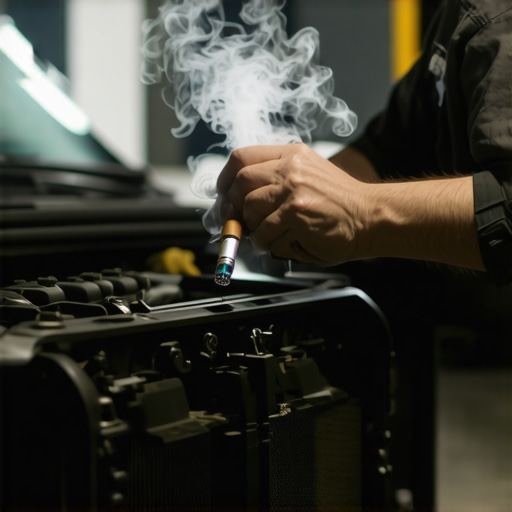
Unmetered air entering an internal combustion engine is one of the most frustrating variables a technician faces during diagnostics. When the engine control unit (ECU) detects more oxygen than the mass airflow (MAF) sensor has accounted for, it struggles to maintain the stoichiometric 14.7:1 air-fuel ratio. This imbalance often presents itself as a erratic idle, stalling, or a stubborn P0171 lean code. While professional smoke machines cost hundreds of dollars, experienced mechanics rely on a classic, field-tested alternative: using a simple cigar to pressurize the intake tract. This elegant diagnostic hack allows you to trace microscopic leaks visually without expensive shop equipment.
The Physics of Unmetered Air and Why Modern Engines Fail
Modern vehicle management systems are highly sensitive to vacuum deviations. The manifold absolute pressure (MAP) and MAF sensors continuously communicate with the ECU to fine-tune fuel injector pulse width. Even a minor leak in a plastic intake plenum or a degraded vacuum line can cause a major driveability issue, such as why your car stumbles at red lights but runs fine on the highway. Standard diagnostics usually involve spraying volatile aerosol chemicals around the intake manifold, but this method is highly flammable and fails to pinpoint leaks hidden on the underside of hoses or deep within the engine bay. Utilizing pressurized smoke remains the safest, most precise way to isolate structural failures in the air intake network.
Step-by-Step Guide to the Cigar Smoke Method
To execute this test safely, ensure the engine is completely cool and turned off. Locate the main intake boot and disconnect it from the air filter box. Seal the opening of the boot using a nitrile glove and rubber bands, or a plastic cap, to prevent smoke from escaping. Next, locate a reliable vacuum access port, such as the brake booster supply hose or a small PCV line. After lighting a robust, premium cigar, draw smoke into your mouth and gently blow it through the disconnected vacuum hose into the intake manifold. Hold pressure in the system by capping the hose with your thumb between breaths. Within seconds, thick white smoke will begin to seep out of any compromised gaskets, hairline cracks, or failed diaphragms.
Advanced Diagnostics for Hard-to-Find Vacuum Gremlins
In many scenarios, the leak is not located within a prominent hose, but rather beneath the intake manifold assembly or inside a vacuum-operated actuator. For instance, a small leak under the manifold can easily lead to a misdiagnosis, tricking technicians into performing complex and unnecessary driveline overhauls. This is similar to how a 9 dollar vacuum hose tricks drivers into a transmission overhaul when the shifting issues are actually caused by engine load miscalculations. If you suspect a leak but the cigar smoke is too thin to detect, you can also utilize a wet-method alternative. Knowing how to find an intake leak using only a 5 dollar bottle of soapy water is another highly effective technique, as escaping air will produce visible bubbles around the compromised mating surface.
Why does my engine surge only when the vehicle comes to a complete stop?
When you press the brake pedal, you actuate the brake booster, which relies heavily on manifold vacuum to assist braking force. If the internal diaphragm of the brake booster is ruptured, pressing the pedal introduces a massive rush of unmetered air directly into the intake manifold, causing a lean spike. This sudden lean condition forces the ECU to rapidly dump fuel to prevent a stall, resulting in a dramatic RPM surge. If you experience this issue alongside a stiff pedal, consider investigating the booster connection during your next brake service. For more technical deep dives, explore our expert-level guide on diagnosing common auto problems to sharpen your troubleshooting skills. According to the Society of Automotive Engineers (SAE), systematic isolation of vacuum subsystems is the most reliable method to resolve persistent lean-burn diagnostic trouble codes.
Isolating EVAP and Crankcase Leaks with Pressurized Smoke
While the intake plenum is the most common source of unmetered air, vacuum leaks frequently lurk within the evaporative emissions (EVAP) system and the engine crankcase. A degraded gas cap seal, a cracked charcoal canister, or a sticking purge valve can introduce unmetered vapor or fresh air into the combustion chamber. When diagnosing these closed systems, the cigar smoke method remains highly effective, but it requires a slightly different approach. Instead of sealing the intake boot, you must isolate the EVAP purge line and gently introduce smoke directly toward the fuel tank. This technique quickly reveals dry-rotted hoses and rusty fuel filler necks that typically evade visual inspections.
Crankcase leaks present another diagnostic hurdle, often manifesting as a high-mileage oil consumption issue rather than a standard vacuum leak. A failing positive crankcase ventilation valve can pull oil vapor directly into the combustion chamber, mimicking worn piston rings. Understanding how the 13 dollar PCV valve stops your engine from burning oil is crucial before committing to expensive mechanical teardowns. By blowing smoke into the oil dipstick tube or oil fill cap, you can verify if the valve diaphragm is ruptured or if valve cover gaskets have degraded, allowing air to bypass the PCV system entirely.
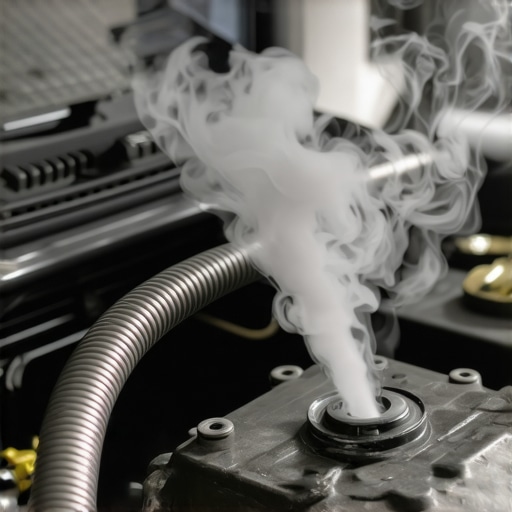
Why does the idle change when spraying brake cleaner around the intake manifold?
Many old-school technicians spray volatile aerosol solvents, like chlorinated brake cleaner or starting fluid, around vacuum connections to find leaks. When the engine draws these flammable chemicals through a crack, it briefly alters the air-fuel ratio, causing a sudden drop or rise in engine RPM. However, modern variable valve timing and highly adaptive fuel trim strategies can react so quickly that the technician might miss the acoustic change in idle. Relying solely on this method can also lead to catastrophic plastic or rubber degradation over time. Instead, observing short-term fuel trims on a live OBD-II scanner while performing a targeted smoke or soapy water test provides a safer, data-backed diagnostic reading.
The Thermal Expansion Dilemma in Cold-Start Diagnostics
One of the most vexing phenomena in automotive diagnostics is the temporary vacuum leak that disappears once the engine reaches operating temperature. As metal and plastic components warm up, thermal expansion causes materials to swell, sealing tiny gaps along mating surfaces. This explains why an engine might stumble, misfire, or trigger a flashing check engine light first thing in the morning but run perfectly fine after a ten-minute drive. If you are dealing with a vehicle that only acts up during the initial warm-up phase, you must perform your smoke diagnostic on a completely cold engine block. This ensures that plastic intake runners and throttle body gaskets remain in their contracted, leaking state.
For those dealing with severe cold-start issues that extend beyond standard vacuum lines, examining the throttle body itself is a logical next step. Over time, carbon buildup around the butterfly valve mimics a vacuum leak by restricting the precise idle air control path, forcing the ECU to overcompensate. Reading up on how a dirty throttle body steals 5 MPG from your commute can shed light on these closely related idle quality issues. For comprehensive procedures on restoring engine breathing and efficiency, consider checking out our complete ultimate tune-up checklist for every car owner. Additionally, researchers at the Argonne National Laboratory emphasize that maintaining precise air-to-fuel ratios is paramount for minimizing cold-start tailpipe emissions and preserving catalytic converter health.
Evaluating the Real Cost of DIY vs. Shop Diagnostics
Many vehicle owners hesitate to perform their own diagnostics, fearing they lack the specialized machinery found in professional bays. However, taking a systematic approach with a humble cigar or a bottle of soapy water can save you hundreds of dollars in exploratory labor fees. Professional shops charge flat diagnostic fees just to hook up a dedicated smoke machine, even if the root cause is a simple cracked rubber elbow. By mastering these low-cost diagnostic hacks at home, you protect your wallet from the common industry practice of throwing parts at a problem until it goes away. Share your diagnostic success stories or ask our community a question in the comments below to help fellow drivers demystify their engine bay mysteries.
Upgrading from Cigars to a DIY Pressure Regulator System
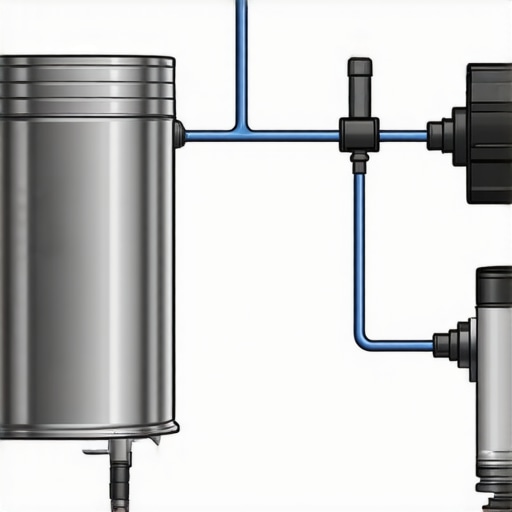
While the classic cigar method is undeniably effective in a pinch, serious DIY mechanics often crave more consistent pressure and volume. Blowing into a hose repeatedly can be physically exhausting and makes it difficult to maintain a steady, controlled pressure of 1 to 2 PSI. To bridge the gap between temporary roadside hacks and expensive professional smoke machines, you can construct a highly reliable, low-cost pressure canister system. Using a sealed paint can, a low-voltage heating element, a regulator, and a small air compressor, you can generate continuous, dense smoke for hours without risking moisture contamination from your breath.
Why is keeping test pressure under 2 PSI critical for plastic intakes?
Modern engine manifolds are increasingly manufactured from composite plastics and thermoset resins rather than heavy cast iron or aluminum. These materials are incredibly lightweight and durable under vacuum, but they are not designed to withstand high positive internal pressure. Exceeding 2 to 3 PSI during a smoke test can easily rupture delicate internal diaphragms, pop out vacuum port plugs, or crack fragile plastic welds along the manifold seams. Always utilize a dedicated, low-pressure regulator to keep the input air down to a gentle whisper, ensuring you isolate the leak without creating new mechanical failures in the process.
Advanced Fuel Trim Analysis to Confirm Your Leak Repair
Once you have located and sealed the physical crack or gasket breach, you must verify the repair using real-time engine data. Do not simply clear the diagnostic trouble codes and hope for the best. Instead, connect your OBD-II scanner and monitor the Short-Term Fuel Trim (STFT) and Long-Term Fuel Trim (LTFT) values at a warm idle. A healthy engine should show combined fuel trim values between -5% and +5%. If your values were previously hovering at a corrective +20% (indicating a massive lean condition) and instantly drop back down near zero after your repair, you have successfully eliminated the unmetered air leak.
If the fuel trims remain elevated despite sealing the primary intake leaks, you may be dealing with a secondary issue like a failing mass airflow sensor calibration or degraded fuel injectors. According to research published by the Society of Automotive Engineers (SAE), dirty MAF hot-wires can under-report incoming air volume by up to 15%, mimicking a physical vacuum leak on the scanner even when the intake tract is completely airtight. This highlights the importance of combining mechanical pressure tests with active sensor data stream evaluation to ensure your engine is breathing cleanly. For further diagnostic strategies, consult our comprehensive guide on diagnosing common auto problems to systematically isolate these stubborn sensor faults.
The Critical Role of Smoke Testing in Turbocharged and Supercharged Applications
The diagnostic stakes are significantly higher when dealing with forced induction systems. Unlike naturally aspirated engines that operate primarily under vacuum, turbocharged and supercharged engines switch rapidly between vacuum and high positive boost pressures. A microscopic split in an intercooler coupler might remain completely sealed while the engine is idling under vacuum, only to balloon outward and leak massive amounts of air under 15 PSI of boost. To diagnose these transient boost leaks, standard low-pressure vacuum tests are often insufficient, requiring specialized high-pressure smoke testing procedures that simulate actual driving loads.
When dealing with turbocharged or supercharged powerplants, standard diagnostic routines often fall short because the physical forces inside the intake tract reverse completely under load. At idle, the system draws a vacuum, pulling gaskets inward and holding minor structural fissures closed. Once the throttle plates snap open and the compressor wheel spools, the intake tract experiences positive pressure that forces these same joints outward. Under these high-stress conditions, a minuscule hairline crack in a plastic charge pipe or a slightly worn clamp on a silicone coupler will expand dramatically, venting metered boost into the atmosphere and triggering immediate rich-limit fuel cut safeties.
How Charge Air Coolers Hide Under-Boost Failures
The front-mounted intercooler sits in a highly vulnerable location, subjected to constant road debris, vibration, and extreme thermal cycling. A stone impact can easily puncture a cooling tube or crack the plastic end tanks where they crimp to the aluminum core. Because these leaks are often buried deep behind the front bumper cover, they remain invisible during standard idle inspections. Using a low-pressure smoke machine calibrated to 1 PSI will rarely expose these failures because it lacks the force required to stretch the aluminum-and-plastic seams. Technicians must construct a dedicated boost leak tester utilizing threaded PVC end caps, a Schrader valve, and a regulated air supply to slowly ramp up pressure to matches the vehicle’s peak operating boost.
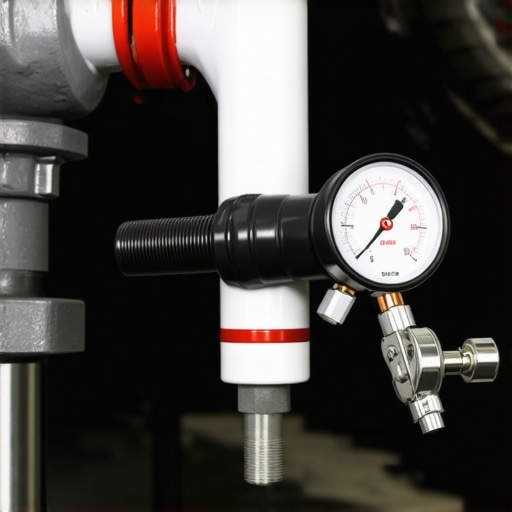
How do you safely pressure test a turbocharger system without blowing out the engine oil seals?
To safely execute a high-pressure boost leak test, you must isolate the engine block and turbocharger bearing housing from excessive positive pressure. Introducing high pressure directly through the turbo inlet can force air past the dynamic compressor seals, pressurizing the crankcase and blowing out weak valve cover gaskets or main seals. To prevent this catastrophic oil seal failure, always block off the PCV fresh air makeup lines and disconnect the charge pipe directly from the turbocharger outlet. Install your pressure tester plug directly into the hot-side charge pipe, bypassing the turbocharger assembly entirely, and limit your maximum test pressure to no more than 5 PSI above the vehicle’s factory boost target.
The Critical Interplay of MAP and MAF Sensor Calibration
In dual-sensor engine management systems, the ECU continuously cross-references the mass airflow reading at the intake with the manifold absolute pressure reading past the throttle body. When a boost leak occurs under load, the MAF sensor reports a massive volume of incoming air, but the MAP sensor registers a disappointing lack of actual manifold pressure. This mismatch instantly alerts the ECU to a system breach, causing it to drop the vehicle into a protective limp-home mode to prevent over-speeding the turbocharger. For highly detailed procedures on resolving these complex sensor mismatch faults, you can reference the comprehensive Society of Automotive Engineers (SAE) standards on vehicle diagnostic criteria. You can also dive into our guide on diagnosing common auto problems to master the exact scanner parameters needed to monitor these conflicting sensor voltages in real time.
Preventing Boost Leak Comebacks with High-Quality T-Bolt Clamps
Using standard worm-gear clamps on high-boost silicone couplers is a recipe for recurring pressure leaks. Standard band clamps apply uneven clamping force and easily slice into delicate silicone layers when over-tightened. Upgrading your high-pressure connections to heavy-duty, spring-loaded T-bolt clamps ensures 360-degree seal pressure that expands and contracts naturally with the engine’s thermal cycles. Regularly checking these critical connection points should be a standard part of your ultimate tune-up checklist for every car owner to keep your forced induction system running at peak thermal efficiency. If you have ever chased a mysterious loss of power under acceleration, share your findings in the comments below or ask our community how to properly pressure-test your specific forced-induction setup.
Expert Insights & Advanced Considerations
Track short-term fuel trims instead of waiting for a stored code
Waiting for a check engine light to illuminate is a passive diagnostic strategy that often leads to prolonged driveability issues. An experienced technician monitors the short-term fuel trim values in real time while introducing trace amounts of propane or smoke. If the values shift rapidly from highly positive to near zero, you have identified your leak point long before the ECU registers a permanent lean fault code.
Address thermal contraction in plastic plenums during seasonal shifts
Composite intake manifolds contract significantly in sub-zero temperatures, creating temporary leak paths that vanish as the engine warms up. To capture these elusive anomalies, you must perform your smoke tests after the vehicle has sat idle overnight in a cold environment. This ensures that the physical gaps remain open long enough for the visual smoke agent to escape and pinpoint the compromised mating surface.
Isolate the brake booster to rule out internal diaphragm failures
Internal booster leaks can mimic a cracked intake manifold, causing the engine to surge unpredictably when coming to a halt. When troubleshooting, always pinch off the main vacuum supply line to the booster; if the idle stabilizes immediately, the booster diaphragm is ruptured. This simple step prevents you from ordering unnecessary parts during your next brake service.
Curated Expert Resources
The Society of Automotive Engineers (SAE) Technical Papers
This resource offers peer-reviewed research on sensor calibration, fuel trim strategies, and advanced diagnostic protocols. It is indispensable for understanding the exact algorithms the ECU uses to calculate unmetered air and engine load variables.
The Ultimate Tune-Up Checklist for Every Car Owner
Our comprehensive, in-house technical guide focuses on routine engine maintenance, filtration checks, and preventative care. Accessing the ultimate tune-up checklist for every car owner helps you build a systematic maintenance baseline before diving into complex electronic diagnostics.
Argonne National Laboratory Combustion Research Publications
These scientific publications provide deep-dive analyses on how cold-start emissions and modern fuel delivery systems are impacted by minor vacuum deviations, bridging the gap between theoretical physics and shop-floor diagnostics.
Final Expert Perspective
Accurate engine diagnostics rely on isolating variables rather than guessing which component has failed. Whether you are using a simple cigar, a soapy water spray, or a regulated DIY pressure canister, understanding how unmetered air alters the internal combustion cycle is key to maintaining peak performance. By mastering fuel trim data and systematically sealing vacuum leaks, you can avoid the common industry practice of throwing expensive parts at a simple problem. If you want to further sharpen your troubleshooting skills, read our comprehensive guide on diagnosing common auto problems to resolve complex engine issues with confidence.