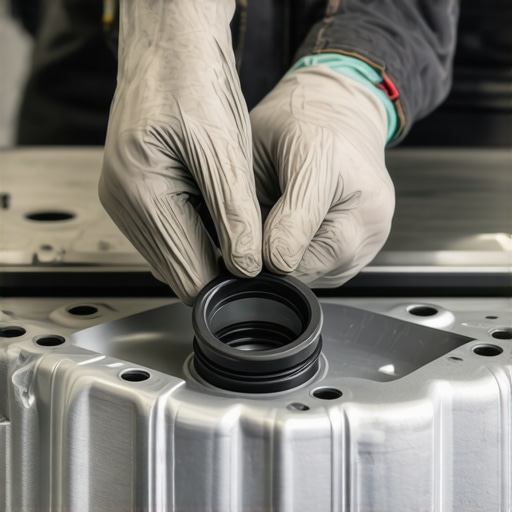
When dealing with a persistent engine bay mess, many vehicle owners automatically fear the worst: a blown head gasket, a cracked block, or a costly rear main seal failure. In reality, modern automotive engineering often relies on simple, inexpensive elastomeric seals to isolate high-pressure fluids. Over time, heat cycles and chemical exposure harden these components, turning a compliant barrier into brittle plastic. Finding and replacing a minor $9 seal can instantly resolve an issue that looks like a catastrophic failure, saving thousands of dollars in unnecessary labor at an auto repair shop.
How Diagnostic Misinterpretations Lead to Unnecessary Major Engine Repairs
Oil under pressure will travel along paths of least resistance, often blown backward by cooling fans or road wind. This creates a deceptive trail of grime that can easily lead a hasty technician to misdiagnose the root cause. A common culprit is the oil cooler adapter housing or the oil filter bypass valve assembly. These metal-to-metal junctions rely on a specialized rubber O-ring to contain pressurized oil. When this tiny ring fails, fluid pools in areas that mimic a oil pan gasket breach or a failing valve cover gasket.
To prevent these misinterpretations, professional technicians perform a thorough engine degreasing followed by a specialized UV dye test. Adding a fluorescent tracer to the crankcase allows the mechanic to pinpoint the exact origin of the seepage under a blacklight. For those looking to master preventative maintenance, learning diagnosing common auto problems can prevent you from falling victim to inaccurate, high-priced repair estimates.
Why Do Modern Engine Seals Fail So Suddenly?
Unlike older cork or paper gaskets, modern vehicles utilize advanced synthetic elastomers like Viton or Nitrile. While these materials offer exceptional chemical resistance and can withstand extreme temperatures, they possess a distinct failure mode known as compression set. Under constant pressure and thermal load, the O-ring loses its elasticity and permanently deforms into a flattened shape. Once the material hardens, it can no longer expand and contract to seal the microscopic gaps created by thermal expansion between mating metal surfaces, resulting in a sudden, heavy leak.
The Critical Intersect of Lubrication and Ignition System Health
A neglected oil leak is rarely just a cosmetic nuisance; it represents an active threat to your vehicle’s electrical and ignition systems. When oil escapes from upper engine components, it frequently drains directly into the spark plug wells or onto nearby electrical connectors. This saturates the protective rubber boots of the ignition coils, causing the high-voltage spark to ground out against the cylinder head rather than jumping the gap of the spark plug. The result is a persistent engine misfire, rough idling, and a flashing check engine light under load.
Addressing these compounding issues requires a comprehensive approach to vehicle maintenance. Regularly scheduling a professional tune up ensures that your ignition components, spark plugs, and filtration systems are evaluated concurrently. When ignition components are compromised by oil contamination, simply replacing the plugs is a temporary fix; the source of the fluid intrusion must be resolved first to prevent rapid recurring failure. According to the National Institute for Automotive Service Excellence (ASE), maintaining clean, fluid-free ignition environments is crucial for preserving catalytic converter efficiency and preventing costly exhaust system damage.
Are You Ignoring the Real Source of Your Fluid Loss?
Many drivers mistake a slow, steady drop in oil level for normal engine consumption. If you notice your fluid levels dropping but see no puddles on your driveway, the fluid might be pooling on the vehicle’s plastic underbody splash shields or burning off directly on the hot exhaust manifold. If you suspect your engine is losing fluid due to component wear rather than a simple external seal, check out this guide on how a simple PCV valve replacement stops oil consumption.
Strategic Step-by-Step Resolution for Persistent Leaks
Resolving a stubborn oil leak yourself or communicating effectively with your mechanic requires methodical execution. Begin by identifying the exact part numbers using factory service schematics rather than relying on generic auto parts store databases. When replacing an O-ring or small gasket, ensure both mating metal surfaces are meticulously cleaned using a chemical solvent and a non-marring scraper to prevent scratching the aluminum mating surfaces, which would create a permanent leak path.
If you prefer to have a professional handle the physical labor, finding an honest workshop is paramount. Take time to research how to choose a reliable mechanic who utilizes digital diagnostic reports and offers transparent, itemized estimates. For more expert-level automotive diagnostics and money-saving maintenance strategies, explore our comprehensive library of repair guides and join our community of proactive car owners today.
How Unseen Vacuum Leaks Destabilize Your Engine Idle
While visible fluid leaks naturally command immediate attention, invisible vacuum leaks can be far more disruptive to your engine’s drivability. Modern internal combustion engines rely on precise measurement of incoming air to maintain a stoichiometric air-fuel ratio. When unmetered air enters the intake manifold behind the mass airflow sensor, the engine control module detects a lean running condition. This mismatch triggers rough idling, poor throttle response, and hard starting conditions that confuse many vehicle owners.
Instead of immediately assuming you have a failing mass airflow sensor or a damaged throttle body, the diagnostic process should start with the simplest suspect. Often, the culprit is a small, cracked vacuum line or a brittle manifold gasket. Using a specialized diagnostic approach, such as finding an intake leak with soapy water, can pinpoint the exact breach within minutes without expensive workshop fees. Left unchecked, these tiny air intrusions force the engine to adjust fuel trim levels to their absolute limits, causing premature catalytic converter wear and poor fuel economy.
What if Your Rough Idle is Actually an Intake Gasket Issue?
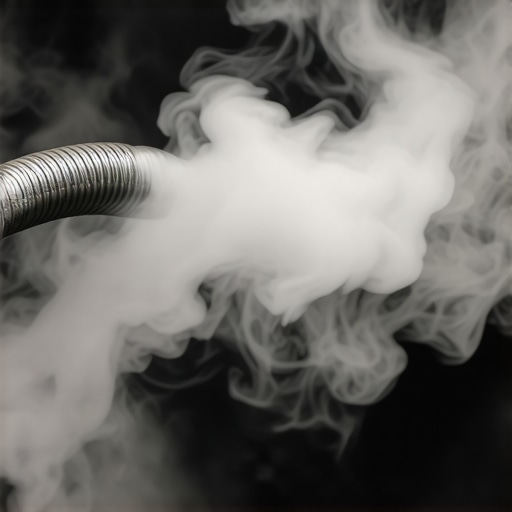
When temperatures drop, rubber and plastic materials contract significantly. This physical phenomenon explains why many drivers notice an incredibly rough idle only during cold starts, which mysteriously improves once the engine reaches normal operating temperature. The intake manifold gasket, which seals the runner ports to the cylinder head, can harden over time. At cold temperatures, it shrinks and allows unmetered air to bypass the throttle body. As the engine block heats up, the metal expands and compresses the hardened gasket, temporarily sealing the leak. For a highly effective and safe method to locate these elusive cold-start vacuum leaks, read how to diagnose a vacuum leak with a simple cigar smoke test.
The Critical Role of PCV System Integrity in Engine Longevity
An अक्सर-overlooked contributor to both vacuum leaks and oil consumption is the positive crankcase ventilation (PCV) system. The PCV valve acts as a variable restriction control, routing blow-by gases from the crankcase back into the combustion chamber to be burned cleanly. If this valve becomes stuck open, it acts as a massive vacuum leak, drawing excess air and oil mist directly into the intake manifold. Conversely, if the valve sticks closed, crankcase pressure builds up rapidly, seeking the weakest point of escape and blowing out vital oil seals.
According to technical specifications published by the Society of Automotive Engineers (SAE), uncontrolled crankcase pressure can increase seal blowout risks by up to 40% in high-mileage engines. Regularly inspecting this inexpensive component during your annual maintenance routine is highly recommended. To prevent severe oil leaks and restore proper engine vacuum, consider checking how a 13 dollar PCV valve stops oil burning. If you have any diagnostic tips or want to share your experience solving a mysterious rough idle, leave a comment below or share this guide with fellow car enthusiasts who love keeping their engines running smoothly.
How Crankcase Overpressurization Destroys Brand New Seals
Many DIY enthusiasts and even novice technicians make the critical mistake of replacing a leaking valve cover gasket or camshaft seal, only to find the new component weeping oil within a few hundred miles. When a replacement seal fails prematurely, the root cause is rarely installation error or a defective part; instead, it is almost always an underlying ventilation issue. High crankcase pressure, caused by piston ring blow-by escaping into the engine block faster than the positive crankcase ventilation system can evacuate it, creates a pressurized chamber. This pressure actively pushes oil past the lips of brand-new elastomeric seals, rendering even the most meticulous auto repair job useless.
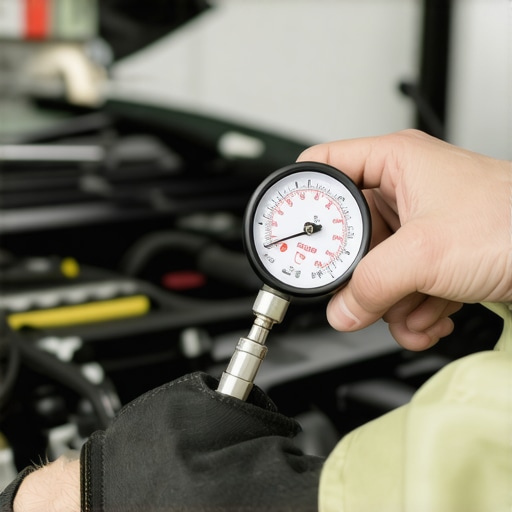
To diagnose this before tear-down, a professional mechanic uses a sensitive crankcase vacuum/pressure tester attached directly to the oil dipstick tube. A healthy engine should maintain a slight vacuum at idle. If the gauge shows positive pressure, the ventilation channels are restricted, or blow-by is excessive. For those looking to master these diagnostic nuances, understanding how to interpret pressure readings can save hours of frustration. This level of systemic troubleshooting is what separates a basic parts-changer from a master technician who provides reliable auto repair.
Why Does Oil Quality Directly Affect Your Engine’s Internal Vacuum?
It is a common misconception that motor oil only lubricates moving metal parts. In reality, the viscosity and chemical stability of your engine oil play a vital role in maintaining the pneumatic seal between the piston rings and the cylinder wall. When oil undergoes thermal breakdown and shears down to a lower viscosity, the oil film thins excessively. This allows high-pressure combustion gases to blow past the rings into the crankcase, overwhelming the PCV system and destabilizing engine vacuum. Regular, high-quality fluid changes and timely engine tune up services are essential to preserve this gas-tight seal, protecting both your engine’s compression and its emission controls.
The Multi-Sensor Failure Cascade Triggered by Neglected Leaks
When fluids or unmetered air escape their designated paths, the consequences quickly cascade beyond mechanical wear, triggering complex electrical faults. For instance, when oil runs down the engine block from a high-altitude leak, it often pools inside the electrical connectors of critical sensors, such as the crankshaft position sensor or oxygen sensors. This fluid intrusion degrades the wire insulation and creates high electrical resistance, distorting the sensitive millivolt signals sent to the engine control unit. The vehicle’s computer, receiving corrupt data, begins altering ignition timing and fuel delivery curves erratically.
This chaotic feedback loop often results in intermittent drivability issues that leave standard OBD-II scanners showing a confusing array of unrelated trouble codes. A technician must look past the superficial codes and trace the physical harness. According to the automotive standards established by the Society of Automotive Engineers (SAE), fluid contamination remains one of the leading causes of premature wiring harness degradation in modern engine bays. If you are struggling with a car that runs poorly but throws no clear codes, sharing your specific symptoms in our community comments below can help us pinpoint whether a hidden fluid path is shorting your sensor signals.
Microscopic Blowby and the Silent Erosion of Cylinder Compression
While external fluid paths are easy to spot with a blacklight, the internal degradation of cylinder sealing surfaces represents a much more insidious threat to performance. Over tens of thousands of miles, cross-hatch honing patterns on the cylinder walls naturally wear down. This micro-texture is designed to hold a microscopic film of oil that seals the piston ring gap. When this texture glazes over, combustion pressure slips past the piston rings, directly diluting the engine oil with raw fuel and moisture. This bypass process silently degrades the oil’s viscosity from the inside out, leading to rapid bearing wear and persistent low-rpm hesitations that frustrate standard diagnostic workflows.
How Thermal Expansion Deltas Rupture Dissimilar Engine Metals
One of the most complex challenges in modern engine design is managing the contact point between an aluminum cylinder head and a cast-iron engine block. These two metals possess vastly different coefficients of thermal expansion, meaning they expand and contract at completely different rates during every single heat cycle. The head gasket must act as a dynamic shear barrier, sliding and compressing to absorb this physical movement while containing thousands of pounds of combustion pressure. When cooling system maintenance is neglected, localized hot spots develop along these critical junctions, exceeding the gasket material’s physical elasticity and causing microscopic pathways to open up between the coolant jackets and the combustion chambers.
What happens when high-pressure fuel vapors bypass your charcoal canister?
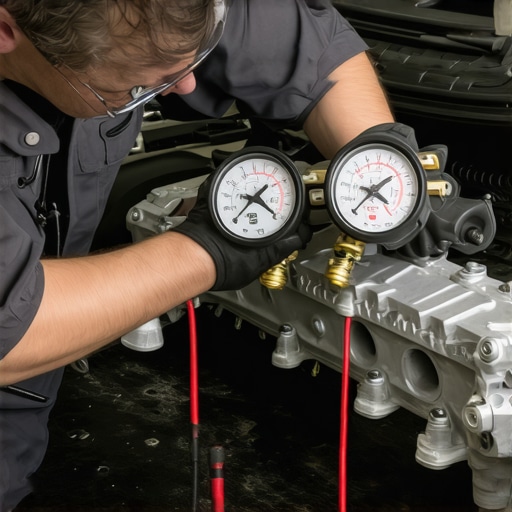
When the evaporative emissions (EVAP) purge valve fails to seal completely, it acts as an unregulated vacuum leak that draws raw fuel vapors directly from the gas tank into the intake manifold. This unmetered fuel bypasses the fuel injection control algorithms entirely, throwing off the oxygen sensor feedback loops and causing highly erratic idle fluctuations immediately after refueling. Diagnostics require isolating the purge valve solenoids and checking for pressure drop using a hand-held vacuum pump to verify physical seat sealing. For more information on maintaining critical vehicle subsystems, the National Institute for Automotive Service Excellence (ASE) provides comprehensive guides on automotive diagnostics and technician certifications.
Proactive Diagnostic Strategy to Safeguard Your Engine Block
To keep your engine running at peak efficiency and avoid unexpected failure, you must monitor its internal health using advanced diagnostic techniques rather than waiting for warning lights. Performing a dynamic cylinder leak-down test is highly recommended, as it allows you to pinpoint the exact location of compression loss through the intake, exhaust, or cooling systems. If you want to take control of your vehicle’s health and prevent costly shop bills, check out our diagnostic archives to learn how simple tools can help you master complex troubleshooting at home.
When dealing with a persistent engine bay mess, many vehicle owners automatically fear the worst: a blown head gasket, a cracked block, or a costly rear main seal failure. In reality, modern automotive engineering often relies on simple, inexpensive elastomeric seals to isolate high-pressure fluids. Over time, heat cycles and chemical exposure harden these components, turning a compliant barrier into brittle plastic. Finding and replacing a minor $9 seal can instantly resolve an issue that looks like a catastrophic failure, saving thousands of dollars in unnecessary labor at an auto repair shop.
How Diagnostic Misinterpretations Lead to Unnecessary Major Engine Repairs
Oil under pressure will travel along paths of least resistance, often blown backward by cooling fans or road wind. This creates a deceptive trail of grime that can easily lead a hasty technician to misdiagnose the root cause. A common culprit is the oil cooler adapter housing or the oil filter bypass valve assembly. These metal-to-metal junctions rely on a specialized rubber O-ring to contain pressurized oil. When this tiny ring fails, fluid pools in areas that mimic a oil pan gasket breach or a failing valve cover gasket.
To prevent these misinterpretations, professional technicians perform a thorough engine degreasing followed by a specialized UV dye test. Adding a fluorescent tracer to the crankcase allows the mechanic to pinpoint the exact origin of the seepage under a blacklight. For those looking to master preventative maintenance, learning diagnosing common auto problems can prevent you from falling victim to inaccurate, high-priced repair estimates.
Why Do Modern Engine Seals Fail So Suddenly?
Unlike older cork or paper gaskets, modern vehicles utilize advanced synthetic elastomers like Viton or Nitrile. While these materials offer exceptional chemical resistance and can withstand extreme temperatures, they possess a distinct failure mode known as compression set. Under constant pressure and thermal load, the O-ring loses its elasticity and permanently deforms into a flattened shape. Once the material hardens, it can no longer expand and contract to seal the microscopic gaps created by thermal expansion between mating metal surfaces, resulting in a sudden, heavy leak.
The Critical Intersect of Lubrication and Ignition System Health
A neglected oil leak is rarely just a cosmetic nuisance; it represents an active threat to your vehicle’s electrical and ignition systems. When oil escapes from upper engine components, it frequently drains directly into the spark plug wells or onto nearby electrical connectors. This saturates the protective rubber boots of the ignition coils, causing the high-voltage spark to ground out against the cylinder head rather than jumping the gap of the spark plug. The result is a persistent engine misfire, rough idling, and a flashing check engine light under load.
Addressing these compounding issues requires a comprehensive approach to vehicle maintenance. Regularly scheduling a professional tune up ensures that your ignition components, spark plugs, and filtration systems are evaluated concurrently. When ignition components are compromised by oil contamination, simply replacing the plugs is a temporary fix; the source of the fluid intrusion must be resolved first to prevent rapid recurring failure. According to the National Institute for Automotive Service Excellence (ASE), maintaining clean, fluid-free ignition environments is crucial for preserving catalytic converter efficiency and preventing costly exhaust system damage.
Are You Ignoring the Real Source of Your Fluid Loss?
Many drivers mistake a slow, steady drop in oil level for normal engine consumption. If you notice your fluid levels dropping but see no puddles on your driveway, the fluid might be pooling on the vehicle’s plastic underbody splash shields or burning off directly on the hot exhaust manifold. If you suspect your engine is losing fluid due to component wear rather than a simple external seal, check out this guide on how a simple PCV valve replacement stops oil consumption.
Strategic Step-by-Step Resolution for Persistent Leaks
Resolving a stubborn oil leak yourself or communicating effectively with your mechanic requires methodical execution. Begin by identifying the exact part numbers using factory service schematics rather than relying on generic auto parts store databases. When replacing an O-ring or small gasket, ensure both mating metal surfaces are meticulously cleaned using a chemical solvent and a non-marring scraper to prevent scratching the aluminum mating surfaces, which would create a permanent leak path.
If you prefer to have a professional handle the physical labor, finding an honest workshop is paramount. Take time to research how to choose a reliable mechanic who utilizes digital diagnostic reports and offers transparent, itemized estimates. For more expert-level automotive diagnostics and money-saving maintenance strategies, explore our comprehensive library of repair guides and join our community of proactive car owners today.
How Unseen Vacuum Leaks Destabilize Your Engine Idle
While visible fluid leaks naturally command immediate attention, invisible vacuum leaks can be far more disruptive to your engine’s drivability. Modern internal combustion engines rely on precise measurement of incoming air to maintain a stoichiometric air-fuel ratio. When unmetered air enters the intake manifold behind the mass airflow sensor, the engine control module detects a lean running condition. This mismatch triggers rough idling, poor throttle response, and hard starting conditions that confuse many vehicle owners.
Instead of immediately assuming you have a failing mass airflow sensor or a damaged throttle body, the diagnostic process should start with the simplest suspect. Often, the culprit is a small, cracked vacuum line or a brittle manifold gasket. Using a specialized diagnostic approach, such as finding an intake leak with soapy water, can pinpoint the exact breach within minutes without expensive workshop fees. Left unchecked, these tiny air intrusions force the engine to adjust fuel trim levels to their absolute limits, causing premature catalytic converter wear and poor fuel economy.
What if Your Rough Idle is Actually an Intake Gasket Issue?
When temperatures drop, rubber and plastic materials contract significantly. This physical phenomenon explains why many drivers notice an incredibly rough idle only during cold starts, which mysteriously improves once the engine reaches normal operating temperature. The intake manifold gasket, which seals the runner ports to the cylinder head, can harden over time. At cold temperatures, it shrinks and allows unmetered air to bypass the throttle body. As the engine block heats up, the metal expands and compresses the hardened gasket, temporarily sealing the leak. For a highly effective and safe method to locate these elusive cold-start vacuum leaks, read how to diagnose a vacuum leak with a simple cigar smoke test.
The Critical Role of PCV System Integrity in Engine Longevity
An अक्सर-overlooked contributor to both vacuum leaks and oil consumption is the positive crankcase ventilation (PCV) system. The PCV valve acts as a variable restriction control, routing blow-by gases from the crankcase back into the combustion chamber to be burned cleanly. If this valve becomes stuck open, it acts as a massive vacuum leak, drawing excess air and oil mist directly into the intake manifold. Conversely, if the valve sticks closed, crankcase pressure builds up rapidly, seeking the weakest point of escape and blowing out vital oil seals.
According to technical specifications published by the Society of Automotive Engineers (SAE), uncontrolled crankcase pressure can increase seal blowout risks by up to 40% in high-mileage engines. Regularly inspecting this inexpensive component during your annual maintenance routine is highly recommended. To prevent severe oil leaks and restore proper engine vacuum, consider checking how a 13 dollar PCV valve stops oil burning. If you have any diagnostic tips or want to share your experience solving a mysterious rough idle, leave a comment below or share this guide with fellow car enthusiasts who love keeping their engines running smoothly.
How Crankcase Overpressurization Destroys Brand New Seals
Many DIY enthusiasts and even novice technicians make the critical mistake of replacing a leaking valve cover gasket or camshaft seal, only to find the new component weeping oil within a few hundred miles. When a replacement seal fails prematurely, the root cause is rarely installation error or a defective part; instead, it is almost always an underlying ventilation issue. High crankcase pressure, caused by piston ring blow-by escaping into the engine block faster than the positive crankcase ventilation system can evacuate it, creates a pressurized chamber. This pressure actively pushes oil past the lips of brand-new elastomeric seals, rendering even the most meticulous auto repair job useless.
To diagnose this before tear-down, a professional mechanic uses a sensitive crankcase vacuum/pressure tester attached directly to the oil dipstick tube. A healthy engine should maintain a slight vacuum at idle. If the gauge shows positive pressure, the ventilation channels are restricted, or blow-by is excessive. For those looking to master these diagnostic nuances, understanding how to interpret pressure readings can save hours of frustration. This level of systemic troubleshooting is what separates a basic parts-changer from a master technician who provides reliable auto repair.
Why Does Oil Quality Directly Affect Your Engine’s Internal Vacuum?
It is a common misconception that motor oil only lubricates moving metal parts. In reality, the viscosity and chemical stability of your engine oil play a vital role in maintaining the pneumatic seal between the piston rings and the cylinder wall. When oil undergoes thermal breakdown and shears down to a lower viscosity, the oil film thins excessively. This allows high-pressure combustion gases to blow past the rings into the crankcase, overwhelming the PCV system and destabilizing engine vacuum. Regular, high-quality fluid changes and timely engine tune up services are essential to preserve this gas-tight seal, protecting both your engine’s compression and its emission controls.
The Multi-Sensor Failure Cascade Triggered by Neglected Leaks
When fluids or unmetered air escape their designated paths, the consequences quickly cascade beyond mechanical wear, triggering complex electrical faults. For instance, when oil runs down the engine block from a high-altitude leak, it often pools inside the electrical connectors of critical sensors, such as the crankshaft position sensor or oxygen sensors. This fluid intrusion degrades the wire insulation and creates high electrical resistance, distorting the sensitive millivolt signals sent to the engine control unit. The vehicle’s computer, receiving corrupt data, begins altering ignition timing and fuel delivery curves erratically.
This chaotic feedback loop often results in intermittent drivability issues that leave standard OBD-II scanners showing a confusing array of unrelated trouble codes. A technician must look past the superficial codes and trace the physical harness. According to the automotive standards established by the Society of Automotive Engineers (SAE), fluid contamination remains one of the leading causes of premature wiring harness degradation in modern engine bays. If you are struggling with a car that runs poorly but throws no clear codes, sharing your specific symptoms in our community comments below can help us pinpoint whether a hidden fluid path is shorting your sensor signals.
Microscopic Blowby and the Silent Erosion of Cylinder Compression
While external fluid paths are easy to spot with a blacklight, the internal degradation of cylinder sealing surfaces represents a much more insidious threat to performance. Over tens of thousands of miles, cross-hatch honing patterns on the cylinder walls naturally wear down. This micro-texture is designed to hold a microscopic film of oil that seals the piston ring gap. When this texture glazes over, combustion pressure slips past the piston rings, directly diluting the engine oil with raw fuel and moisture. This bypass process silently degrades the oil’s viscosity from the inside out, leading to rapid bearing wear and persistent low-rpm hesitations that frustrate standard diagnostic workflows.
How Thermal Expansion Deltas Rupture Dissimilar Engine Metals
One of the most complex challenges in modern engine design is managing the contact point between an aluminum cylinder head and a cast-iron engine block. These two metals possess vastly different coefficients of thermal expansion, meaning they expand and contract at completely different rates during every single heat cycle. The head gasket must act as a dynamic shear barrier, sliding and compressing to absorb this physical movement while containing thousands of pounds of combustion pressure. When cooling system maintenance is neglected, localized hot spots develop along these critical junctions, exceeding the gasket material’s physical elasticity and causing microscopic pathways to open up between the coolant jackets and the combustion chambers.
What happens when high-pressure fuel vapors bypass your charcoal canister?
When the evaporative emissions (EVAP) purge valve fails to seal completely, it acts as an unregulated vacuum leak that draws raw fuel vapors directly from the gas tank into the intake manifold. This unmetered fuel bypasses the fuel injection control algorithms entirely, throwing off the oxygen sensor feedback loops and causing highly erratic idle fluctuations immediately after refueling. Diagnostics require isolating the purge valve solenoids and checking for pressure drop using a hand-held vacuum pump to verify physical seat sealing. For more information on maintaining critical vehicle subsystems, the National Institute for Automotive Service Excellence (ASE) provides comprehensive guides on automotive diagnostics and technician certifications.
Proactive Diagnostic Strategy to Safeguard Your Engine Block
To keep your engine running at peak efficiency and avoid unexpected failure, you must monitor its internal health using advanced diagnostic techniques rather than waiting for warning lights. Performing a dynamic cylinder leak-down test is highly recommended, as it allows you to pinpoint the exact location of compression loss through the intake, exhaust, or cooling systems. If you want to take control of your vehicle’s health and prevent costly shop bills, check out our diagnostic archives to learn how simple tools can help you master complex troubleshooting at home.
Expert Insights & Advanced Considerations
How Over-Torquing Distorts the Oil Seal Seat
When executing a repair, many DIY mechanics assume that tighter means a better seal. In reality, modern aluminum castings distort under even slight excess torque. Over-tightening fasteners crushes the elastomeric material beyond its physical elastic limit and warps the thin metal housing. This warping creates microscopic gaps that cause immediate, persistent leaks, rendering the new gasket useless.
Why Short Drives Accelerate Gasket Degradation
Engines that consistently fail to reach operating temperature suffer from a severe chemical disadvantage. Without sustained heat, condensation cannot boil off from the engine oil. Water and fuel accumulate in the crankcase, reacting with oil additives to form acidic compounds that actively eat away at soft rubber seals and the gasket that fixes a persistent oil leak under the intake.
The Hidden Risk of High-Pressure Fluid Washing
Using a heavy power washer to degrease an engine bay frequently does more harm than good. High-velocity water easily bypasses the weather-tight connectors of sensitive engine management electronics, trapping moisture inside. This leads to pin corrosion, phantom electrical signals, and eventual multi-sensor dropouts that can take weeks to properly diagnose.
Curated Expert Resources
Society of Automotive Engineers (SAE) Technical Library: The absolute authority on thermal expansion dynamics, material thresholds of synthetic elastomers, and pressure characteristics within modern combustion engines.
ASE Certification Test Prep & Blueprints: An invaluable resource to understand professional standards of physical diagnostics, particularly for tracking down complex vacuum leaks and mechanical drive anomalies.
Factory Service Manuals (FSM) Database: The only reliable source for true torque specifications, exploded structural diagrams, and specific diagnostic procedures unique to individual vehicle models.
Final Expert Perspective
Mastering the complexities of modern engines requires looking past surface symptoms to trace the real root causes. A simple rough idle or persistent engine bay mess is rarely isolated; it is often the direct result of interrelated pneumatic, mechanical, and electrical subsystems. By committing to proactive, systematic troubleshooting instead of blindly replacing parts, you protect your engine from premature wear and bypass high-priced garage bills. If you want to refine your technical diagnostics, check out our guide on how to solve a persistent rough idle or share your recent repair victories in the comments section below.